43
► The short instructions do not replace the installation and
operating manual.
► Read this Installation and Operating Manual carefully
and, most importantly, observe all safety instructions
and warnings.
► Work on the electrical system and live parts may be
performed only by a trained electrician in accordance
with EN 50110-1.
► The installation, initial operation and disassembly of
thecontrolunitmayonlybeperformedbyaqualied
specialist.
► Comply with all valid directives and standards.
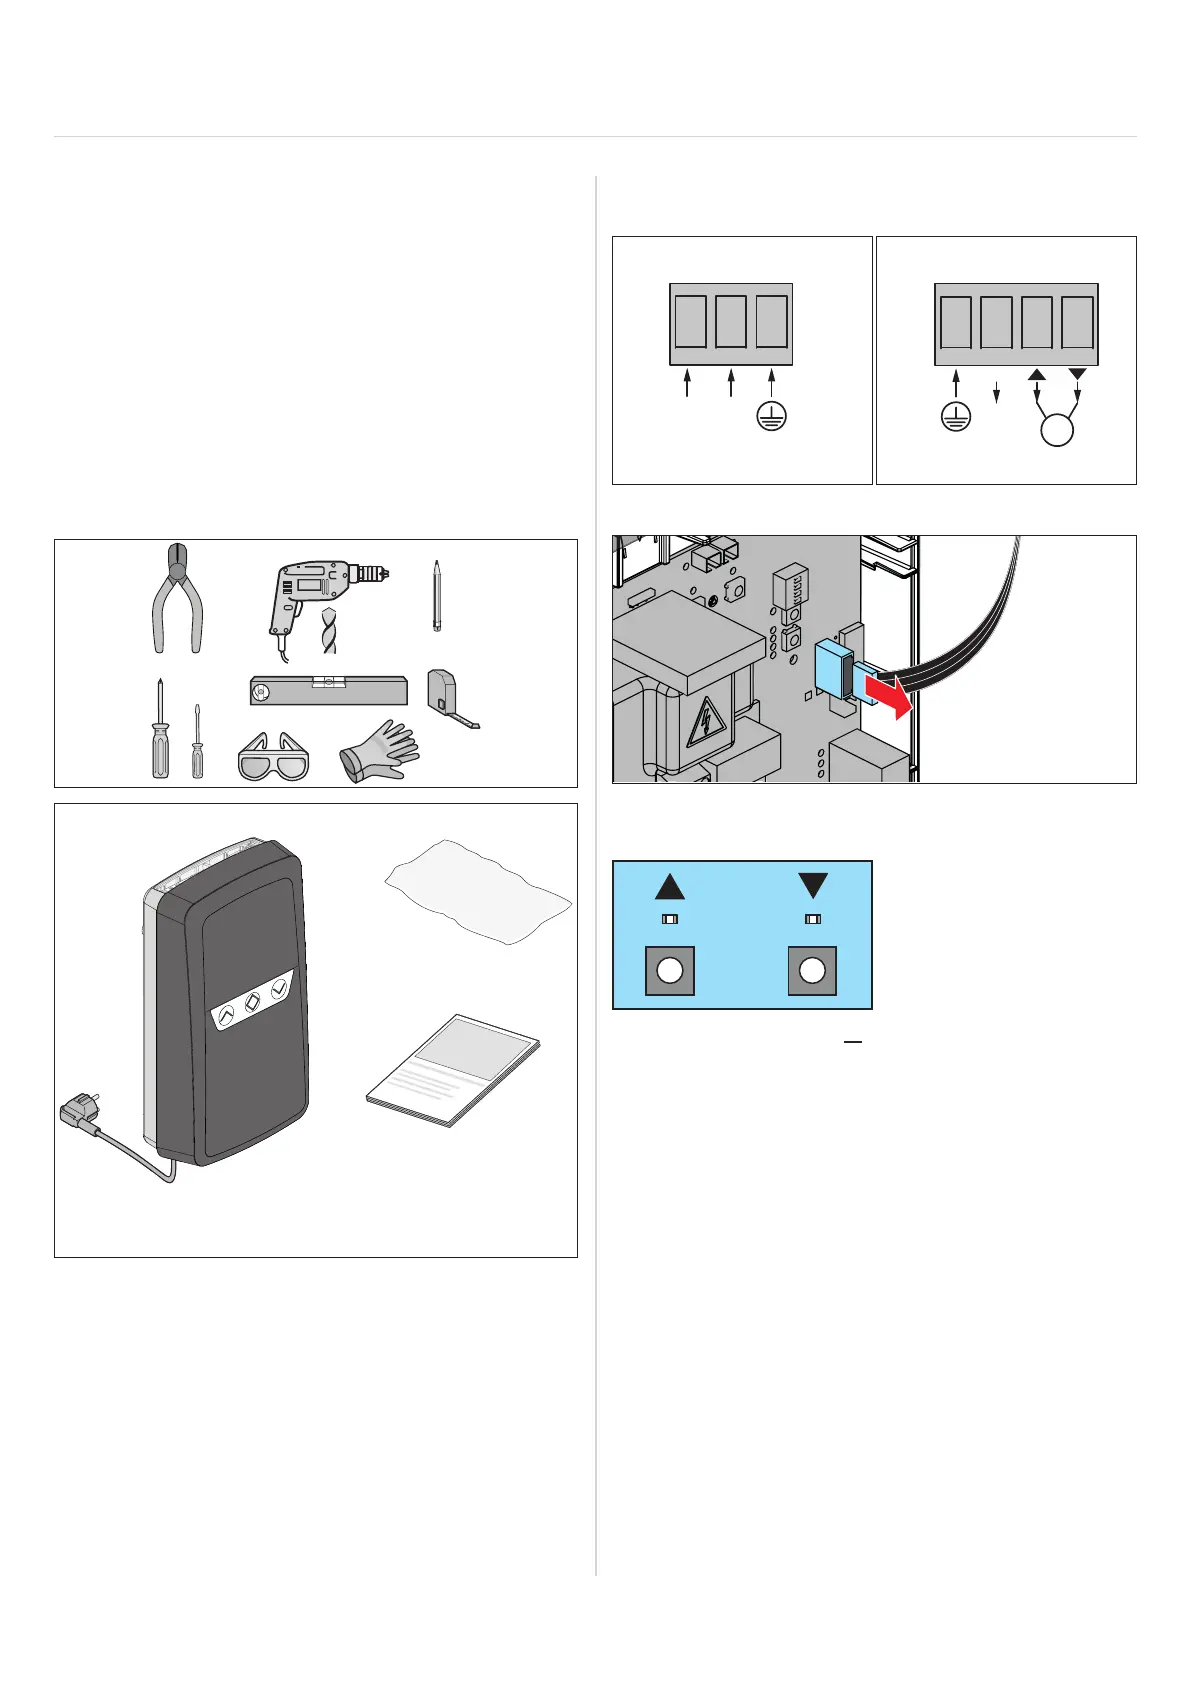
14.1 Preparations
y Check that the scope of delivery is complete
14. Brief instructions
14.2 Electrical connection
1. Turn off the control unit voltage supply.
X1
NL1
X3
N
M
2. Wire.
3. Pull the ribbon cable of the integrated 3-function pad
off the control unit circuit board.
1. Press the door OPEN or door CLOSE button on the
circuit board.
⇒ If the door runs in the opposite direction:
Disconnect the control unit from the mains and switch
the lines at X3 for door OPEN and door CLOSE.
2. If necessary, correct the end position setting in
accordance with the instructions from the motor
manufacturer “8.3 Setting the motor limit switches”
on page 23.
For further information, see “14.2 Electrical connection”
on page 43 and “8.2 Checking the direction of
running” on page 22.