16 Chapter 2: Getting Started
Getting Started
System Set-up
To adjust system settings (first page):
1 Press the Patient key.
2 Select or tap System Set-up... from the on-screen menu.
3 Press the Patient key at any time to exit System Set-up and return to live imaging.
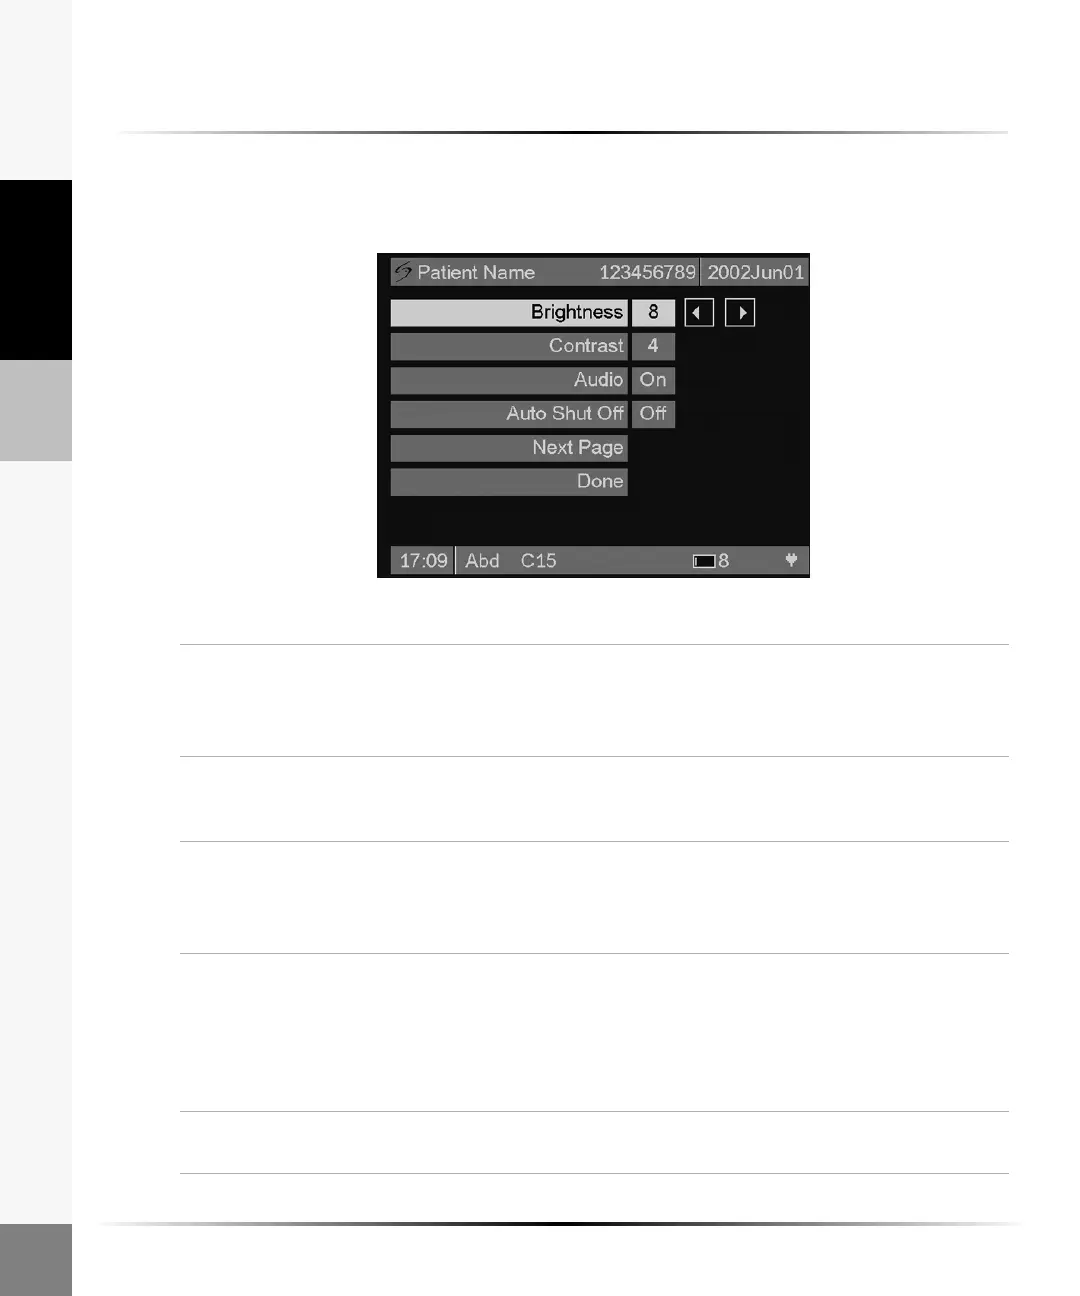
Figure 5 System Settings (First Page)
Brightness 1 Highlight or tap Brightness from the menu to adjust the display brightness.
2 Use the right and left arrows or tap the touch screen to choose the desired
setting (0-12).
Note: To conserve battery life, adjust brightness to a lower setting.
Contrast 1 Highlight or tap Contrast from the menu to adjust the display contrast.
2 Use the right and left arrows or tap the touch screen to choose the desired
setting (0-10).
Audio 1 Highlight or tap Audio from the menu to change audio feedback.
2 Use the right and left arrows or tap the touch screen to choose Off or On.
Note: Selecting Off will disable the audio feedback provided when pressing buttons
or tapping on the touch screen.
Auto Shut
Off
1 Highlight or tap Auto Shut Off from the menu to change the auto shut off
feature.
2 Use the right and left arrows or tap the touch screen to choose Off, 5,or 10
minutes.
Note: Selecting Off will allow the system to run continuously. This is only
recommended if the system is operated on AC power.
Next Page Select or tap Next Page from the menu to view the second page of the Set-up
menu.