Chapter 2: Getting Started 17
Getting Started
To adjust system settings (second page):
1 Press the Patient key.
2 Select or tap System Set-up... from the on-screen menu.
3 Select or tap Next Page.
4 Press the Patient key at any time to exit System Set-up and return to live imaging.
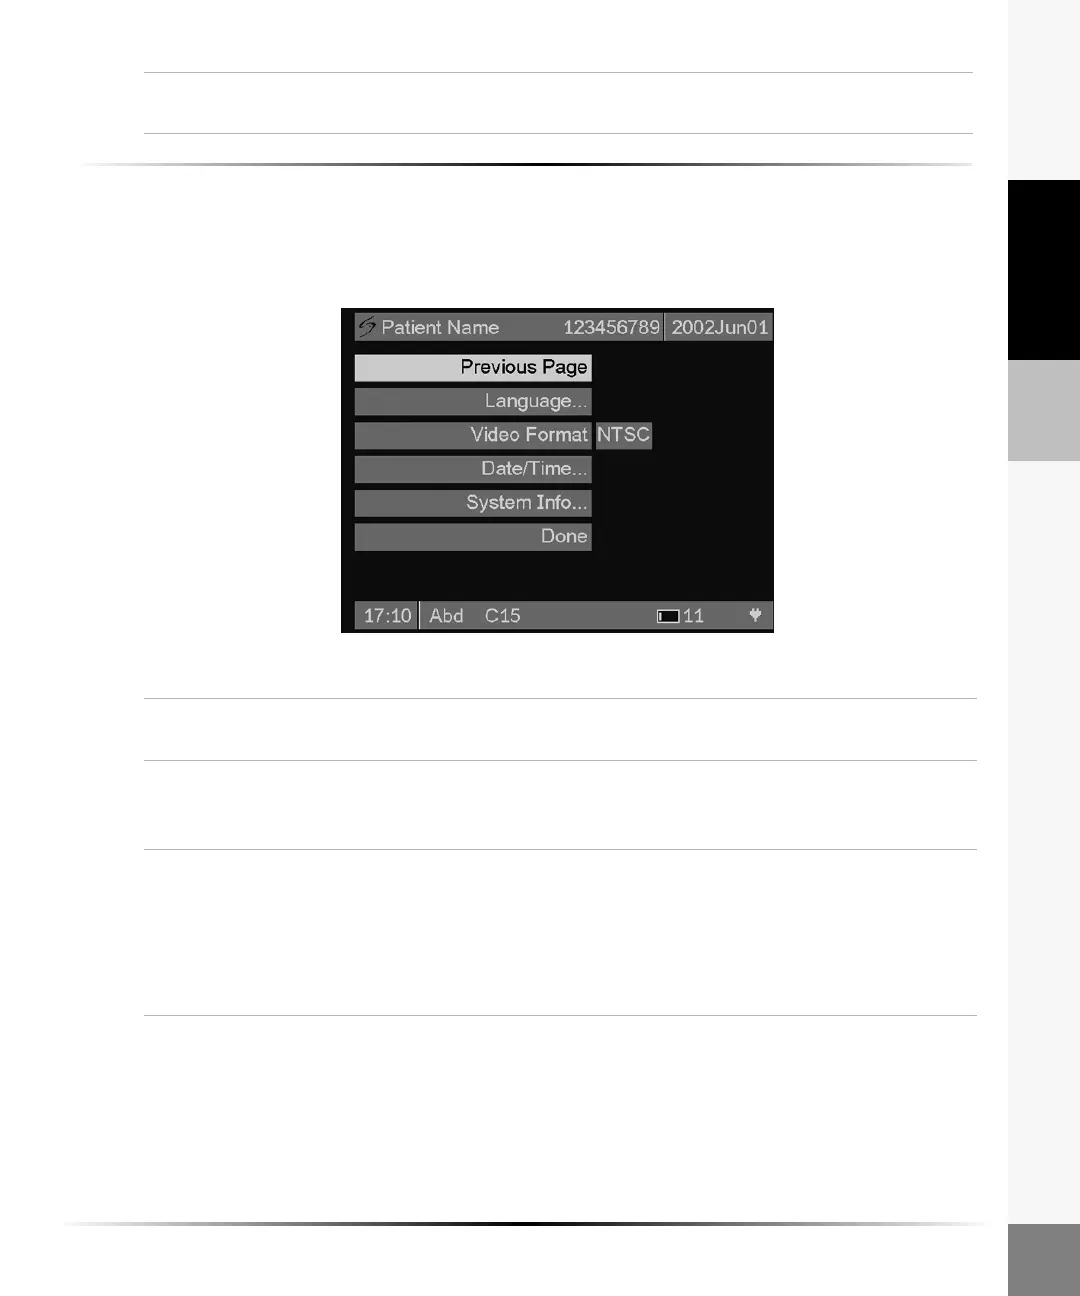
Figure 6 System Settings (Second Page)
Done Select or tap Done from the menu to exit System Set-up or press the Patient key
to return to imaging.
Previous
Page
Select or tap Previous Page from the menu to view the first page of the Set-up
menu.
Language 1 Select or tap Language from the menu to change the system language.
2 Select or tap the desired language.
Note: The system powers off when the language is changed.
Video
Format
1 Highlight or tap Video Format from the menu to change the video output.
2 Use the right and left arrows or tap the touch screen to choose NTSC or PAL.
Note: The system powers off when video format is changed.
3 Recalibrate the touch screen. See “To calibrate the touch screen:” on page 18.
Note: If you have difficulty using the stylus to access menu options, use the
directional controller.