Chapter 1: Getting Started 5
Getting Started
To insert a USB storage device
InserttheUSBstoragedeviceintoaUSBport
onthesystem.SeeFigure 1onpage 2.
TheUSBstoragedeviceisreadywhenthe
USBiconappears.
Toviewinformationaboutthedevice,see
“USBDevicessetup”onpage 16.
To remove a USB storage device
RemovingtheUSBstoragedevicewhilethe
systemisexportingmaycausetheexportedfiles
tobecorruptedorincomplete.
1 WaitfivesecondsaftertheUSBanimation
stops.
2 RemovetheUSBstoragedevicefromthe port.
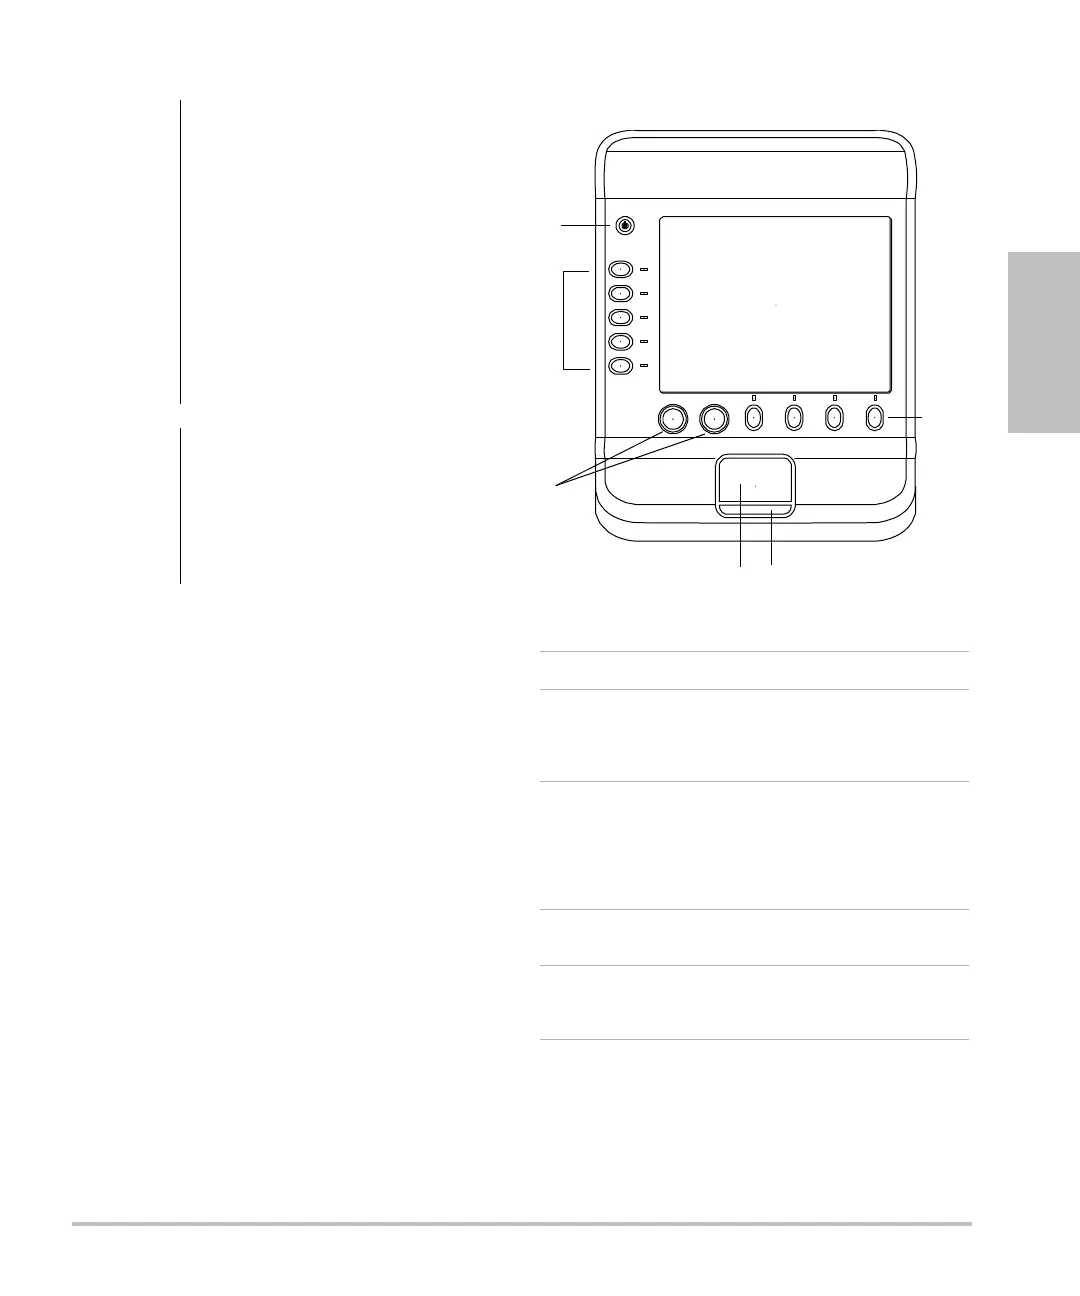
System controls
Figure 3 System Controls:
WARNING:
To avoid damaging the USB storage
device and losing patient data from
it, observe the following:
• Do not remove the USB storage
device or turn off the ultrasound
system while the system is
exporting.
• Do not bump or otherwise apply
pressure to the USB storage
device while it is in a USB port on
the ultrasound system. The
connector could break.
Caution:
If the USB icon does not appear in
the system status area on-screen,
the USB storage device may be
defective or password-protected.
Turn the system off and replace the
device.
1 Power switch Turns the system on and off.
2 Control keys Perform an action or make a
selection based on context.
Current names appear
on-screen adjacent to the keys.
3Control
knobs
Adjust gain, depth, cine buffer,
brightness, and more. Can also
perform an action. Are turned,
pressed, or both, depending on
context. Current names appear
on-screen above the knobs.
4 Touchpad Moves the pointer and other
items.
5 Touchpad
key
Works in conjunction with the
touchpad. Is pressed to activate
an item on-screen.