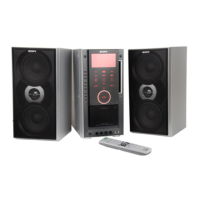
77
11 Turn MULTI CONTROLLER to
select the preset station you want to
record, then press n or
ENTER/YES.
12 Turn MULTI CONTROLLER to
select the recording destination (MD
number).
Select the slot containing the MD you
inserted in step 1.
• “to MD DISC1”: Recording to MD 1.
• “to MD DISC2”: Recording to MD 2.
• “to MD DISC3”: Recording to MD 3.
• “to MD DISC ALL”: Recording to
MD 1, then MD 2, then MD 3.
• “to TAPE” (DHC-EX880MD only):
Recording to the optional TC-TX770
tape deck.
13 Press ENTER/YES.
14 Turn MULTI CONTROLLER to
select “STEREO REC” or
“MONO REC”.
Skip this operation if you selected
“to TAPE” in step 12.
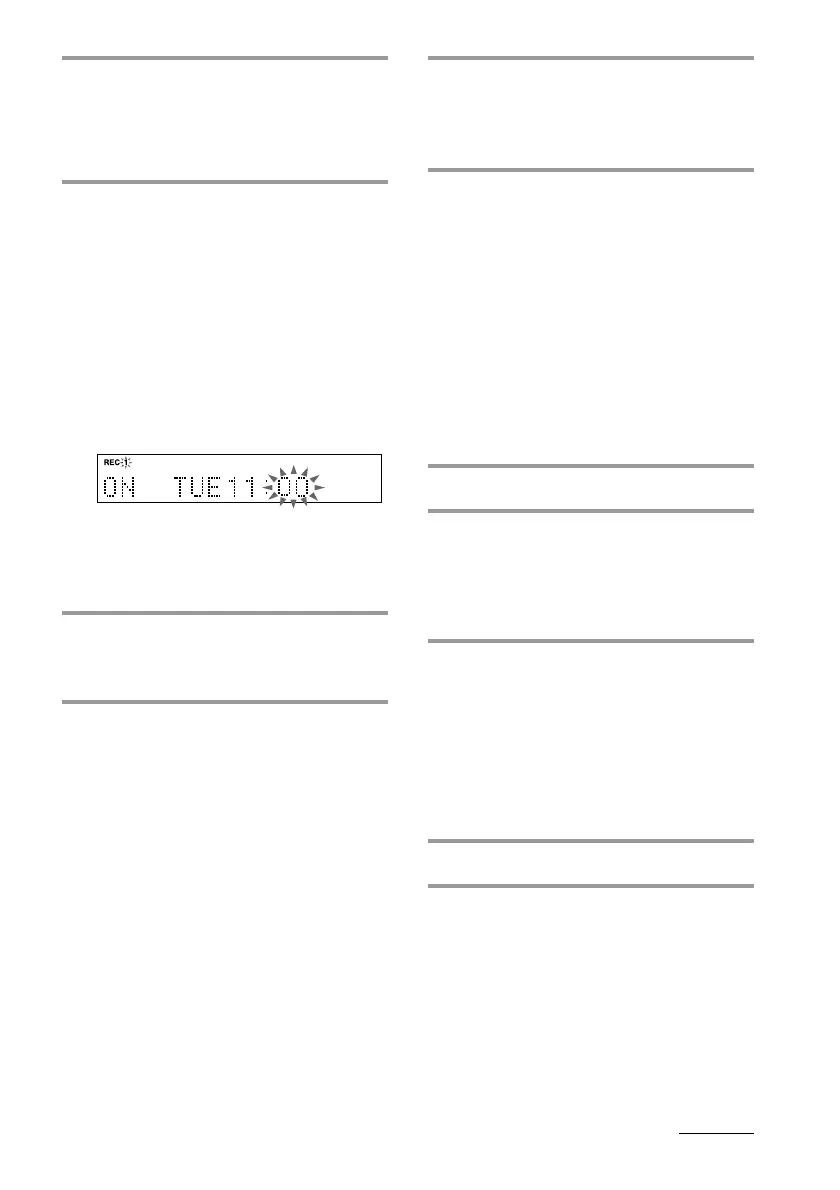
15 Press ENTER/YES.
The timer number (REC 1 – 3) appears,
followed by the timer type (ONCE,
DAILY or WEEKLY), the start time, the
stop time, the recording source, the
recording destination and the recording
method (STEREO or MONO)*, then the
original display appears.
* Only when recording on an MD.
16 Turn off the system.
continued
7 Press n or ENTER/YES.
If you selected “ONCE REC” or
“WEEKLY REC”, the day indication
starts flashing. If you selected “DAILY
REC”, the hour indication starts flashing.
8 Set the time to start recording.
If you selected “DAILY REC” in step 6,
skip step 1 below.
1 Turn MULTI CONTROLLER to set the
day, then press n or ENTER/YES.
The hour indication starts flashing.
The clock is on a 24-hour system for
the DHC-EX880MD, and a 12-hour
system for DHC-MD717.
2 Turn MULTI CONTROLLER to set the
hour, then press n or ENTER/YES.
The minute indication starts flashing.
3 Turn MULTI CONTROLLER to set the
minute, then press n or ENTER/YES.
The day or hour indication flashes
again.
9 Set the time to stop recording
following the procedure in step 8.
The sound source indication appears.
10 Turn MULTI CONTROLLER to
select “TUNER”, then press n or
ENTER/YES.