HCD-SX7/SX7B
17
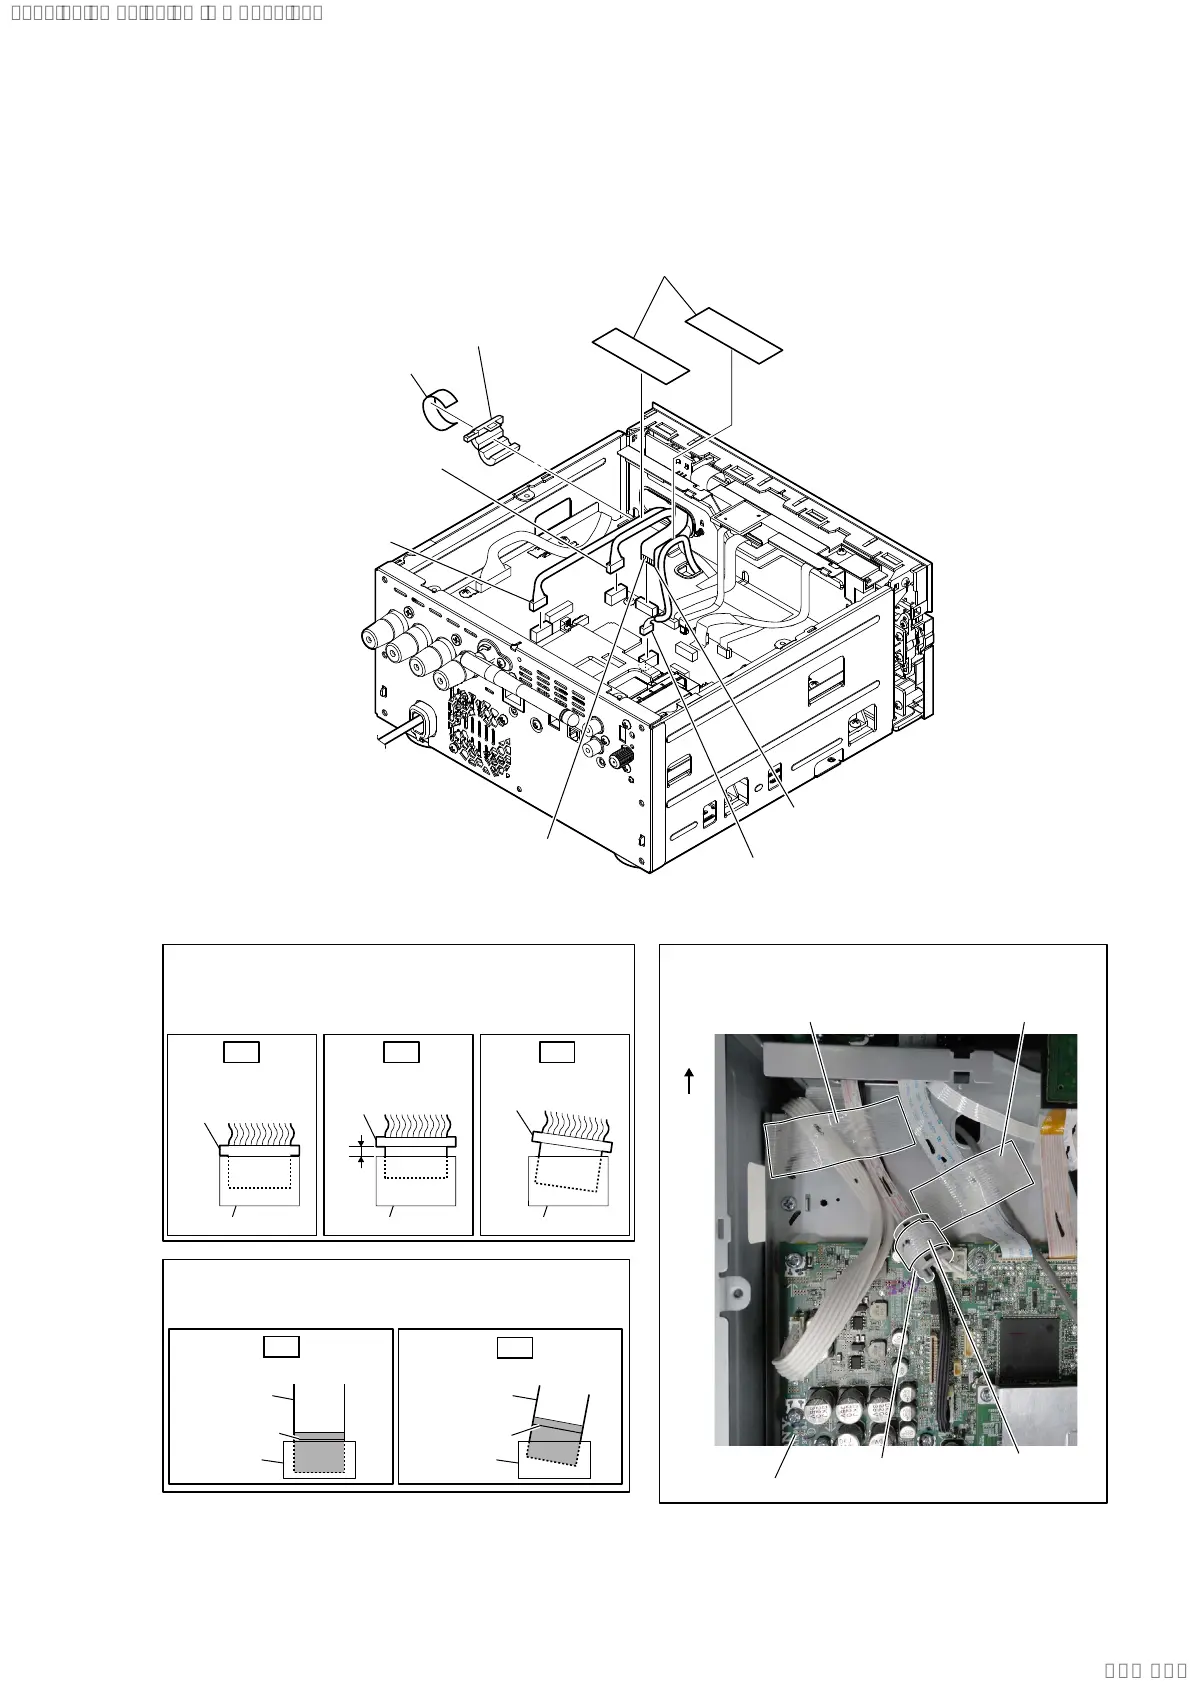
2-7. PANEL (FRONT) BLOCK-1
• Continued on 2-8 (page 18).
– Rear view –
terminal side
1 two filament tapes
(sub material)
6 filament tape
(sub material)
filament tape
(sub material)
filament tape
(sub material)
filament tape
(sub material)
7 sleeve ferrite clamp
(FC1)
sleeve ferrite clamp
(FC1)
Insert only part way.Insert straight into
the interior.
connector
Insert at a slant.
connector
connector
connector
connector connector
OK NG NG
How to install the connector
Insert the connector straight into the interior.
There is a possibility that using this unit without
the connector correctly installed will damage it.
colored line
Insert straight into the interior.
flexible flat
cable
connector
OK
colored line
Insert at a slant.
flexible flat
cable
connector
NG
How to install the flexible flat cable
When installing the flexible flat cable, ensure that
the colored line is parallel to the connector after insertion.
3 flexible flat cable (11 pin)
(CN011)
2 USB-HP board CN1501
cable connector
(CN601)
4 USB-HP board CN1501
cable connector
(CN605)
5 USB-HP board CN1501
cable connector
(CN1101)
:LUHVHWWLQJ
MAIN board
Front
side
SYSSET
2020/02/2722:53:44(GMT+09:00)


 To Next Page