HCD-SX7/SX7B
28
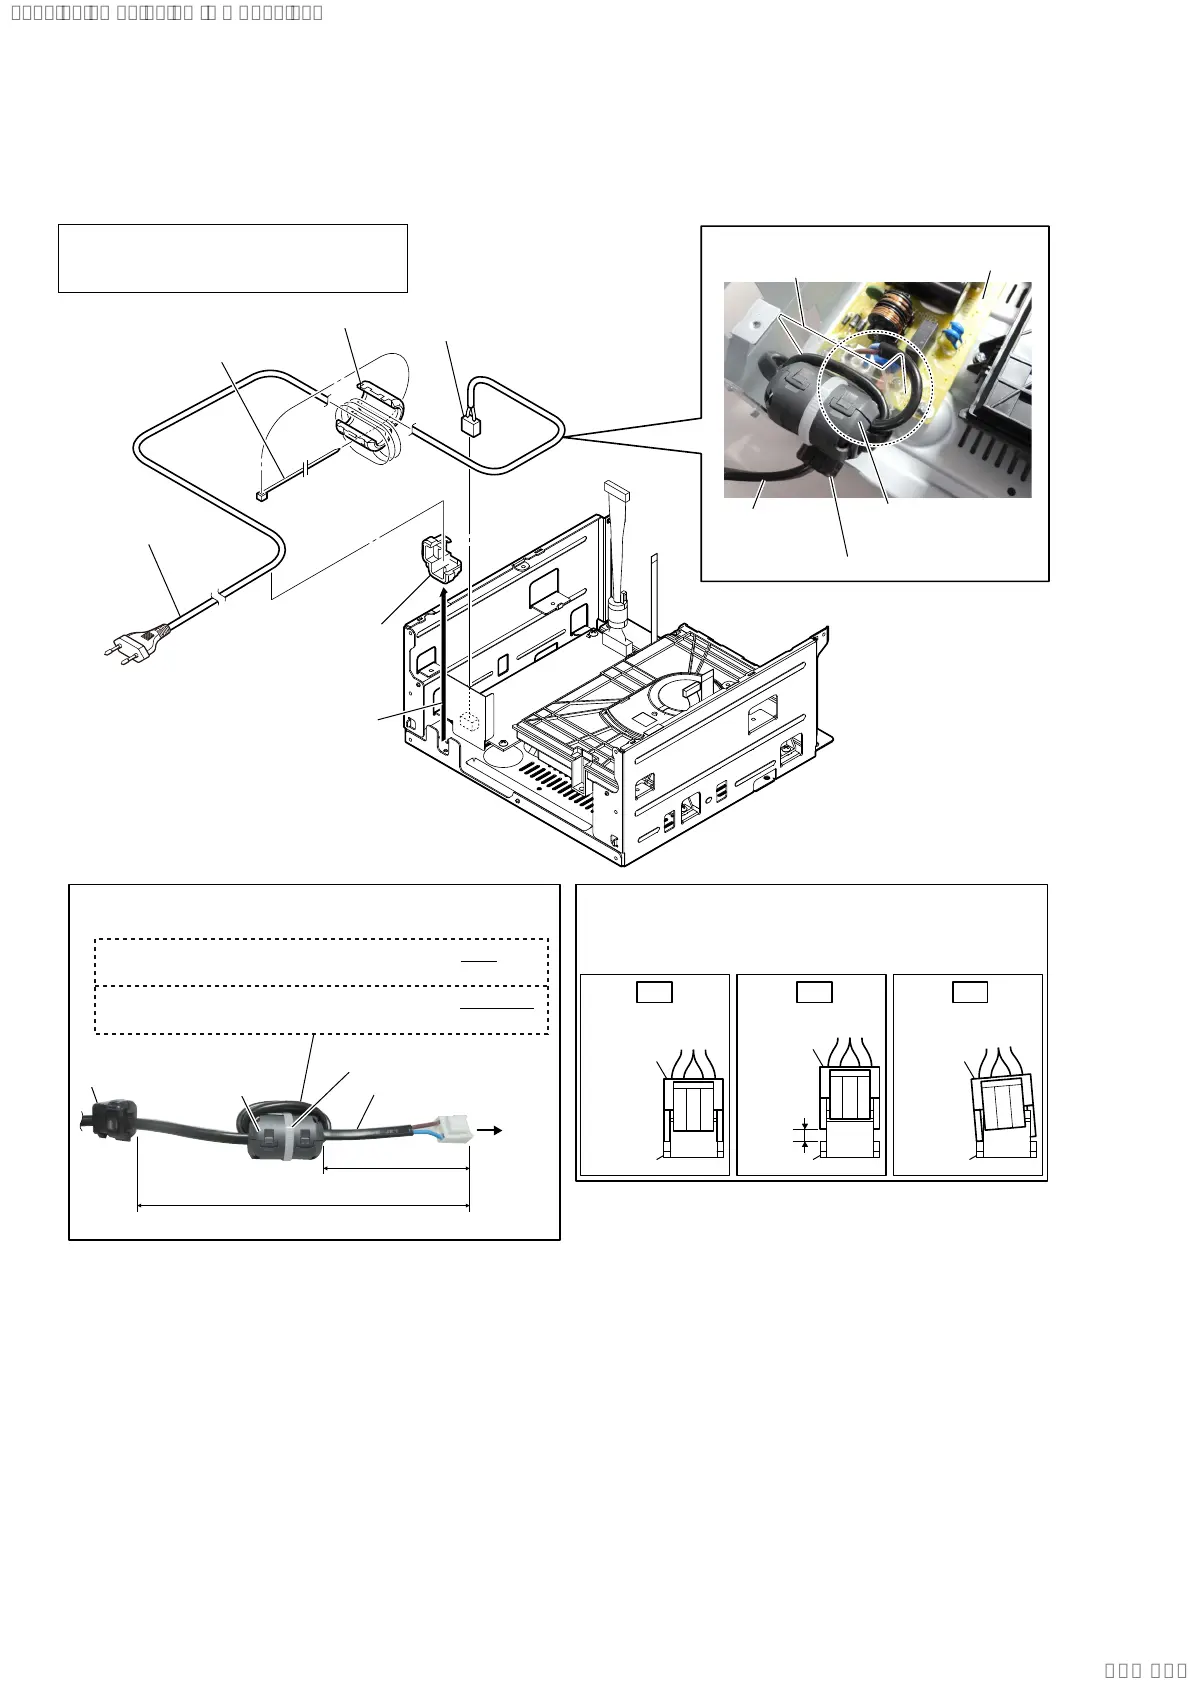
2-22. POWER CORD (AC1)
4 Cut the binding band (taiton).
binding band (taiton)
5 clamp filter (ferrite core) (FC6)
clamp filter
(ferrite core)
(FC6)
clamp filter
(ferrite core) (FC6)
cord bush (2104)
1 Remove the cord bush (2104)
in the direction of the arrow.
2 cord bush (2104)
cord bush (2104)
6 power cord (AC1)
power cord (AC1)
power unit
sheet (PS)
3RZHUFRUGVHWWLQJ
to
power unit
(CN101)
180 ± 5 mm
75 to 80 mm
3 power cord connector
(CN101)
power cord
(AC1)
Insert only part way.Insert straight into
the interior.
connector
Insert at a slant.
connector
connector
connector
connector
connector
OK NG NG
+RZWRLQVWDOOWKHFRQQHFWRU
Insert the connector straight into the interior.
There is a possibility that using this unit without
the connector correctly installed will damage it.
–5HDUYLHZ–
,QVWDOODWLRQSRVLWLRQRIWKHFODPSILOWHUIHUULWHFRUH)&
DQGFRUGEXVK
Note 1:
During reassembly, use new binding band
(taiton) to fasten the wires back in place as
they were before disassembly.
Note 2:
Coil the power cord (AC1) twice
to the clamp filter (ferrite core) (FC6).
Note 3:
Coil the power cord (AC1) three times
to the clamp filter (ferrite core) (FC6).
&1'
([FHSW&1'
SYSSET
2020/02/2722:53:44(GMT+09:00)
 Loading...