HCD-SX7/SX7B
HCD-SX7/SX7B
3535
SECTION 4
ELECTRICAL CHECKS
TUNER SECTION
0 dB = 1 V
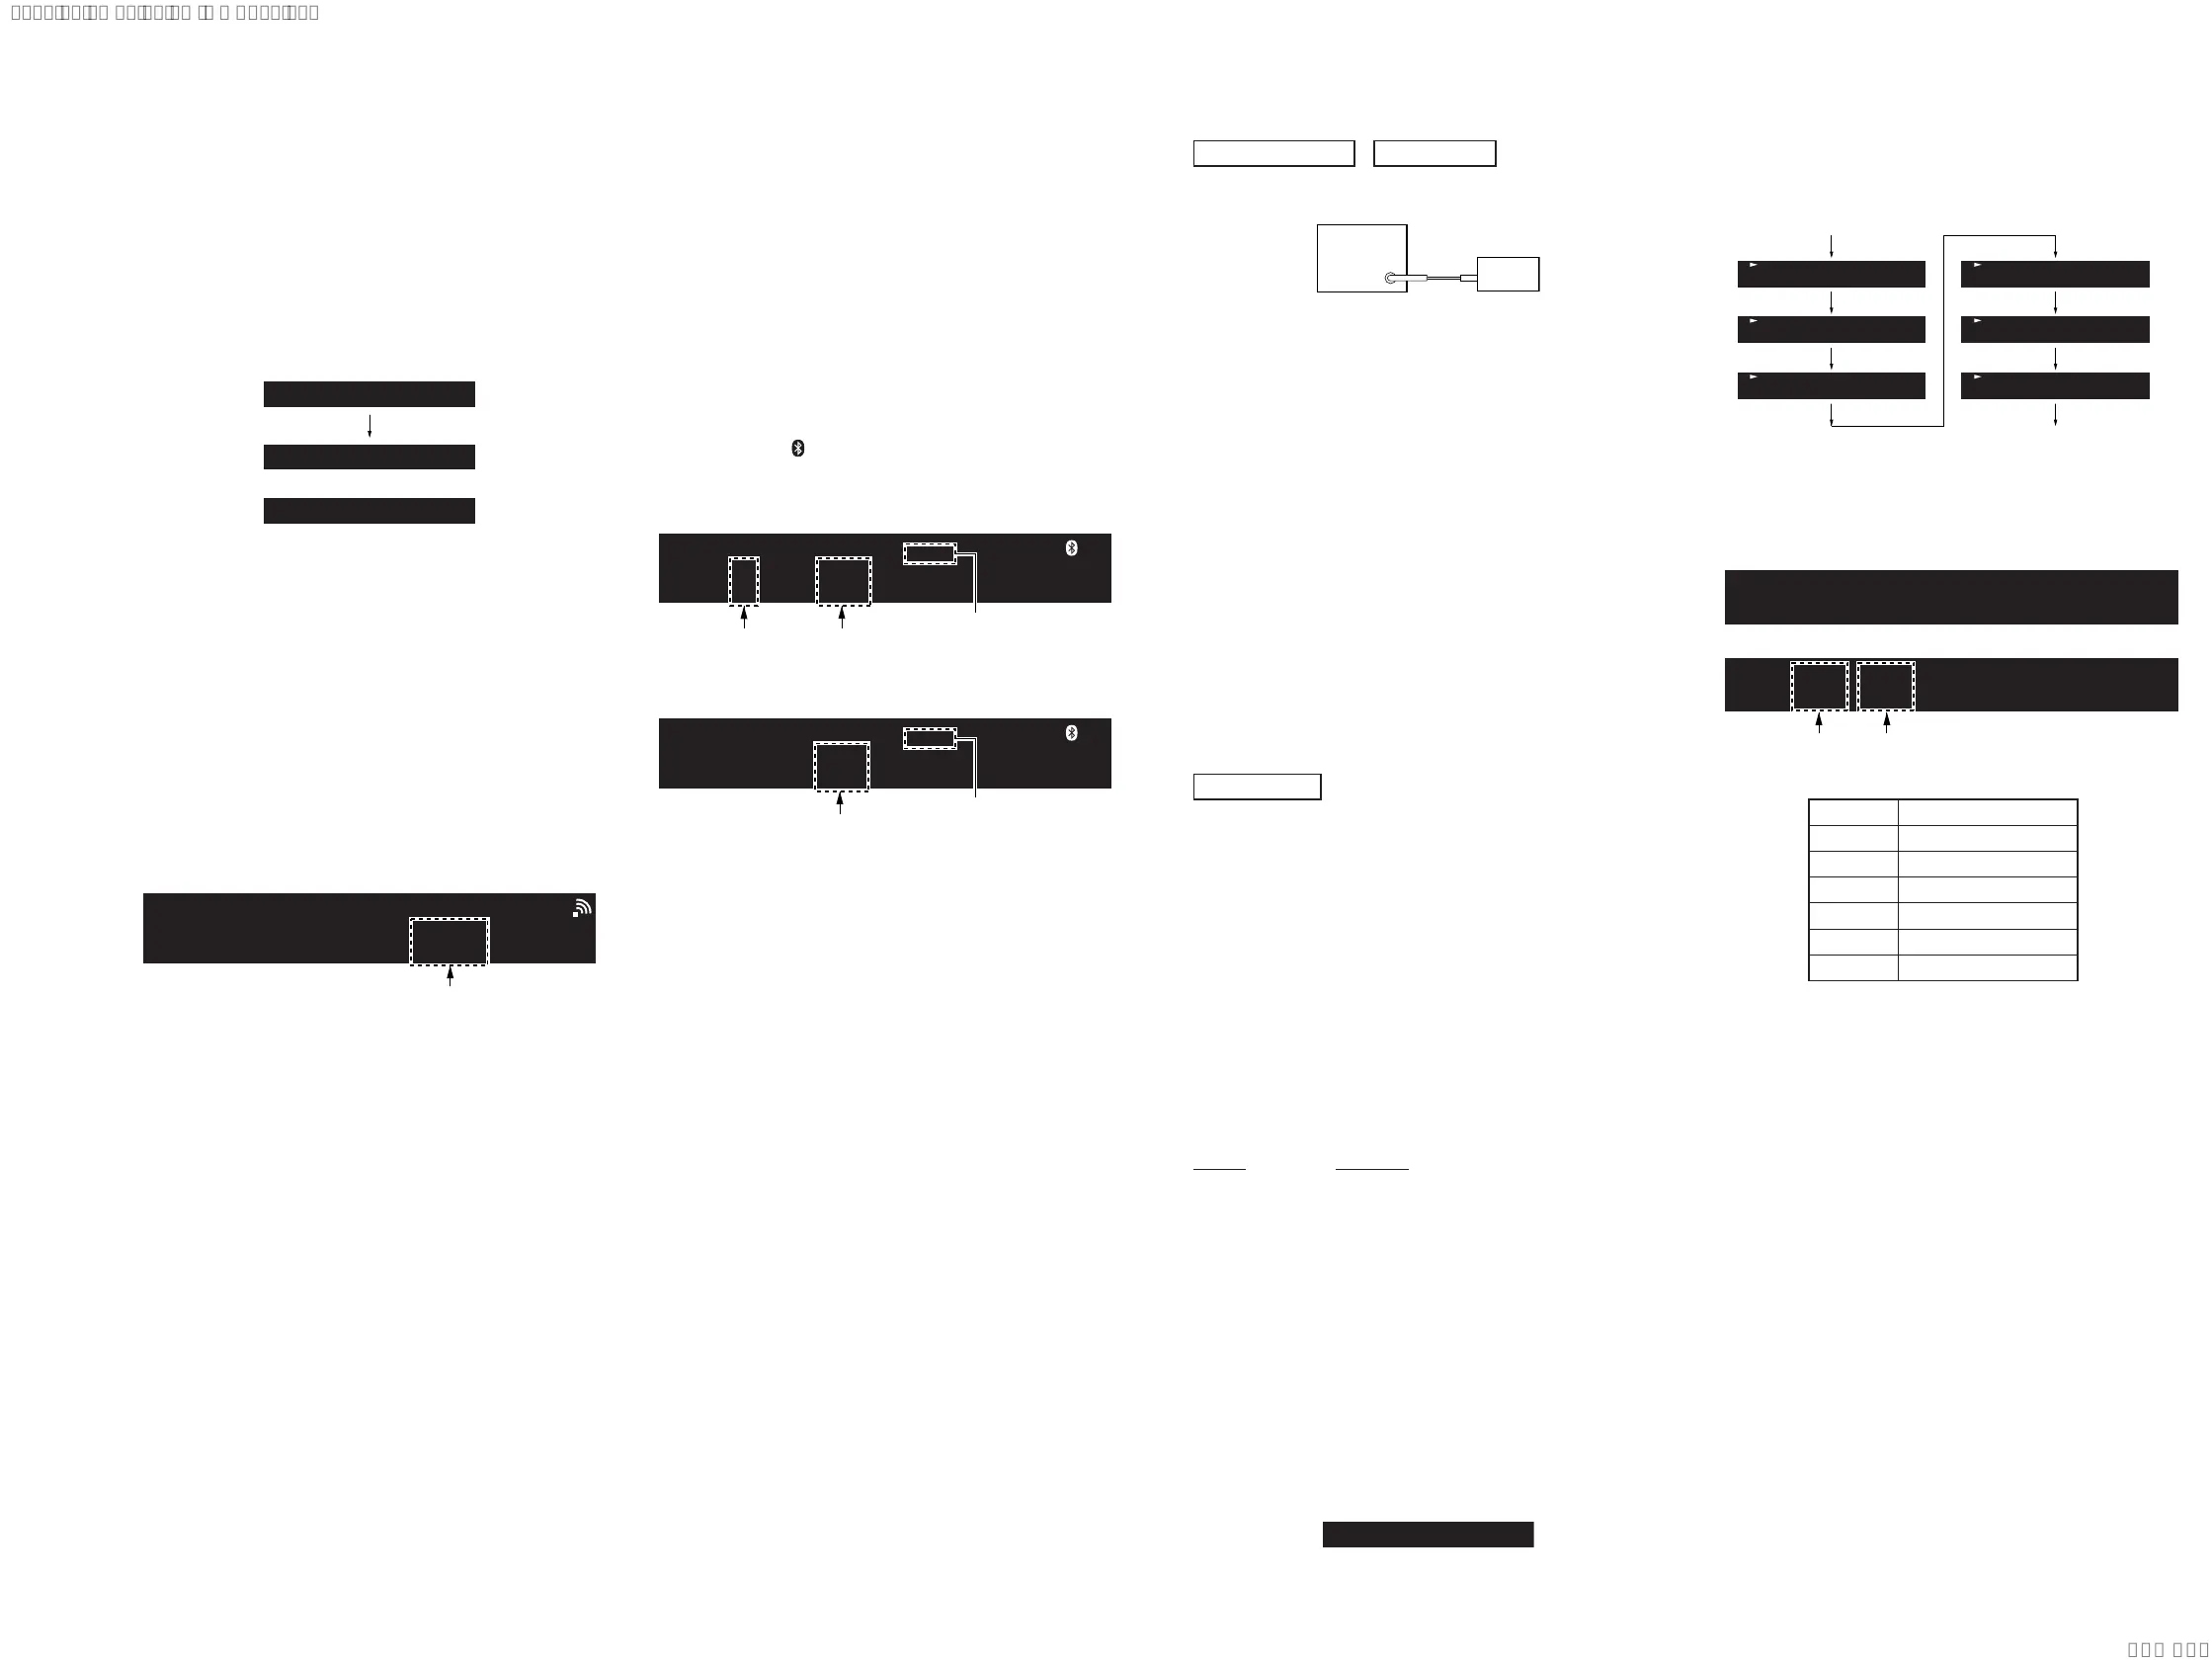
FM TUNE LEVEL CHECK
signal
generator
unit
Procedure:
1. Press the [
@
/
1
] button to turn the power on.
2. Input the following signal from signal generator to FM antenna
input directly.
Carrier frequency : A = 87.5 MHz, B = 98 MHz, C = 108 MHz
Deviation : 75 kHz
Modulation : 1 kHz
ANT input : 35 dBu (EMF)
Note: Use 75 ohm coaxial cable to connect signal generator and the unit.
You cannot use video cable for checking.
Use signal generator whose output impedance is 75 ohm.
3. Press the [FUNCTION] button on the remote commander to
select the FM tuner function and tune A, B and C signals.
4. Confi rm “TUNED” is lit on the display for A, B and C signals.
When the selected station signal is received in good condition,
“TUNED” is displayed.
CD SECTION
Note:
1. CD block is basically constructed to operate without adjustment.
2. Use HLX-A1 disc (Part No. J-2501-307-A) unless otherwise indicat-
ed.
3. Clean the object lens by an applicator with neutral detergent when the
check result is “NG” with the following check.
SERVO CHECK
It can confi rm the servo function.
Note 1: A button having no particular description in the text, indicates the
main unit button.
Also the remote commander use the following.
(Other than the remote commander of the following, it can use if
there are “SEARCH” button and “numeric key”)
Cannot operate on the remote commander of supplied with this
unit.
Part No. Description
1-489-989-11 REMOTE COMMANDER (RM-AMU139)
Procedure:
1. Press the [
@
/
1
] button to turn the power on.
2. Press the [FUNCTION] button on the remote commander to
select the CD function.
3. Press two buttons of the [
u
] and [
Z
] simultaneously for fi ve
seconds, or press the buttons on the remote commander in or-
der of the [ALPHABET SEARCH] → [9] → [1] → [ENTER]
(press the next button within three seconds).
Note 2: The specifi cations are the same even if entering to the check mode
by either operation.
4. Check that the “SET CD” is displayed on the liquid crystal
display. And test disc (HLX-A1) is set after a disc tray opens
automatically.
Screen display
SET CD
5. Press the [
Z
] button to close the disc tray.
6. Servo check is started, following screen is displayed on the
liquid crystal display.
Servo check start
Servo check end
T-1
T-2
T-3
T-6
T-7
T-8
7. When servo check is ended, the disc tray is opened automati-
cally, and “ALL PASS” or “NG XX YY” (XX: error No./YY:
error information) is displayed on the liquid crystal display.
Screen display
ALL PASS
NG XX YY
or
Error No.
(01 to 03, 06 to 08)
Error information
(Hexadecimal)
Error No.
Servo Check Item
01 Disc Type
02 SPFG
03 Mirror Time
06 S Balance
07 RF Level
08 Jitter
Releasing method:
It can be released by one of the following methods.
• Press two buttons of the [
u
] and [
Z
] simultaneously for fi ve
seconds.
• Press the buttons on the remote commander in order of the
[ALPHABET SEARCH] → [9] → [1] → [ENTER].
(Press the next button within three seconds)
• Press the [FUNCTION] button on the remote commander to
select the except CD function.
• Press the [
@
/
1
] button to turn the power off.
2-5. Apple Authorization IC Test
It can confi rm the Apple authorization IC.
Procedure:
1. Press the [
@
/
1
] button to turn the power on.
2. Press the buttons on the remote commander in order of the
[ALPHABET SEARCH] → [7] → [7] → [ENTER].
(Press the next button within three seconds)
3. It enters the Apple authorization IC test mode, and check result
is displayed on the liquid crystal display.
Screen display
MFI OK
MFI NG
or
MFI TEST
4. The check result display disappears in few seconds, and it re-
turns to the display of the normal mode.
2-6. WiFi Reception Level
It can display the reception level at the time of wireless LAN con-
nection.
Procedure:
1. Set this unit to wireless LAN connection state.
(Refer to “CHECKING OF NETWORK CONNECTION” on
page 5)
2. Press the buttons on the remote commander in order of the
[ALPHABET SEARCH] → [9] → [7] → [ENTER].
(Press the next button within three seconds)
3. The reception level is displayed on the liquid crystal display.
Screen display
WiFi Signal:XXX
reception level
(0 to 100)
Releasing method:
Press the buttons on the remote commander in order of the [AL-
PHABET SEARCH] → [9] → [7] → [ENTER].
(Press the next button within three seconds)
2-7. Auto Standby Test
It can confi rm the auto standby function operates normally.
The auto standby function operates in 60 seconds in this mode.
(Usually, it takes 15 minutes)
Procedure:
1. Press the [
@
/
1
] button to turn the power on.
2. Press the [FUNCTION] button on the remote commander to
select the except FM, AM and DAB tuner function.
3. Press the buttons on the remote commander in order of the
[ALPHABET SEARCH] → [9] → [9] → [ENTER].
(Press the next button within three seconds)
4. It enters the auto standby test mode, and the following screen
is displayed on the liquid crystal display.
(In this mode, “
”continues lighting up and “STEREO” con-
tinues blinking on the liquid crystal display)
Screen display of “CD”, “USB FRONT”, “USB REAR”,
“BLUETOOTH”, “OPTICAL IN”, “LINE IN” function
Sig X XX
STEREO
Blinking
Screen display of “NETWORK” function
Status XX
STEREO
Blinking
Countdown
timer
(60 to 0)
Countdown
timer
(60 to 0)
Signal level
(0 or 1)
5. In the case of the following states, the countdown timer de-
creases. This unit will become standby states if the countdown
timer decreases to “0”.
• Operation is not performed.
• The signal level is lower than threshold.
(“CD”, “USB FRONT”, “USB REAR”, “BLUETOOTH”,
“OPTICAL IN”, “LINE IN” function only)
• NETWORK audio is stop status.
(“NETWORK” function only)
Releasing method:
Press the buttons on the remote commander in order of the [AL-
PHABET SEARCH] → [9] → [9] → [ENTER].
(Press the next button within three seconds)
SYSSET
2020/02/2722:53:44(GMT+09:00)

 Loading...