32
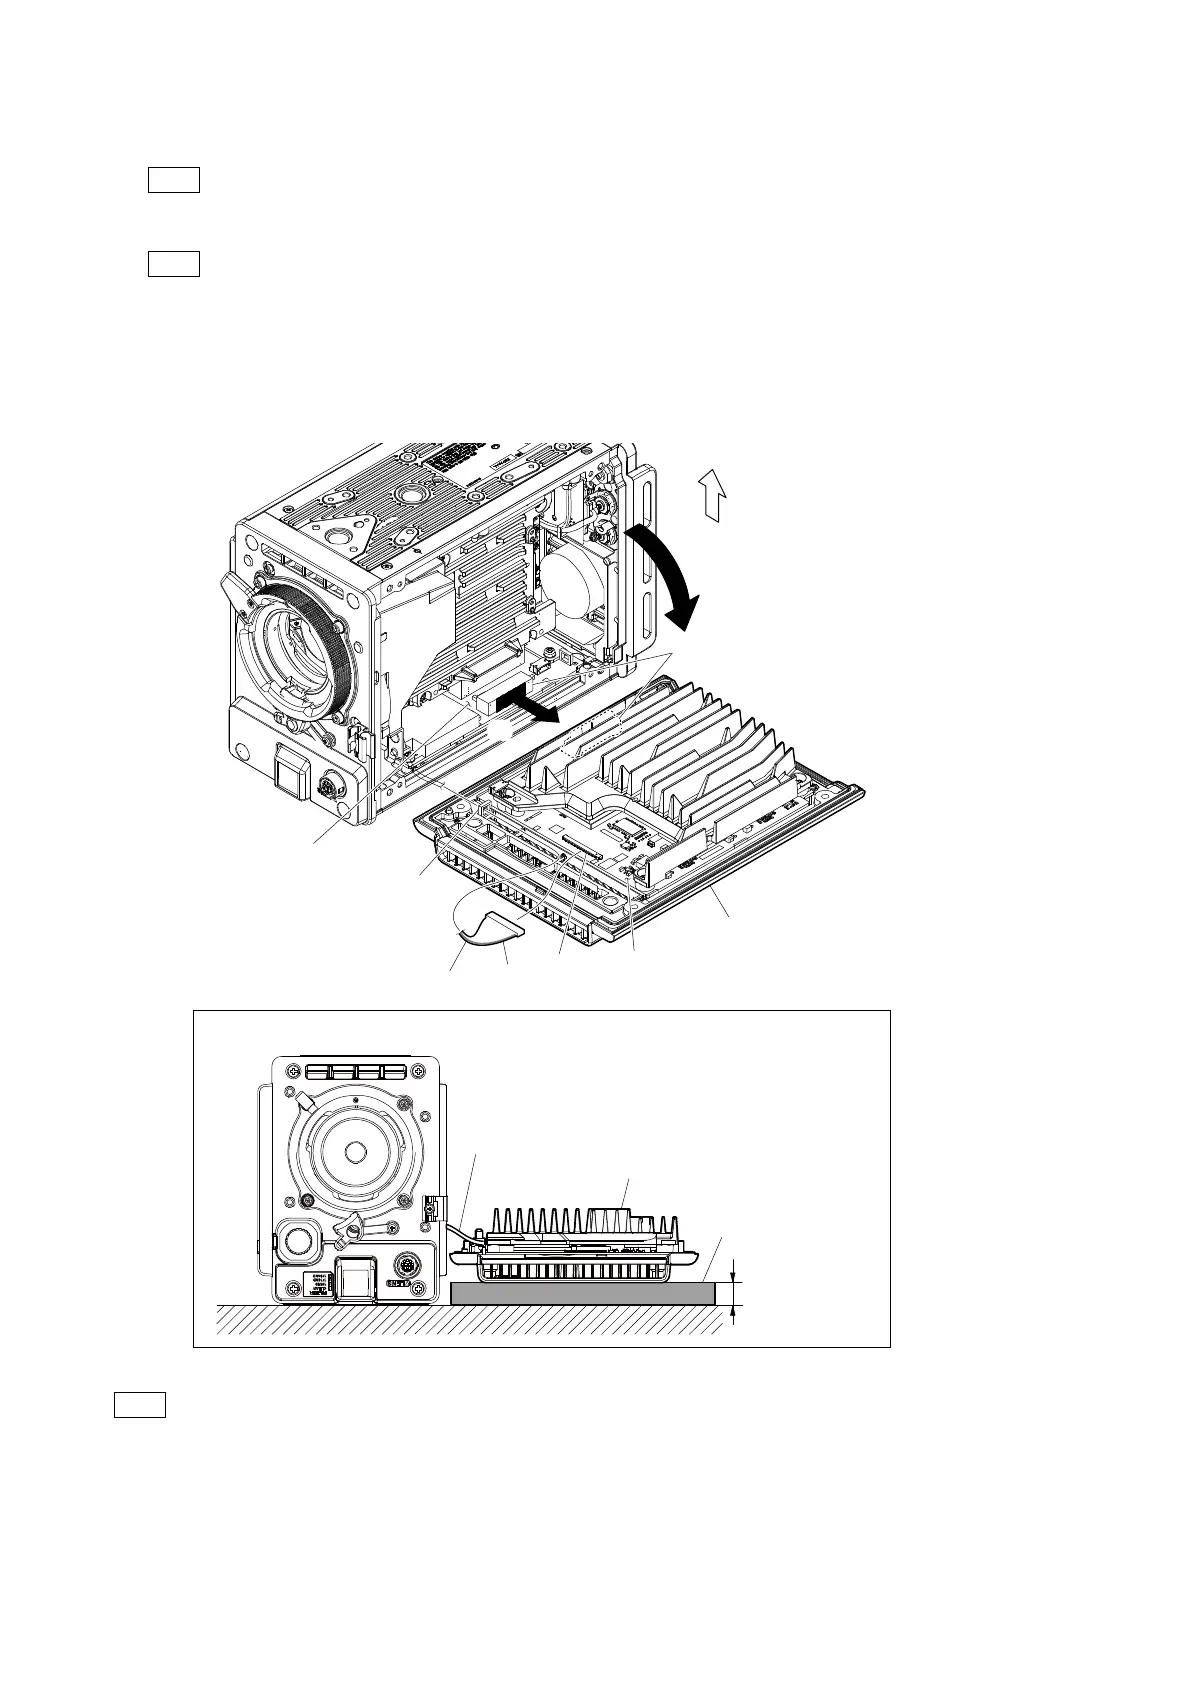
3. Remove the outside assembly in the direction of the arrow (A), and then disconnect the B to B connector.
4. Lay down the outside assembly in the direction of the arrow (B) and place it near this unit.
• The DPR-393 board and MB-1259 board are connected with the B to B connector. Be careful not to damage them.
• Be careful not to damage the lead wire with connector connected to the DPR-393 board.
[HDC-P31 only]
Place the outside assembly on a table (example: book, palm) of about 10 mm, so that the lead wire with connector connected to
the DPR-393 board is short.
5. Disconnect the lead wire with connector from the connector (CN103) on the DPR-393 board.
6. Remove the lead wire with connector from the harness clamp, and then remove the outside assembly.
When attaching the outside assembly, be careful not to catch the lead wire with connector.
7. Install the removed parts by reversing the steps of removal.
Lower side
Outside assembly
Outside assembly
B-to-B connectors
(B)
(A)
DPR-393 board
MB-1259 board
Lead wire with connector
Lead wire with connector
CN103
Yellow
Harness clamp
10mm
How to place outside assembly (HDC-P31 only)
Table
(Example: Book or palm)



 To Next Page