49
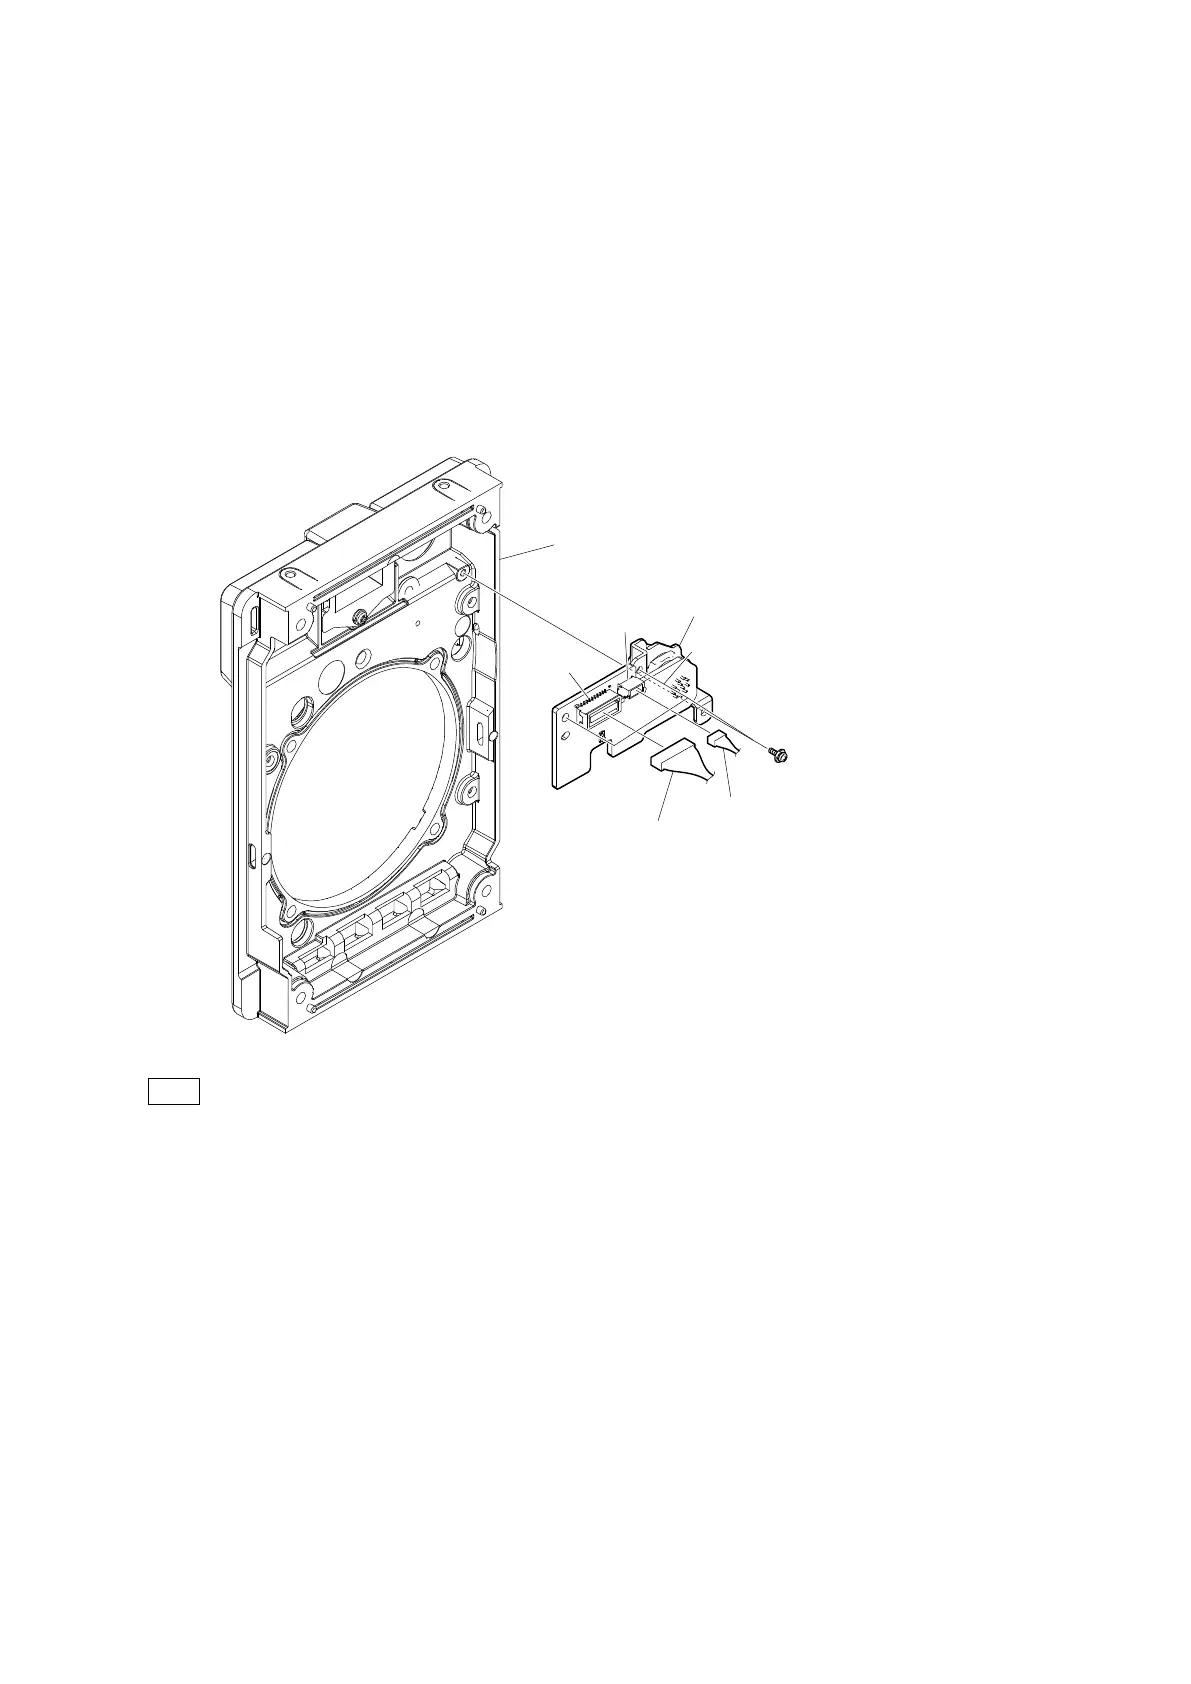
4-17. LE-426 Board
Preparation
1. Remove the outside assembly. (Refer to "4-4. Outside Assembly")
2. Remove the inside assembly. (Refer to "4-5. Inside Assembly")
3. Remove the front panel block. (Refer to "4-7. Front Panel Block")
4. Remove the CMOS block assembly. (Refer to "4-8. CMOS Block Assembly (HDC-P50)" or "4-13. CMOS Block Assembly
(HDC-P31)")
Procedure
1. Disconnect the two harnesses from the two connectors (CN002 and CN003) on the LE-426 board.
2. Remove the three screws, and then remove the LE-426 board.
When installing the LE-426 board, tighten the screw (a) first, and then tighten the remaining two screws.
3. Install the removed parts by reversing the steps of removal.
LE-426 board
(a)
CN002
CN003
Front panel assembly
Harness (FRONT)
Harness (LENS)
PSW
2 x 5
This figure shows HDC-P50.



 To Next Page