1-13
54
Enjoying Movies
Changing the Angles
If various angles (multi-angles) for a scene
are recorded on the DVD, “ANGLE” appears
in the front panel display. This means that
you can change the viewing angle.
For example, while playing a scene of a train
in motion, you can display the view from
either the front of the train, the left window of
the train or from the right window without
having the train’s movement interrupted.
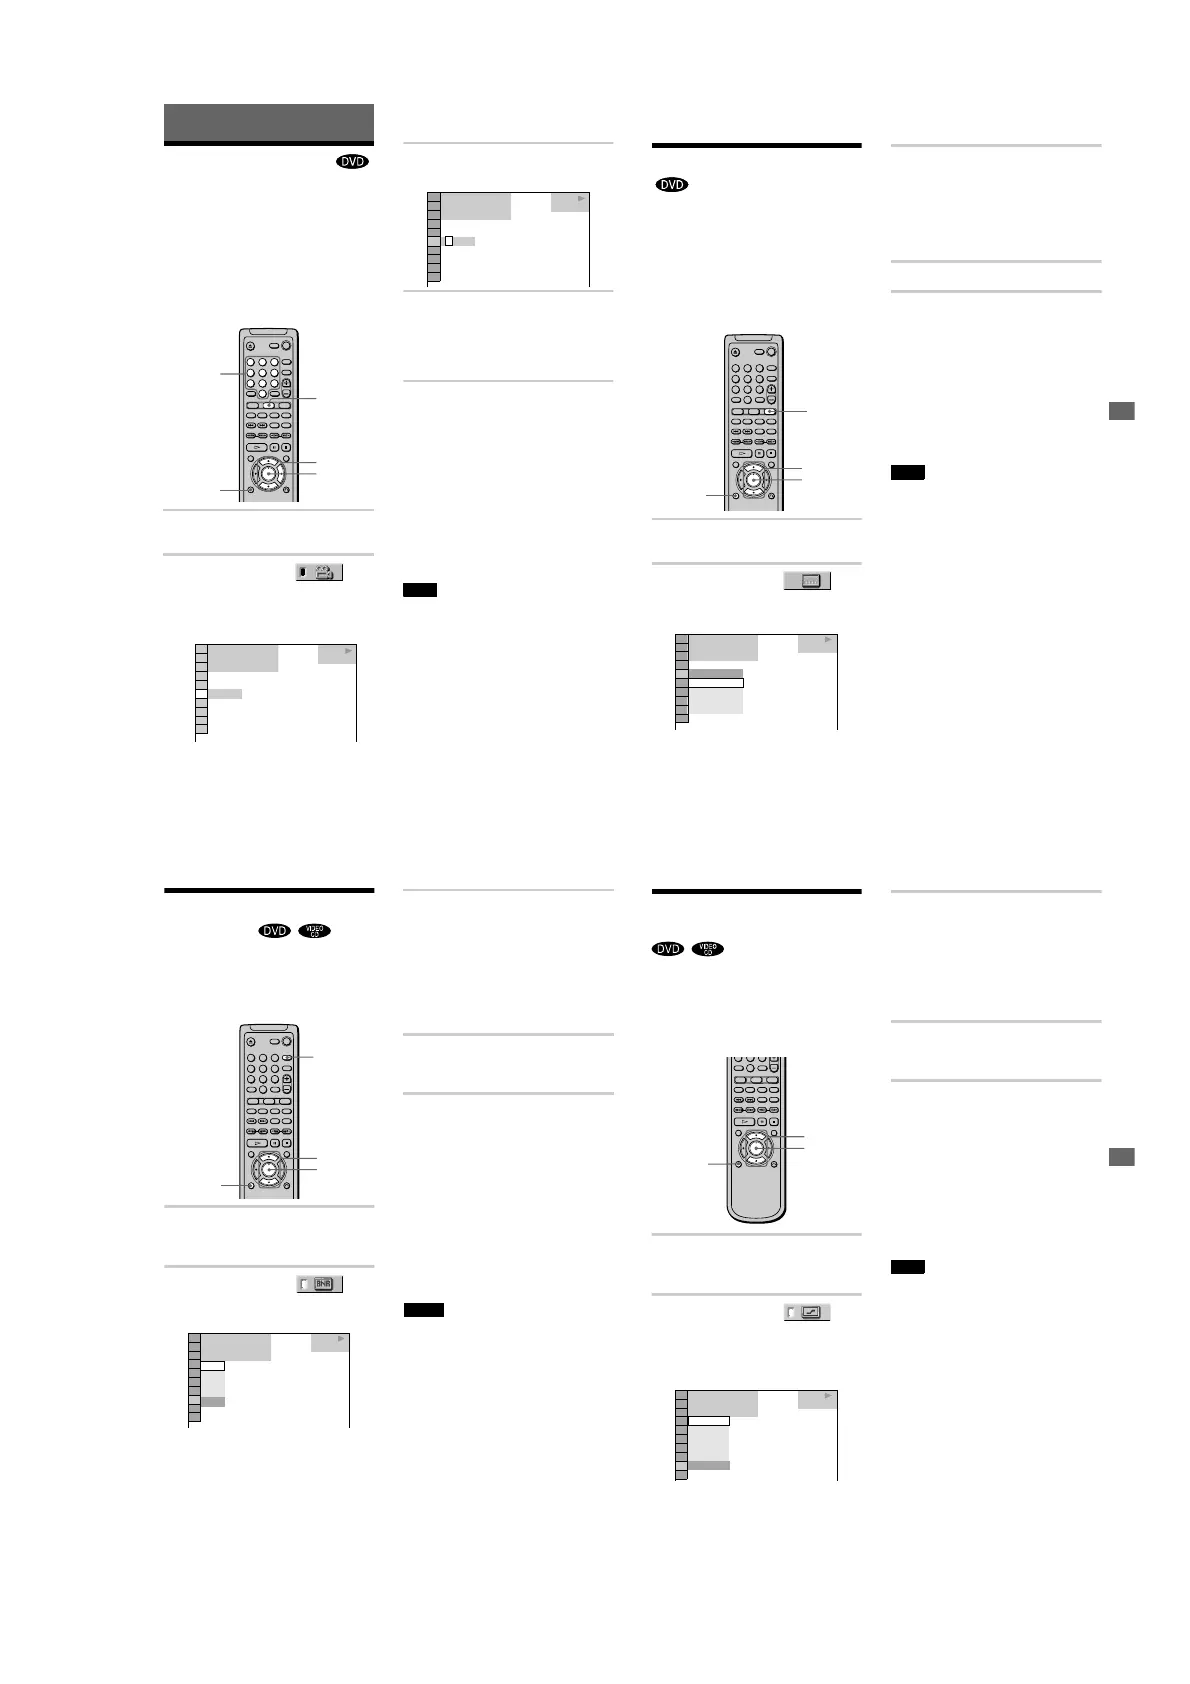
1
Press DISPLAY during playback.
The Control Menu appears.
2
Press X/x to select
(ANGLE).
The number of the angle appear.
The number in parentheses indicates the
total number of angles.
3
Press c or ENTER.
The number of the angle changes to “-.”
4
Select the angle number using the
number buttons or X/x, then press
ENTER.
The angle is changed to the selected
angle.
To turn off the Control Menu
Press DISPLAY repeatedly until the Control
Menu is turned off.
z
You can select the angle directly by pressing
ANGLE. Each time you press the button, the angle
changes.
z Yo u can dis
play all the angles recorded on the disc
on the same screen, and start playback directly in
continuous mode from the chosen angle. The angles
are displayed on a screen divided in 9 sections. For
details, see page
42.
Note
Depending on the DVD, you may not be able to
change the angles even if multi-angles are recorded on
the DVD.
123
456
78
0
9
ENTER
X/x/c
Number
Buttons
ANGLE
DISPLAY
1 8
(
3 4
)
1 2
(
2 7
)
T
1 : 3 2 : 5 5
DVD
1
(
9
)
PLAY
1 8
(
3 4
)
1 2
(
2 7
)
T
1 : 3 2 : 5 5
DVD
PLAY
–
(
9
)
Enjoying Movies
55
Displaying the Subtitles
If subtitles are recorded on the discs, you can
turn the subtitles on and off whenever you want
while playing. If multilingual subtitles are
recorded on the disc, you can change the subtitle
language while playing, and turn it on or off
whenever you want. For example, you can
select the language you want to practice and
turn the subtitles on for better understanding.
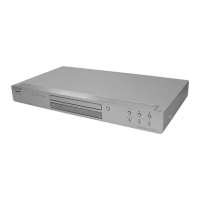
1
Press DISPLAY during playback.
The Control Menu appears.
2
Press X/x to select
(SUBTITLE), then press ENTER.
The options for SUBTITLE appear.
3
Press X/x to select the language.
Depending on the DVD, the choice of
language varies.
When 4 digits are displayed, they
indicate the language code. Refer to the
language code list on page 82 to see
which language the code represents.
4
Press ENTER.
To cancel the setting
Select “OFF” in Step 3.
To turn off the Control Menu
Press DISPLAY repeatedly until the Control
Menu is turned off.
z
You can select SUBTITLE directly by pressing
SUBTITLE. Each time you press the button, the item
changes.
Note
Depending on the DVD, you may not be able to
ch
ange the subtitles on even if multilingual subtitles
are recorded on it.
123
456
78
0
9
ENTER
X/x
SUBTITLE
DISPLAY
1 8
(
3 4
)
1 2
(
2 7
)
T
1 : 3 2 : 5 5
OFF
1: ENGLISH
2: FRENCH
3: SPANISH
OFF
DVD
PLAY
56
Adjusting the Picture
Quality
(BNR)
The Block Noise Reduction (BNR) function
adjusts the picture quality by reducing the
“block noise” or mosaic like patterns that
appear on your TV screen.
1
Press DISPLAY twice during
playback.
The Control Menu appears.
2
Press X/x to select
(BNR), then press ENTER.
The options for BNR appear.
3
Press X/x to select a level.
As the value increases, the mosaic like
patterns on your TV screen will
decrease.
• 1: reduces the “block noise”.
• 2: reduces the “block noise” more
than 1.
• 3: reduces the “block noise” more
than 2.
4
Press ENTER.
The disc plays with the setting you
selected.
To cancel the BNR setting
Select “OFF” in Step 3.
To turn off the Control Menu
Press DISPLAY repeatedly until the Control
Menu is turned off.
z
You can set BNR while the player is stopped.
z You can select BNR directly by pressing BNR on
the remote or player. Each time you press the button,
the item changes. If you select any setting other than
“OFF,” the indicator on the player lights up.
Notes
• If the outlines of the images on your screen should
become blurred, set “BNR” to “OFF.”
• Depending on the disc or the scene being played, the
BNR effect may be hard to discern,
123
456
78
0
9
X/x
BNR
ENTER
DISPLAY
OFF
1
2
3
DVD
OFF
PLAY
1 8
(
3 4
)
1 2
(
2 7
)
T
1 : 3 2 : 5 5
Enjoying Movies
57
Enhancing the Playback
Picture
(DIGITAL VIDEO ENHANCER)
The Digital Video Enhancer function makes
the picture appear clear and crisp by
enhancing the outlines of images on your TV
screen. Also, this function can soften the
images on the screen.
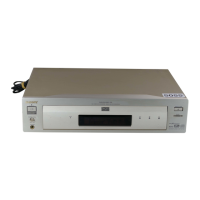
1
Press DISPLAY twice during
playback.
The Control Menu appears.
2
Press X/x to select
(DIGITAL VIDEO ENHANCER), then
press ENTER.
The options for DIGITAL VIDEO
ENHANCER appear.
3
Press X/x to select a level.
As the value increases, the outlines of
images on your TV screen will become
crisper.
• 1: enhances the outline.
• 2: enhances the outline more than 1.
• 3: enhances the outline more than 2.
• SOFT: softens the image (DVD only).
4
Press ENTER.
The disc plays with the setting you
selected.
To cancel the DIGITAL VIDEO
ENHANCER setting
Select “OFF” in Step 3.
To turn off the Control Menu
Press DISPLAY repeatedly until the Control
Menu is turned off.
z
You can set DIGITAL VIDEO ENHANCER
while the player is stopped.
Note
Depending on the DVD/VIDEO CD disc or the scene
being played, noise found in the disc may become
more apparent. If this happens, reduce the Digital
Video Enhancer level.
0
DISPLAY
X/x
ENTER
1 8
(
3 4
)
1 2
(
2 7
)
T
1 : 3 2 : 5 5
DVD
OFF
3
2
1
OFF
PLAY
SOFT