1-15
62
Area Code
Operation Sound Effects
(Sound Feedback)
The player beeps when the following
operations are performed.
The default setting of the Sound Feedback
function is set to off.
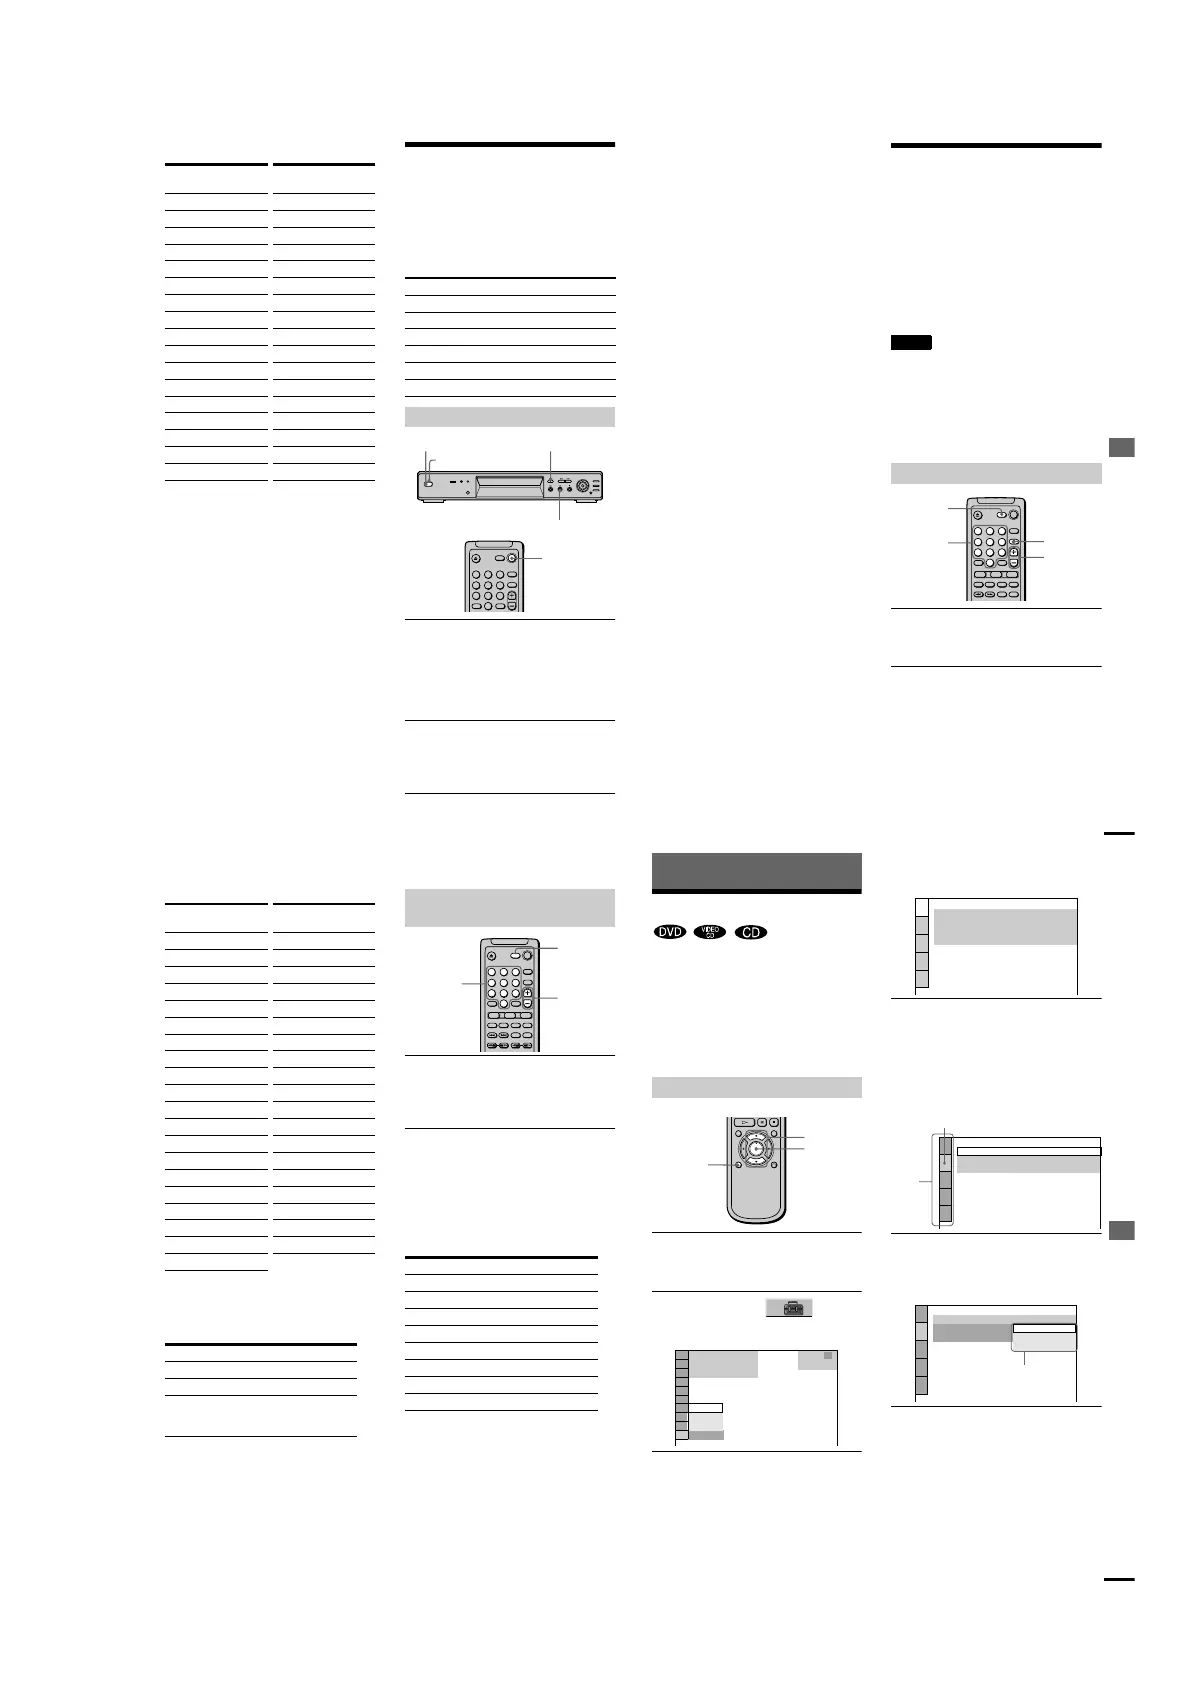
1 Press POWER on the player, then press
[/1 on the remote.
The power indicator lights up in green.
When there is a disc in the player, press
A and remove the disc. Then press A
again to close the disc tray.
2 Press and hold X on the player for more
than two seconds.
You will hear one beep and the Sound
Feedback function is turned on.
Standard Code
number
Argentina 2044
Australia 2047
Austria 2046
Belgium 2057
Brazil 2070
Canada 2079
Chile 2090
China 2092
Denmark 2115
Finland 2165
France 2174
Germany 2109
Hong Kong` 2219
India 2248
Indonesia 2238
Italy 2254
Japan 2276
Korea 2304
Malaysia 2363
Mexico 2362
Netherlands 2376
New Zealand 2390
Norway 2379
Pakistan 2427
Philippines 2424
Portugal 2436
Russia 2489
Singapore 2501
Spain 2149
Sweden 2499
Switzerland 2086
Taiwan 2543
Thailand 2528
United Kingdom 2184
Standard Code
number
Operation Operation sound
Power is turned on One beep
Power is turned off Two beeps
H is pressed One beep
X is pressed Two beeps
Playback is stopped One long beep
Operation is not possible Three beeps
To set Sound Feedback
123
456
78
0
9
[/1
A
X
POWER
Power indicato
r
Using Various Additional Functions
63
To turn off the Sound Feedback
function
When there is no disc in the player, press and
hold
X
on the player for more than two
seconds. You will hear two beeps and the
Sound Feedback function is turned off.
Controlling Your TV or AV
Amplifier (Receiver) with
the Supplied Remote
By adjusting the remote signal, you can
control your TV or AV amplifier (receiver)
with the supplied remote.
If you connect the player with a AV amplifier
(receiver), you can control the volume with
the supplied remote.
Notes
•
Depending on the units being connected, you may
not be able to control your TV or AV amplifier
(receiver) using some of the buttons below.
•
If you enter a new code number, the code number
previously entered will be erased.
•
When you replace the batteries of the remote, the
code number may be reset to the default setting.
Reset the appropriate code number.
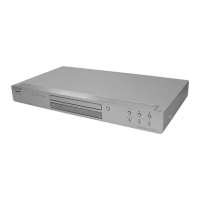
Hold down TV [/1, and enter your TV’s
manufacturer’s code (see the table) using
the number buttons. Then release TV [/1.
Code numbers of controllable TVs
If more than one code number is listed, try
entering them one at a time until you find the
one that works with your TV.
Controlling TVs with the remo
te
123
456
78
0
9
TV [/1
TV/VIDEO
Number
buttons
VOL
continued
64
Controlling the TV
You can control your TV using the buttons
below.
Hold down TV [/1, and enter your AV
receiver’s manufacturer’s code (see the
table) using the number buttons. Then
release TV [/1.
Code numbers of controllable AV
amplifiers (receivers)
If more than one code number is listed, try
entering them one at a time until you find the
one that works with your AV amplifiers
(receiver).
Controlling the AV amplifier (receiver)
You can change the volume of the AV
amplifier (receiver) using VOL +/–.
By pressing You can
TV [/1 Turn the TV on or off
VOL Adjust the volume of the TV
TV/VIDEO Switch the TV’s input source
between
the TV and other input
sources
Manufacture Code
number
Sony (default) 01
Akai 04
AOC 04
Centurion 12
Coronado 03
Curis-Mathes 12
Daytron 12
Emerson 03,04,14
Fisher 11
General Electric 06,10
Gold Star 03,04,17
Hitachi 02,03
J.C.Penney 04,12
JVC 09
KMC 03
Magnavox 03,08,12
Marantz 04,13
MGA/Mitsubishi 04,12,13,17
NEC 04,12
Panasonic 06,19
Philco 03,04
Philips 08,21
Pioneer 16
Portland 03
Quasar 06,18
Radio Shack 05,14
RCA 04,10
Sampo 12
Samsung 20
Sanyo 11
Scott 12
Sears 07,10,11
Sharp 03,05,18
Sylvania 08,12
Teknika 03,08,14
Toshiba 07
Wards 03,04,12
Yorx 12
Zenith 15
Manufacture Code
number
Controlling AV amplifiers (receivers)
with the remote
Manufacturer Code number
Sony
91, 89
Denon 84, 85, 86
Kenwood 92, 93
Onkyo 81, 82, 83
Pioneer 99
Sansui 87
Technics 97, 98
Yamaha 94, 95,
96
123
456
78
0
9
Number
buttons
VOL
TV [/1
Settings and Adjustments
65
Settings and Adjustments
Using the Setup Display
By using the Setup Display, you can make
various adjustments to items such as picture
and sound. You can also set a language for
the subtitles and the Setup Display, among
other things. For details on each Setup
Display item, see page 66. For an overall list
of Setup Display items, see page 83.
1
Press DISPLAY when the player is in
stop mode.
The Control Menu appears.
2 Press X/x to select (SETUP),
then press ENTER.
The options for SETUP appear.
3 Press
X
/
x
to select “CUSTOM” then
press ENTER.
The Setup Display appears.
4 Press X/x to select the setup item from
the displayed list: “LANGUAGE SETUP, ”
“SCREEN SETUP, ” “CUSTOM SETUP, ”
or “AUDIO SETUP,” and “SPEAKER
SETUP.” Then press ENTER.
The selected setup item appears.
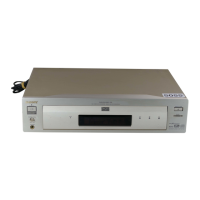
Example: “SCREEN SETUP”
5 Select an item using X/x, then press
ENTER.
The options for the selected item appear.
Example: “TV TYPE”
6 Select a setting using X/x, then press
ENTER.
The setting is selected and setup is complate.
Example: “16:9”
How to use the Setup Display
DISPLAY
ENTER
X/x
(
47
)
: :
QUICK
CUSTOM
RESET
DVD
QUICK
STOP
LANGUAGE SETUP
OSD:
DVD MENU:
AUDIO:
SUBTITLE:
ENGLISH
ENGLISH
ORIGINAL
ENGLISH
SCREEN SETUP
TV TYPE:
SCREEN SAVER
:
BACKGROUND:
4:3 LETTER BOX
ON
JACKET PICTURE
Setup
items
Selected ite
m
SCREEN SETUP
TV TYPE:
SCREEN SAVER
:
BACKGROUND:
16:9
4:3 LETTER BOX
4:3 PAN SCAN
4:3 LETTER BOX
Options
continued