HT-NT5
14
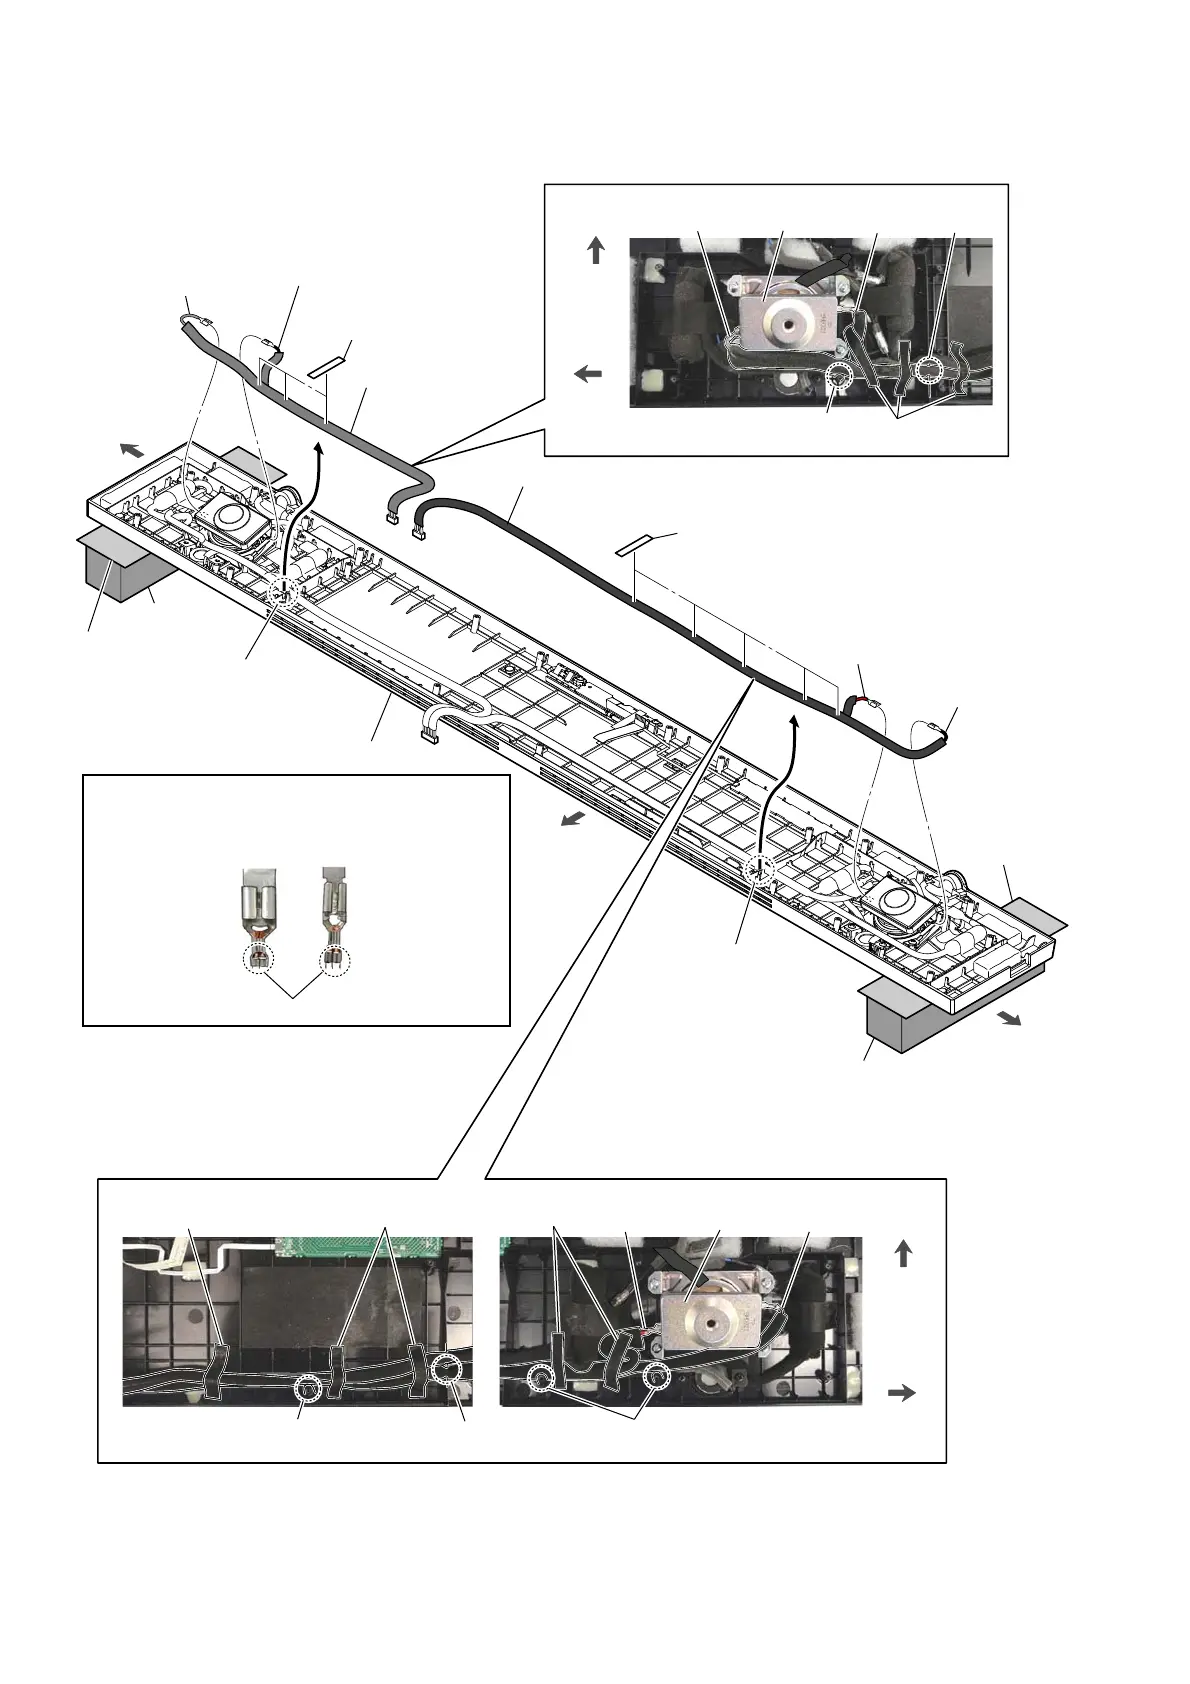
2-8. CONNECTION CABLE WITH SPEAKER (WOOFER)
Note 2:
When installing the connection cable with speaker,
make the position of caulking of terminals is outside.
Caulking is outside.
,QVWDOODWLRQGLUHFWLRQIRUWKHFRQQHFWLRQ
FDEOHZLWKVSHDNHU
2 Draw the connection
cable with speaker
out of groove.
2 Draw the connection
cable with speaker
out of groove.
Pass the connection cable with
speaker beside the screw hole.
saranet cushion
1 five saranet cushions
1 three saranet cushions
3 terminal (wide)
[gray]
3 terminal (narrow)
[black]
[red]
[black]
&RQQHFWLRQFDEOHZLWKVSHDNHUVHWWLQJIRU/FK
[gray]
[black]
groove
4 connection cable
with speaker (short)
(woofer: L-ch)
3 terminal (wide)
[red]
3 terminal (narrow)
[black]
4 connection cable
with speaker (long)
(woofer: R-ch)
rear side
left side
right side
&RQQHFWLRQFDEOHZLWKVSHDNHUVHWWLQJIRU5FK
stand
Pass the connection cable with
speaker beside the screw hole.
saranet cushion
Pass the connection cable with
speaker beside the screw hole.
saranet cushion
groove
saranet cushion
front side
left side
front side
right side
woofer
woofer
top cabinet block
soft cloth, etc.
soft cloth, etc.
stand
Note 1:
The center area of the tweeter on the top side protrudes out
more than the surface of the top cabinet block.
When working with the top side facing down, place stands
so that the center area of the top side tweeter is not crushed.
(Lay a soft piece of cloth between the unit and stands to
avoid damaging the top cabinet assy)