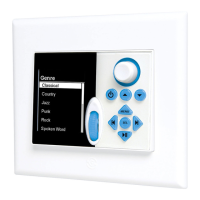
21
With the Mounting Bracket installed, and the address set, the MODE 3.1 can be mounted. (Make and secure wire connec-
tions as described in the section: Connections, prior to mounting the keypad.)
Keypad Angle
There are two options for mounting the MODE 3.1. One is a fl ush installation with the keypad fl at to the wall surface, and
the other is with the lower portion of the keypad sloping away from the wall at about a 15° angle. The angle mount cre-
ates a special cosmetic appeal and provides an improved LCD viewing angle.
Flush Mount
To install the MODE 3.1 Keypad flush (flat) to the wall surface:
1. Slide the lower part of the keypad into the Mounting Bracket and position the Keypad Angle Tabs into the rear
channel of the Keypad Angle Tab Slots.
2. Carefully press the upper corners of the keypad with both thumbs until the Keypad Locking Tabs snap into place.
Angle Mount
To install the MODE 3.1 Keypad with lower portion angled away from the wall surface at approximately 15º:
1. Slide the lower part of the keypad into the Mounting Bracket and position the Keypad Angle Tabs into the forward
channel of the Keypad Angle Tab Slots.
2. Carefully press the upper corners of the keypad with both thumbs until the Keypad Locking Tabs slide into place.
(The keypad will ‘lift’ slightly in the bracket when positioning the Locking Tabs.
NOTE: In an angle mount, the keypad is not secure until the bezel has been installed. The bezel will hold the Lock-
ing Tabs in place and secure the keypad to the bracket. Prior to installing the bezel in an angle mount, be careful if
operating the keypad and avoid incidental contact to prevent the keypad from falling out of the bracket and possibly
damaging the keypad, the wires or the wall.
BEZEL
Installation
With the keypad in place, carefully align the Bezel Tabs with the Bezel Tab Clips on the Mounting Bracket. Apply even
pressure around the bezel to slide it into place. The bezel is made of a plyable material that will ‘form fit’ to the wall
surface for a clean finish.
Removal
Take care when removing the bezel to not scratch custom wall surfaces or tear wall paper. Use a very small, thin tool or
fingernails, to carefully pull the sides of the bezel away from the wall surface.
Custom Wall Plates
Some lighting system companies manufacture special, custom wall plates that can be used with MODE 3.1 to trim out
their low voltage lighting control switches and a MODE 3.1 with a single plate. Please contact specific lighting compa-
nies for additional information.
NOTE: Installing a MODE 3.1, or any low voltage device, in the same J-box with a high voltage device is a violation of
electrical code in most places. Be aware of and comply with all local building and electrical codes.
INSTALLATION
 Loading...