34
ADDING A MODE KEYPAD TO AN EXISTING MZC PROJECT
The EZ-Tools programming instructions provided with the MODE 3.1 are intended to provide direction for adding a MODE
Keypad, multiple MODE Keypads, MODE Base(s) and MODE Adapter(s), to existing MZC Systems. If confi guring a new
system, start with the Programming With EZ-Tools section of the MZC Installation Instructions for system confi guration, source
setup, power management, etc. Use this manual for confi guration and programming zones using MODE Keypads.
If adding iPod(s), MODE Base(s) and MODE Adapter(s), be sure to have followed all instructions in the previous sections for
incorporating those components, updating the Source Setup and Zone Setup for proper system confi guration and perfor-
mance. If only adding MODEs or upgrading EZ-Pads to MODE Keypads, be sure to have followed all instructions for con-
nections and installation in the previous sections.
When adding a MODE 3.1 Keypad to an existing project, EZ-Tools does some of the work automatically in identifying
sources and placing them in the MODE Main Menu. This helps assure that proper control commands will be associated with
the right source. To add a MODE Keypad:
Open Project
1. If not already open, Open the MZC Project to be modifi ed.
2. Under the Project Content Tab, confi rm the source confi guration for the system under Source Setup. If the source con-
fi guration is correct, proceed to Step 3. If not, return to section: Adding An iPod, Mode Base And Mode Adapter To An
Existing Project, and follow all instructions.
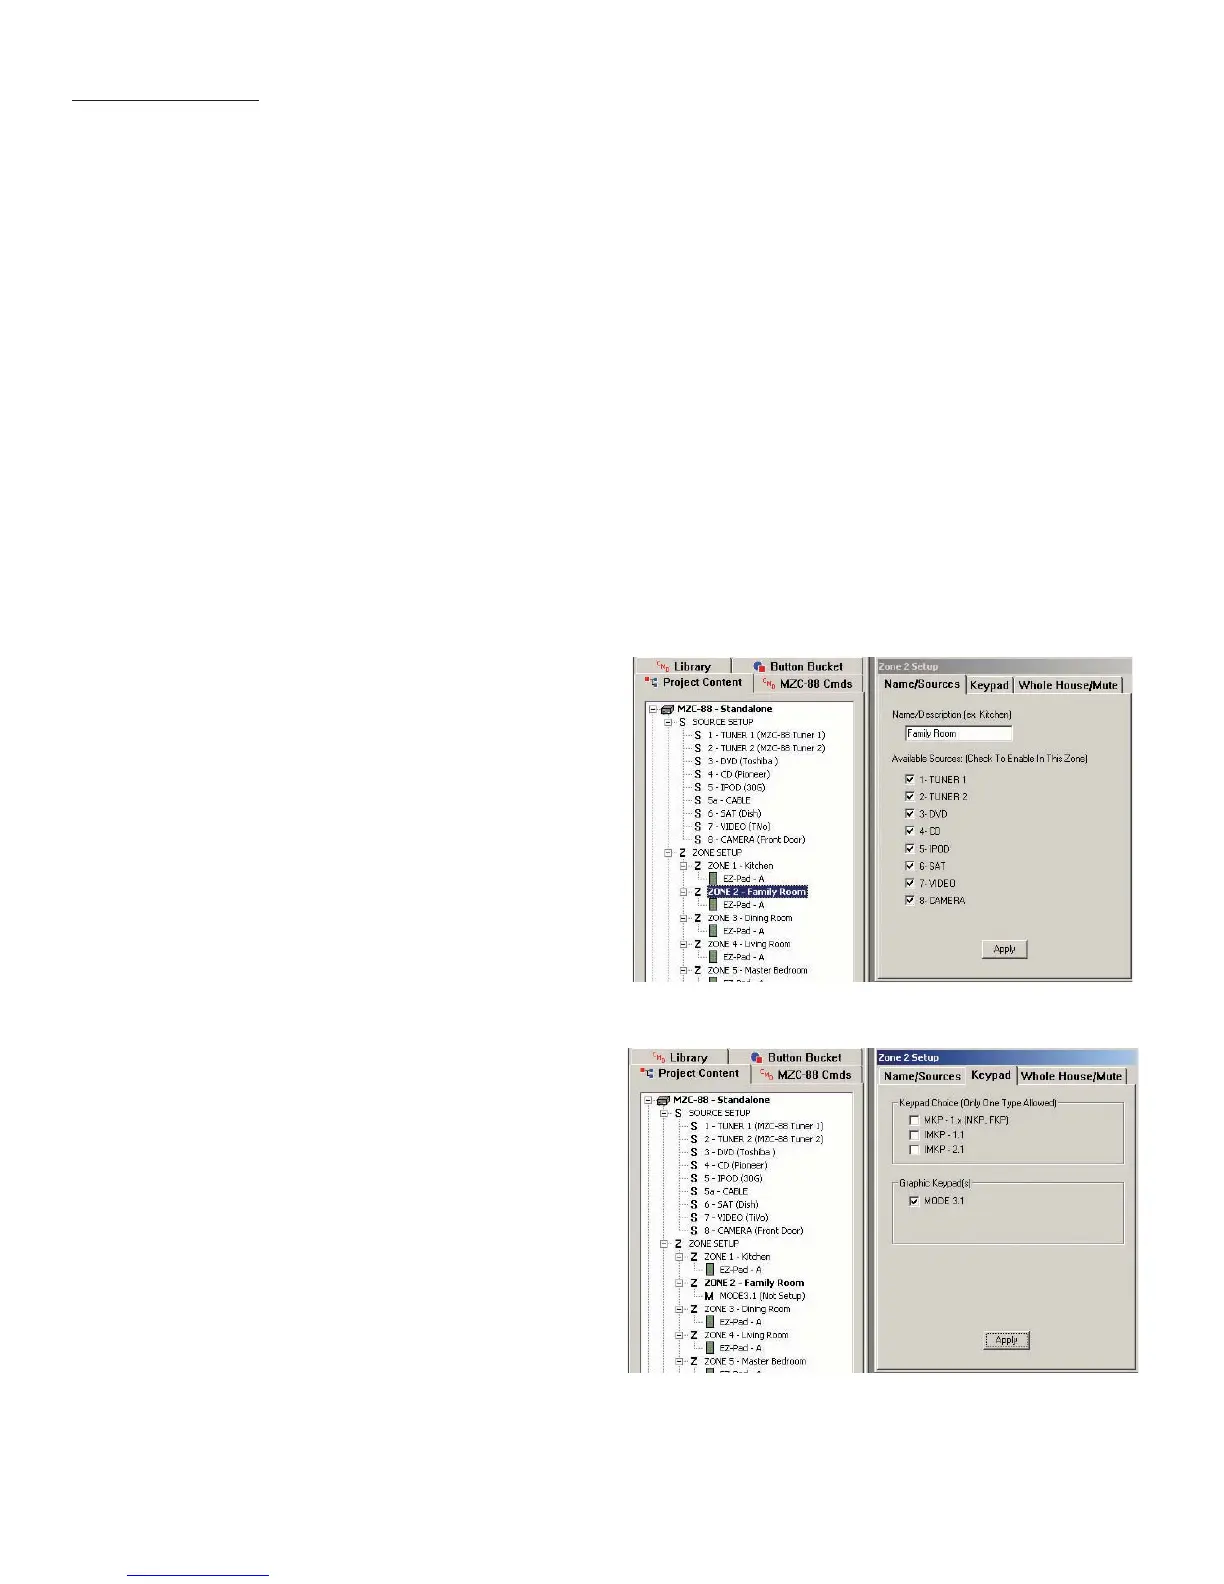
Figure 26
Zone Setup Window
Zone Setup
3. Under Project Content/Zone Setup, left click the Zone
that the MODE Keypad is going to be added to - for this
example, Zone 2. The Zone 2 Setup Window will appear as
shown in Figure 26.
Name/Sources
4. If the Available Sources options are checked and not
going to change, left click Apply. (The Cable Box now
connected as Source 5a or any other sources connected
to the Adapter or Base Aux Inputs will not show in this list,
but will automatically be available to the MODE Keypad
and any other MODE Keypads that get added to the sys-
tem). If the Available Sources options are to be changed,
check or uncheck the sources as appropriate. Left click
Apply.
Keypad
5. To add a MODE Keypad to the zone, left click the Keypad
Tab. MKP-1x(NKP, FKP) should be checked. Under Graphic
Keypad, left click in the MODE 3.1 Box to place a check
mark in the box. This will place a MODE 3.1 in the Zone
Setup. If the EZ-Pad is being replaced with a MODE Key-
pad, left click the MKP-1.x Box to uncheck the MKP. This
will remove the EZ-Pad from the Zone Setup. If the EZ-Pad
is to remain installed, leave the MKP-1.x Box checked. Left
click Apply. For the example system, the EZ-Pad has been
removed and replaced with a MODE 3.1. As soon as Ap-
ply is clicked, the EZ-Pad is removed from the Zone Setup
under Project Content.
Figure 27
Zone Setup Keypad Tab
PROGRAMMING
 Loading...