20
2-Gang
New Construction Box
MODE 3.1
Mounting Brac
ket
MODE 3.1
MODE 3.1
Bezel
Bezel Tab Clips
Keypad Angle
Tab Slots
Keypad
Angle Tabs
Bezel Tabs
Keypad
Locking Tabs
INSTALLATION
MODE 3.1 KEYPAD
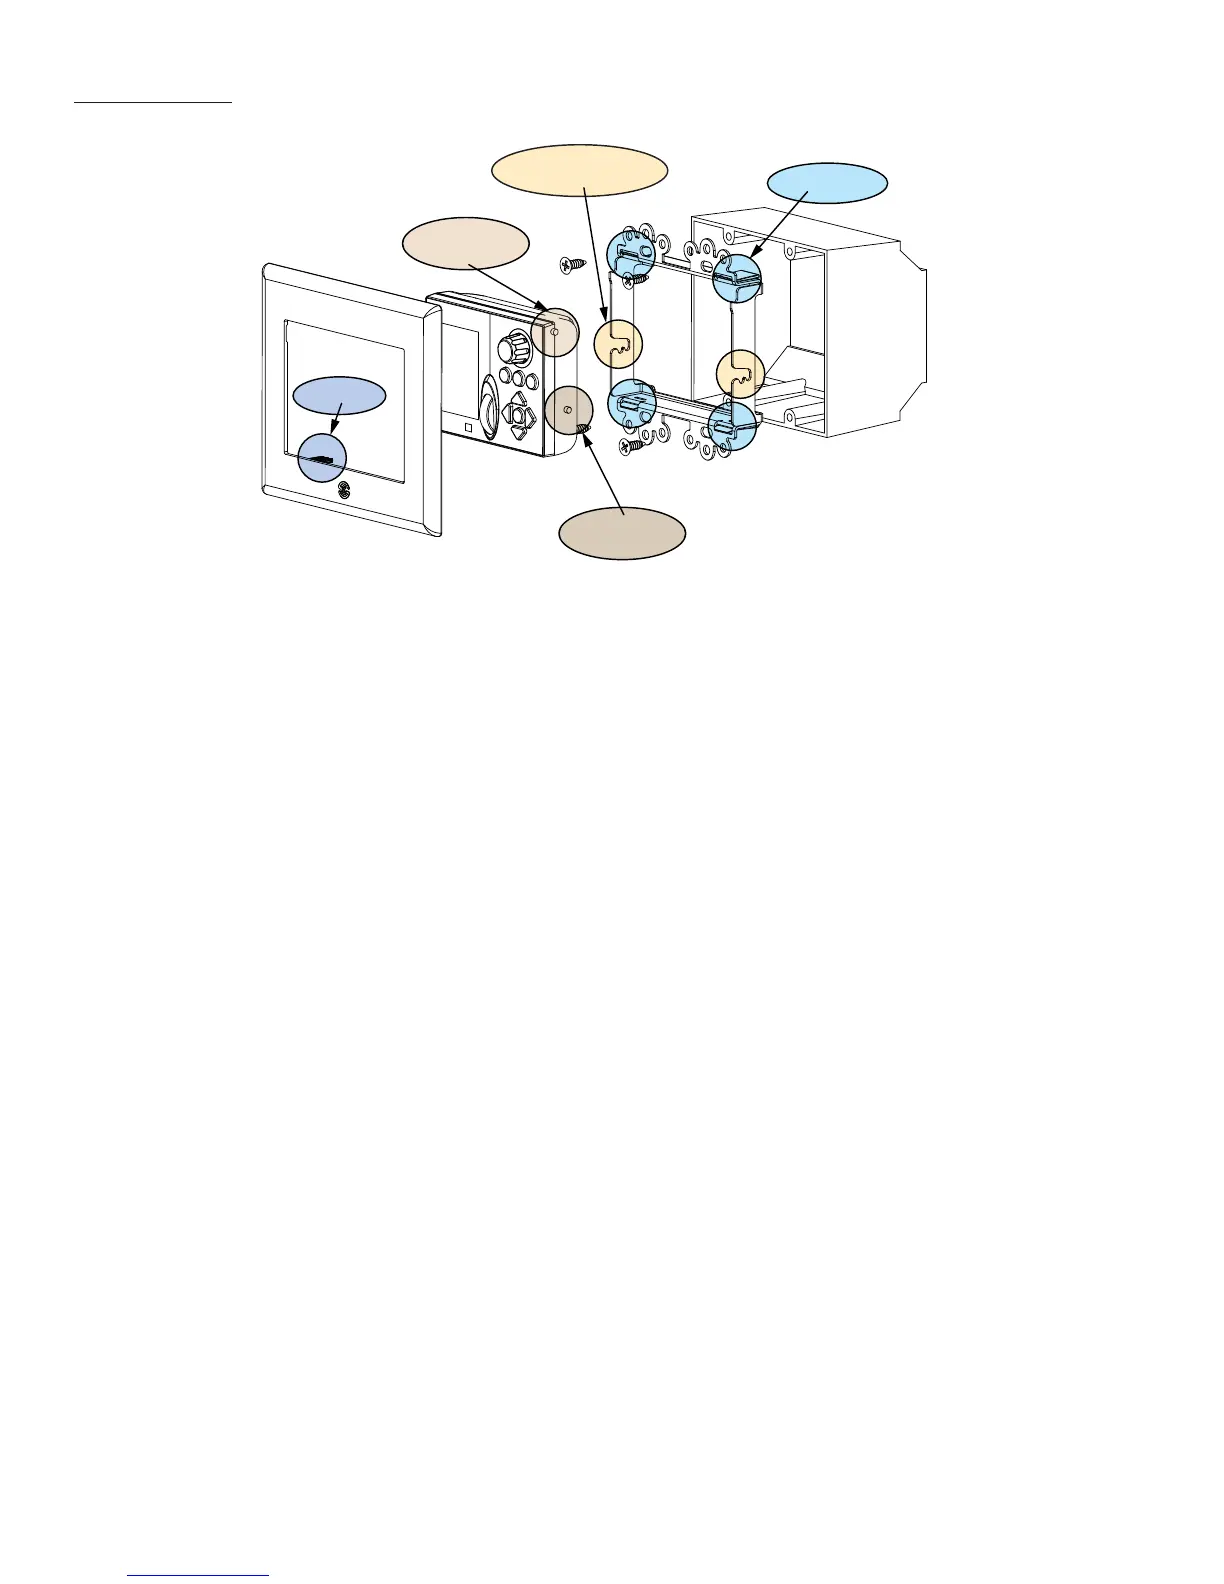
Figure 17
Mounting The MODE 3.1
J-BOX
NOTE: It is highly recommended that the MODE 3.1 Keypad be installed at a height of 56” on center. This provides the best
overall position for optimum LCD viewing angle. This should be discussed with the homeowner prior to installation to avoid
rework, should the homeowner fi nd this undesirable.
New Construction
The MODE 3.1 Keypad should be mounted in a standard 2-gang new construction box whenever possible. The keypad
itself has a thin profi le, but the Bezel Tabs and the Mounting Bracket Bezel Tab Clips require some additional clearance.
Some new construction and many retro-fi t boxes do not provide adequate clearance. Checking the fi t of an as-
sembled keypad, (bezel, keypad and mounting bracket), is recommended prior to installation of the J-boxes to avoid
problems after the wall board has been installed.
Retro-fi t
SpeakerCraft provides a retro Bracket Kit (SpeakerCraft Part Number BKT14331) that is recommended for retro instal-
lations. Although use of retro boxes is not recommended, they can be used in some cases. If using a retro box, it will
probably be necessary to hone out part of the box to provide height and depth clearance for the Mounting Bracket
Bezel Tab Clips and Bezel Tabs. Do not modify the clips or the tabs as this may adversely affect how well the bezel stays
in place.
Mounting Bracket
The MODE 3.1 Keypad cannot be installed without the Mounting Bracket. The keypad is held in place with the Keypad
Locking Tabs and Keypad Angle Tabs. The Bracket should be mounted to a standard 2-gang new construction box as
shown in Figure 10. When installing the Mounting Bracket, be sure the bracket is positioned as shown in Figure 10. The
keypad cannot be mounted if the bracket is upside down. If using a retro box, see section: Retro-fi t, above.
When necessary, and not recommended, the Mounting Bracket can be used without a J-box. When installing a key-
pad without a J-box, be sure to use drywall anchors to provide a more durable and secure mount for the bracket.
MODE 3.1 KEYPAD
Keypad Address
Before installing the MODE 3.1 Keypad, set the Keypad Address Switch. If only one keypad (MODE 3.1, MODE Free or
EZ-Pad) is going to be installed in a zone, then any of the 16 addresses can be used as long as the same address is
confi gured in EZ-Tools for that zone. For simplicity and to help avoid setup errors, if a zone only has one keypad, leave
the address set to ‘0’. If a zone has multiple keypads, set each to a different address and confi gure the zone in EZ-Tools
for the same number and type of keypads and addresses.
 Loading...