24
1. Run a CAT5 cable to the Back Box
location; punch out one of the
knock out tabs to pull the wire
through. NOTE: It is recommended
to run the wire up through the bot-
tom knock out hole; this will give
more room for the RJ45 connec-
tor, and will alleviate any issues of
pinching the wire during installa-
tion.
2. Attach the Wall Dock to the Back
Box with the two mounting screws
provided.
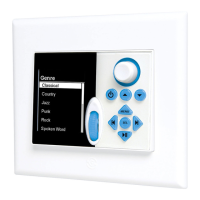
4. Finished Product.
WALL DOCK AND MODE FREE KEYPAD INSTALLATION
INSTALLATION
3. Starting from the left, insert the Wall
Dock Lock Tabs into the Lock Tab
Slots on the left side of the MODE
Free, then click the right side down
over the Locking Mechanism. Press
the Keypad Release Button to re-
move the MODE Free from the Wall
Dock.
Wall Dock Address
Before installing the MODE Free Keypad, set the Wall Dock Address Switch. If only one keypad (MODE 3.1, Wall Dock/MODE
Free or EZ-Pad) is going to be installed in a zone, then any of the 16 addresses can be used as long as the same address is
confi gured in EZ-Tools for the keypad in that zone. For simplicity and to help avoid setup errors, if a zone only has one key-
pad, leave the address set to ‘0’. If a zone has multiple keypads, set each to a different address (0, 1, 2, 3, etc) and confi g-
ure the zone in EZ-Tools for the same number and types of keypads and addresses.
 Loading...