Waukesha Cherry-Burrell Maintenance
10/2012 95-03087 Page 25
NOTE: The bearing will be damaged
during removal and must be replaced
with a new bearing.
5. To install a new bearing, coil the bearing to a size smaller
than the inside diameter of the adapter and insert it into the
proper location.
6. Using your finger, ensure that the bearing is properly seated.
Visually inspect the seating.
7. If necessary, push the actuator stem into the adapter to help
properly seat the bearing.
Outer O-ring Replacement
1. Remove the valve stem assembly from the actuator and slide
the adapter off the outer stem.
2. Slide or cut the outer o-ring (Figure 21, item C) off the
adapter. Do not nick or scratch the o-ring groove.
3. Lubricate the new o-ring with grease and install it.
Tri Ring Seat Replacement
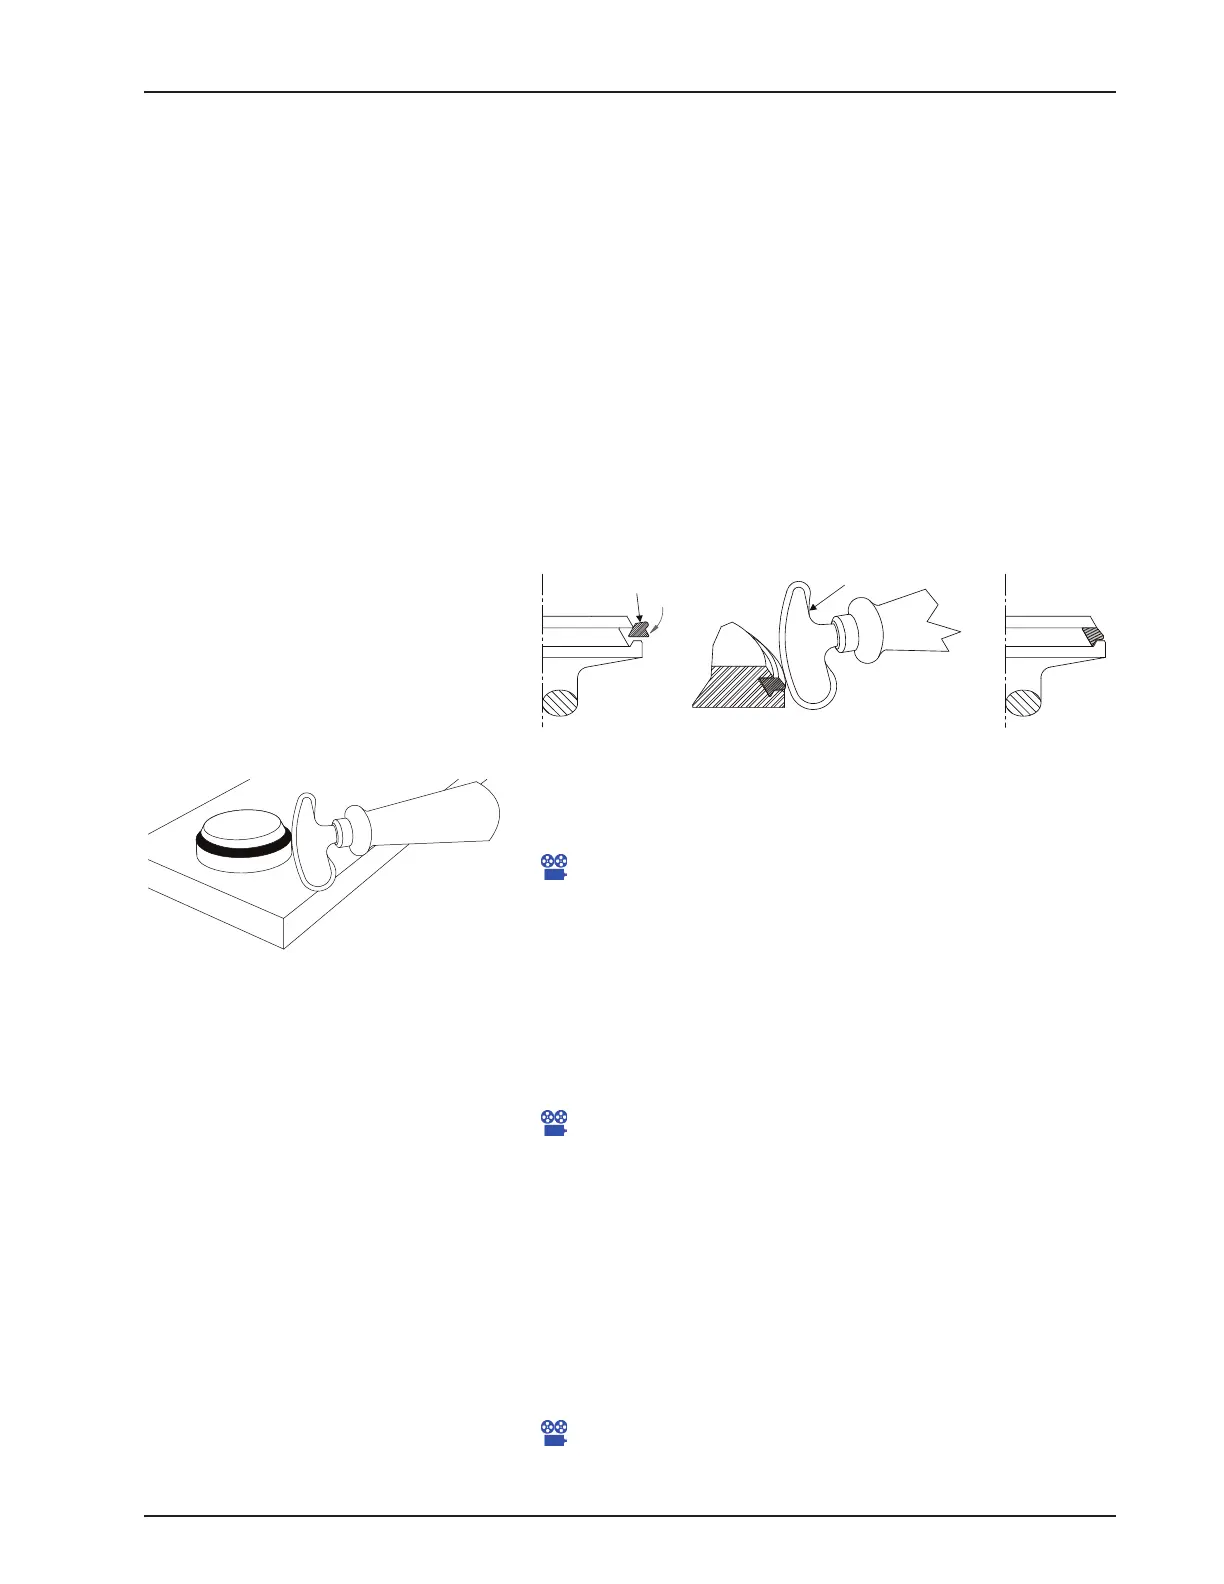
Figure 22 - Installing New Tri Ring Seat
A
1. Remove the Tri Ring seat by carefully cutting or using an o-
ring tool to pull the seat out of the groove. Do not scratch or
nick the metal seating surface.
Maintenance Video 8: Upper stem Tri Ring removal
2. Clean the Tri Ring groove after removing the seat.
3. Lubricate the new Tri Ring (Figure 22, item A) with accept-
able cleansing solution or lubricant.
4. Place the stem through a 1-1/8 inch (30 mm) hole bored
thr
ough a board, secured by a vise.
5. Start the Tri Ring as shown in Figure 22.
Maintenance Video 9: Upper stem Tri Ring replacement
6. Using the installation tool, part number 102797+ (Figure 22,
item B), press the Tri Ring into the plug at locations A, B, C,
and D (Figure 23). If the tool is not used, DO NOT use a knife
or any other sharp item that will tear or cut the Tri Ring.
7. To finish installation, press small sections of the seal, alter-
nating from side to side (A-B-C-D), avoiding large loops of
seal.
8. When properly installed, the Tri Ring seat lip will protrude
slightly from the seat edge as shown in Figure 22.
Maintenance Video 10: Lower stem o-ring and Tri Ring
replacement (W71/W73)
Figure 23 - Pressing Tri Ring Into Plug
B
VA100-208a
C
D
A

 Loading...