11-30 Pretrip inspection and maintenance
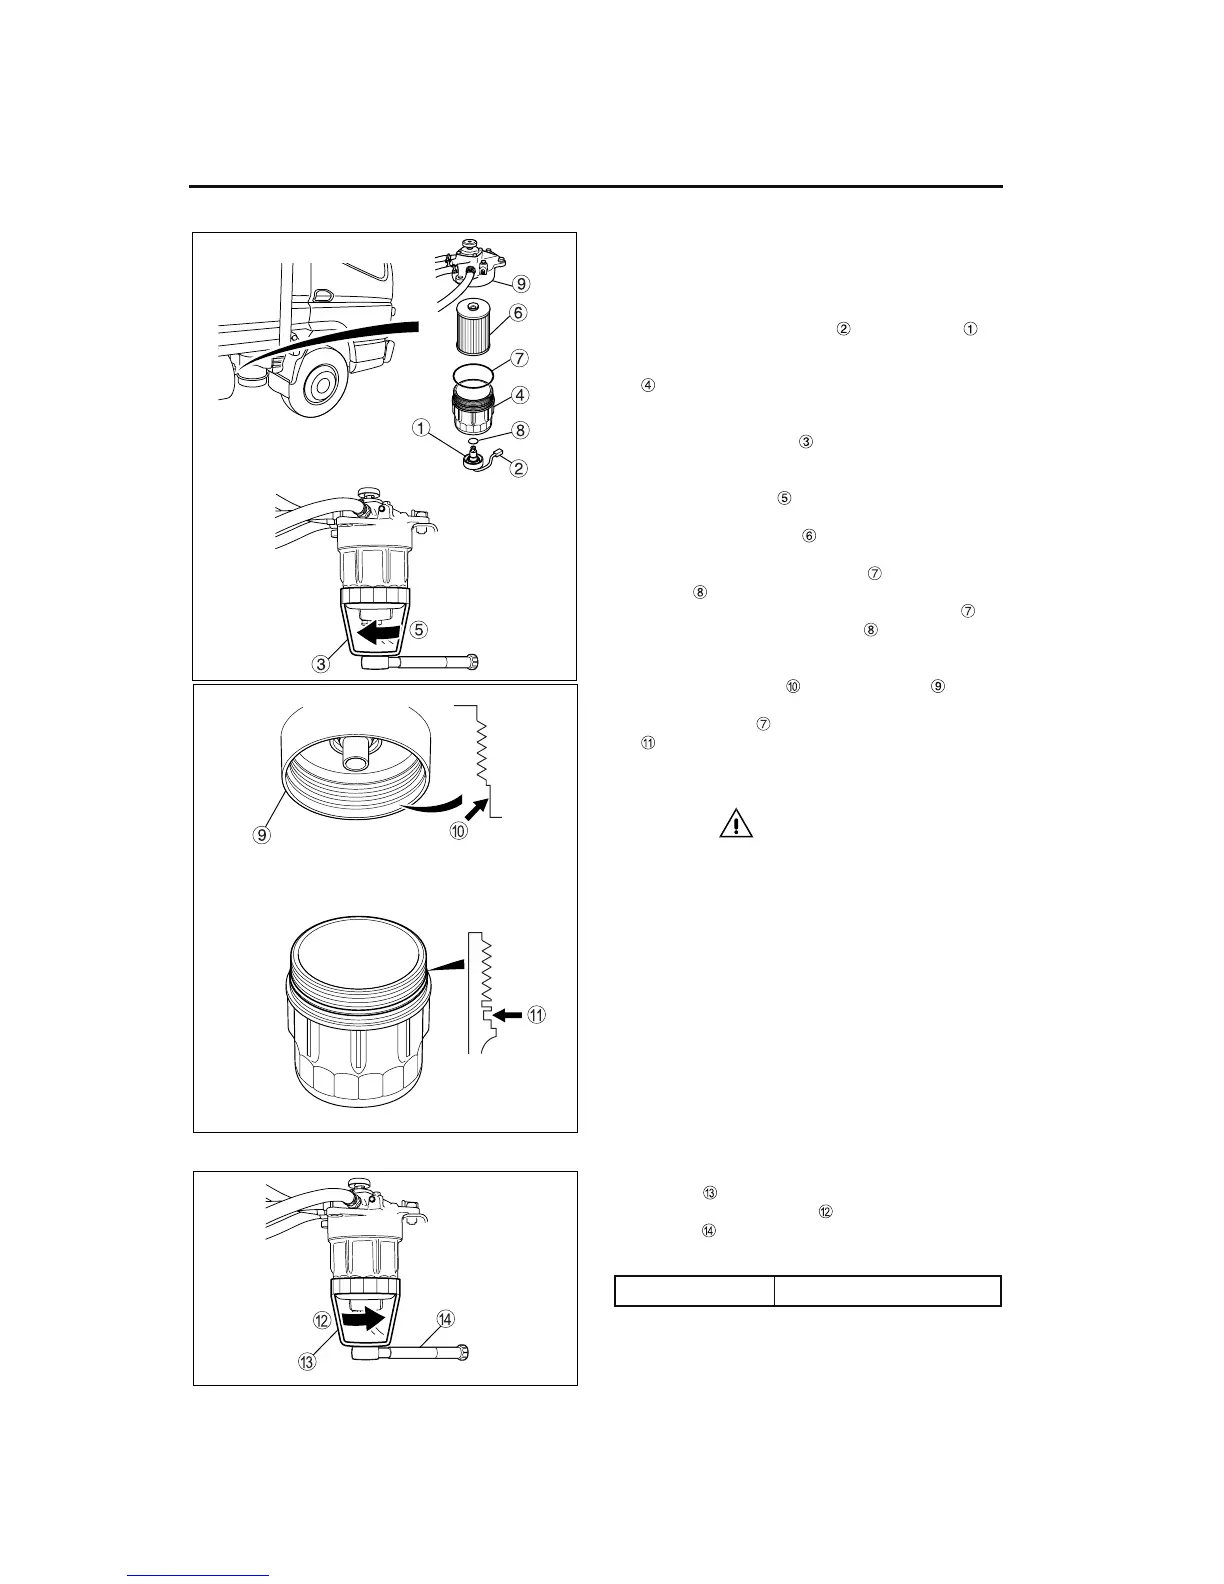
1. Set the parking brake and chock the front tires.
2. Clean the area around the filter to prevent dirt
from entering the new element.
3. Place a suitable container under the fuel filter to
catch any fuel.
4. Disconnect the connector on the sensor .
5. Turn the sensor counterclockwise to loosen it,
and then drain all of the fuel from the filter case
. After the fuel has been drained, turn the sen-
sor clockwise to tighten it.
6. Place the sensor and its harness inside the spe-
cial fuel filter wrench .
7. Remove the filter case using the special fuel fil-
ter wrench. Turn the case clockwise (in the
direction of arrow ). Drain the fuel from the fil-
ter case.
8. Remove the element and the sensor from the
filter case.
9. Replace the filter case O-ring and the sensor
O-ring . Apply a thin coat of engine oil to each
of the new O-rings and install one O-ring on
the filter case and one O-ring on the sensor.
10. Clean the surfaces of the filter head and fil-
ter case where they come in contact with the fil-
ter case O-ring . Make sure that the O-ring slot
in the filter case is clean.
11. Install the element with the open end facing
upward. Use a genuine replacement element.
CAUTION
• Use the O-rings that are supplied with the
new replacement element.
• When installing the filter case, be careful not
to kink the O-ring.
• Do not reuse the filter element.
Reusing the fuel filter element and the fuel filter
O-rings can damage the fuel injection system.
12. Install the filter case using the special fuel filter
wrench . Turn the case counterclockwise (in
the direction of arrow ). Then use a torque
wrench to tighten it to the following range of
values.
Filter case torque 21 to 24 lbf·ft (28 to 32 N·m)
Z12053
Z11924
Z12054