12-16 In an emergency
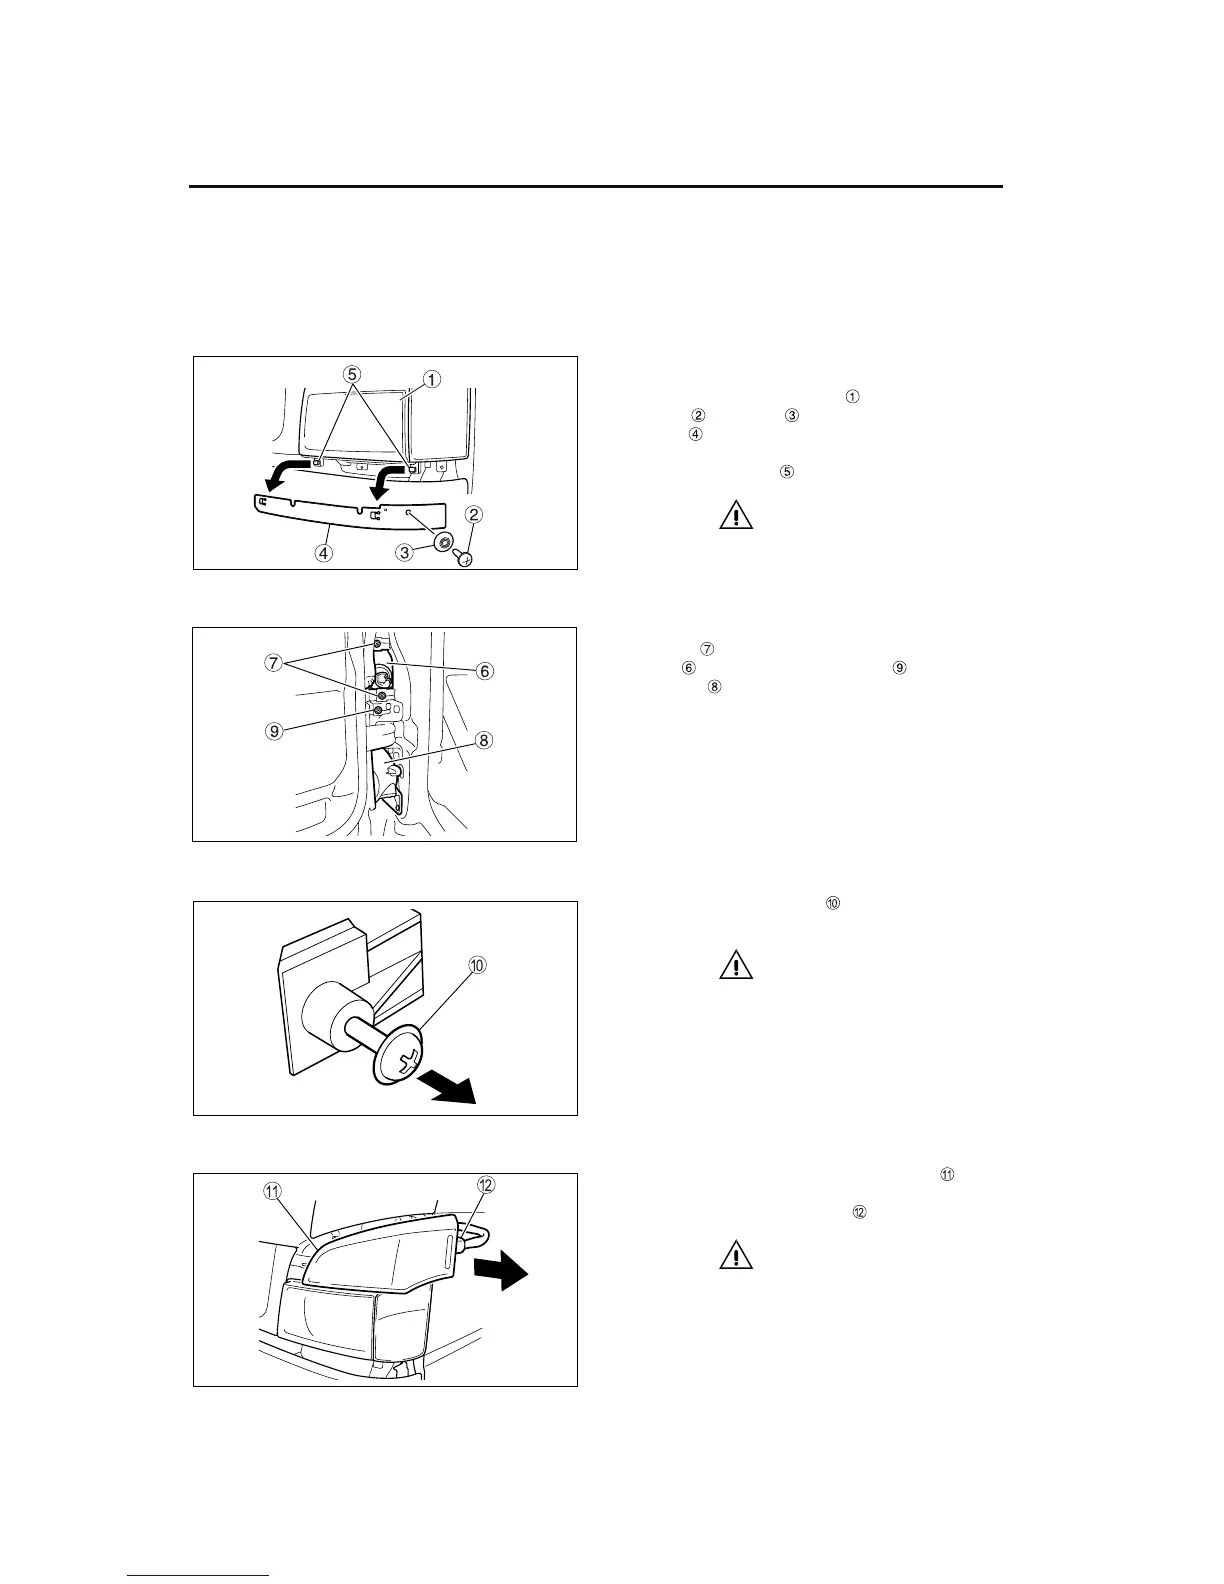
1 Headlight bulb replacement
For safety and simplicity, bulb replacement is per-
formed with the headlight removed. In order to
remove the headlight, the front and side turn signal
lens and the reflector must be removed first.
1.1 Headlight removal and installation
• Remove the headlight.
1. To remove the headlight , first remove the
screw and rivet . Then move the headlight
bezel from underneath the headlight toward
the centerline of the vehicle to release it from
the mounting tabs .
CAUTION
When removing the headlight bezel, do not pull
it with excessive force. The mounting tabs could
break.
2. Open the door, then loosen the two keeper
screws behind the front and side turn signal
lens and the keeper screw behind the
reflector . Continue loosening the screws until
they spin freely.
NOTE:
The keeper screws are designed to remain in the
vehicle. They are not supposed to be removed.
3. Pull each keeper screw toward you until it is
fully extended.
CAUTION
Unless the keeper screw is extended, the front
and side turn signal lens and the reflector will
catch on it and you will not be able to remove
them from the vehicle without damaging them.
4. Close the door.
5. Pull the front and side turn signal lens away
from the vehicle as shown in the illustration.
Then remove the connector .
CAUTION
• When removing the front and side turn sig-
nal lens, do not pull it forward (toward the
front of the vehicle) or its tabs could break.
• Do not open the door with the front and side
turn signal lens moved outward (but not
completely removed). The door could hit the
lens and damage it.
Z11264
Z11265
Z11266
Z11267