FSA 90, FSA 90 R
English
52
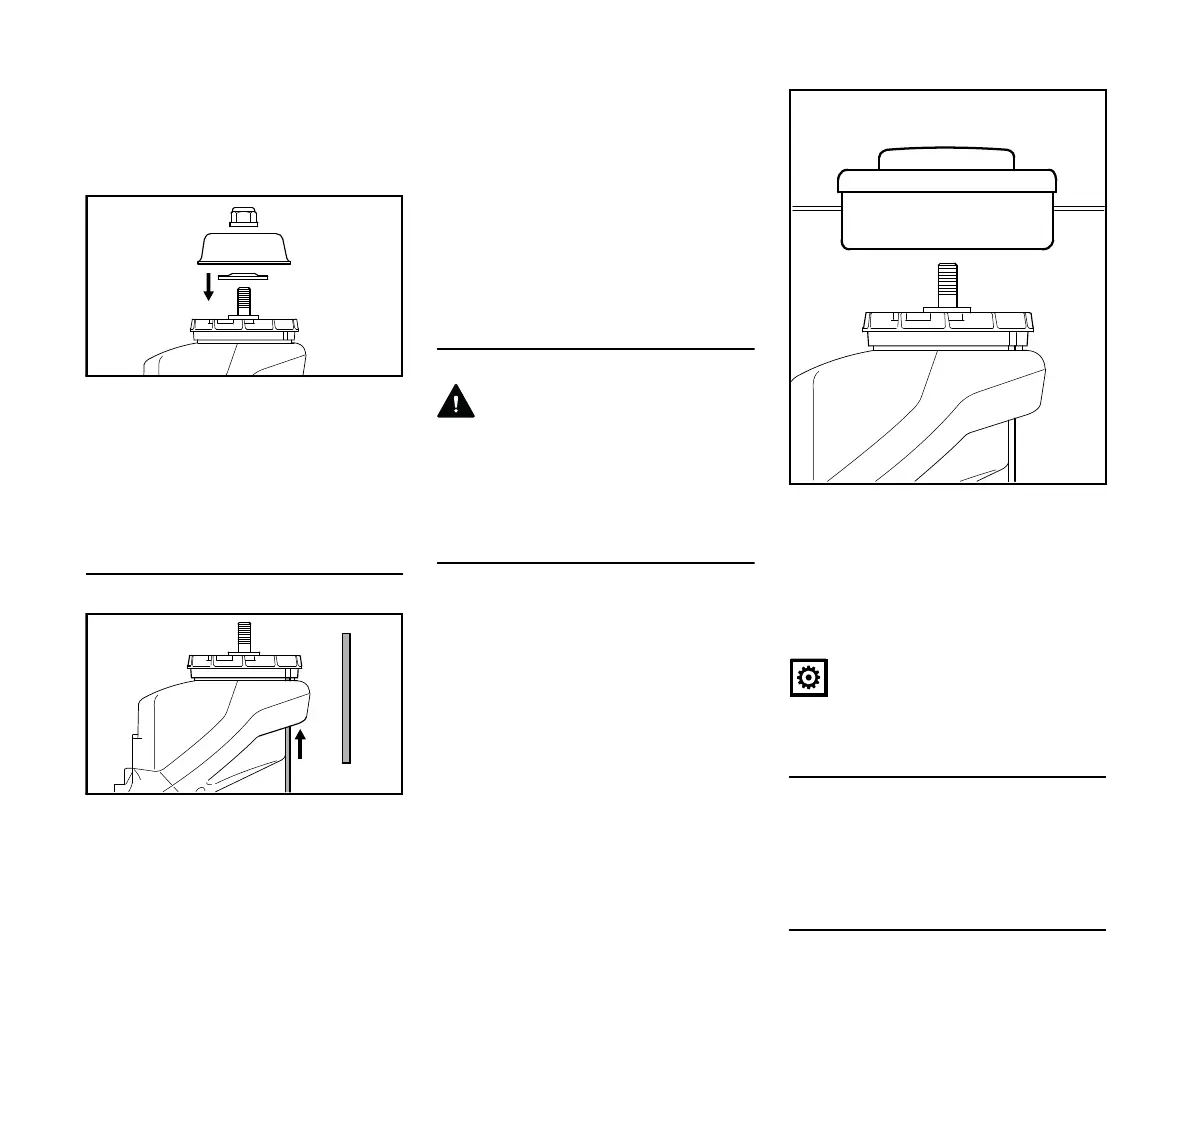
Machine supplied with mounting
hardware
Mowing heads and metal cutting
attachments may be mounted.
Depending on the cutting attachment, it
may be necessary to use the nut (3),
rider plate (4) and thrust washer (5).
These parts are included in a kit
supplied with the machine and are also
available as special accessories.
Blocking the Shaft
The output shaft (2) must be blocked
with the stop pin (6) to mount or remove
cutting attachments. The stop pin is
included with the machine and is
available as a special accessory.
N Push the stop pin (6) into the
hole (7) in the motor housing.
N Rotate the shaft, nut or cutting
attachment to line up the hole in the
fanwheel (1) with the stop pin (6).
N Push the stop pin (6) home until its
end is level with the blades on the
fanwheel (1).
The shaft is now blocked.
Mounting the Cutting Attachment
WARNING
Use a deflector that matches the cutting
attachment – see "Mounting the
Deflector".
Fitting Mowing Head with Screw
Mounting
Keep the instruction leaflet for the
mowing head in a safe place.
N Screw the mowing head
counterclockwise on to the shaft (2)
as far as stop.
N Blocking the shaft
N Tighten down the mowing head
firmly.
NOTICE
Remove the tool used to block the shaft.
Remove the mowing head.
N Block the shaft.
N Unscrew the mowing head
clockwise.
Mounting the Metal Cutting Attachment
Keep the leaflet and packaging of the
metal cutting attachment in a safe place.

 Loading...