26 GS 461
: Slide on oil seal (1) with the
sealing lip facing the crankcase
: Use the press sleeve (2)
1115 893 4600 to install the oil
seal (1)
The seating face must be flat and
free from burrs.
– Install woodruff key
– Crankshaft / flywheel connection
must be degreased and oil-free,
clean if necessary, b 12
– Reassemble remaining parts in
reverse order
5.3.1 Oil seals on clutch side
– Remove clutch, b 4
: Undo screws (1) and remove
flange (2)
– Remove gasket – always use a
new gasket
2411RA037 TG
2
1
2411RA038 TG
2
1
1
: Press out oil seal
: Examine and clean flange (1),
replace if necessary
Avoid damage to the crankshaft
stub.
– Free the oil seal in its seat by
tapping it with a suitable tube or a
punch.
: Apply the puller (1)
5910 890 4400 with jaws (profile
no. 3.1) 0000 893 3706
– Clamp the puller arms
– Pull out the oil seal
2411RA039 TG
1
2411RA040 TG
1
Installation
– Clean the mating surface
– Coat the sealing lips of the new
oil seals with STIHL grease,
b 12
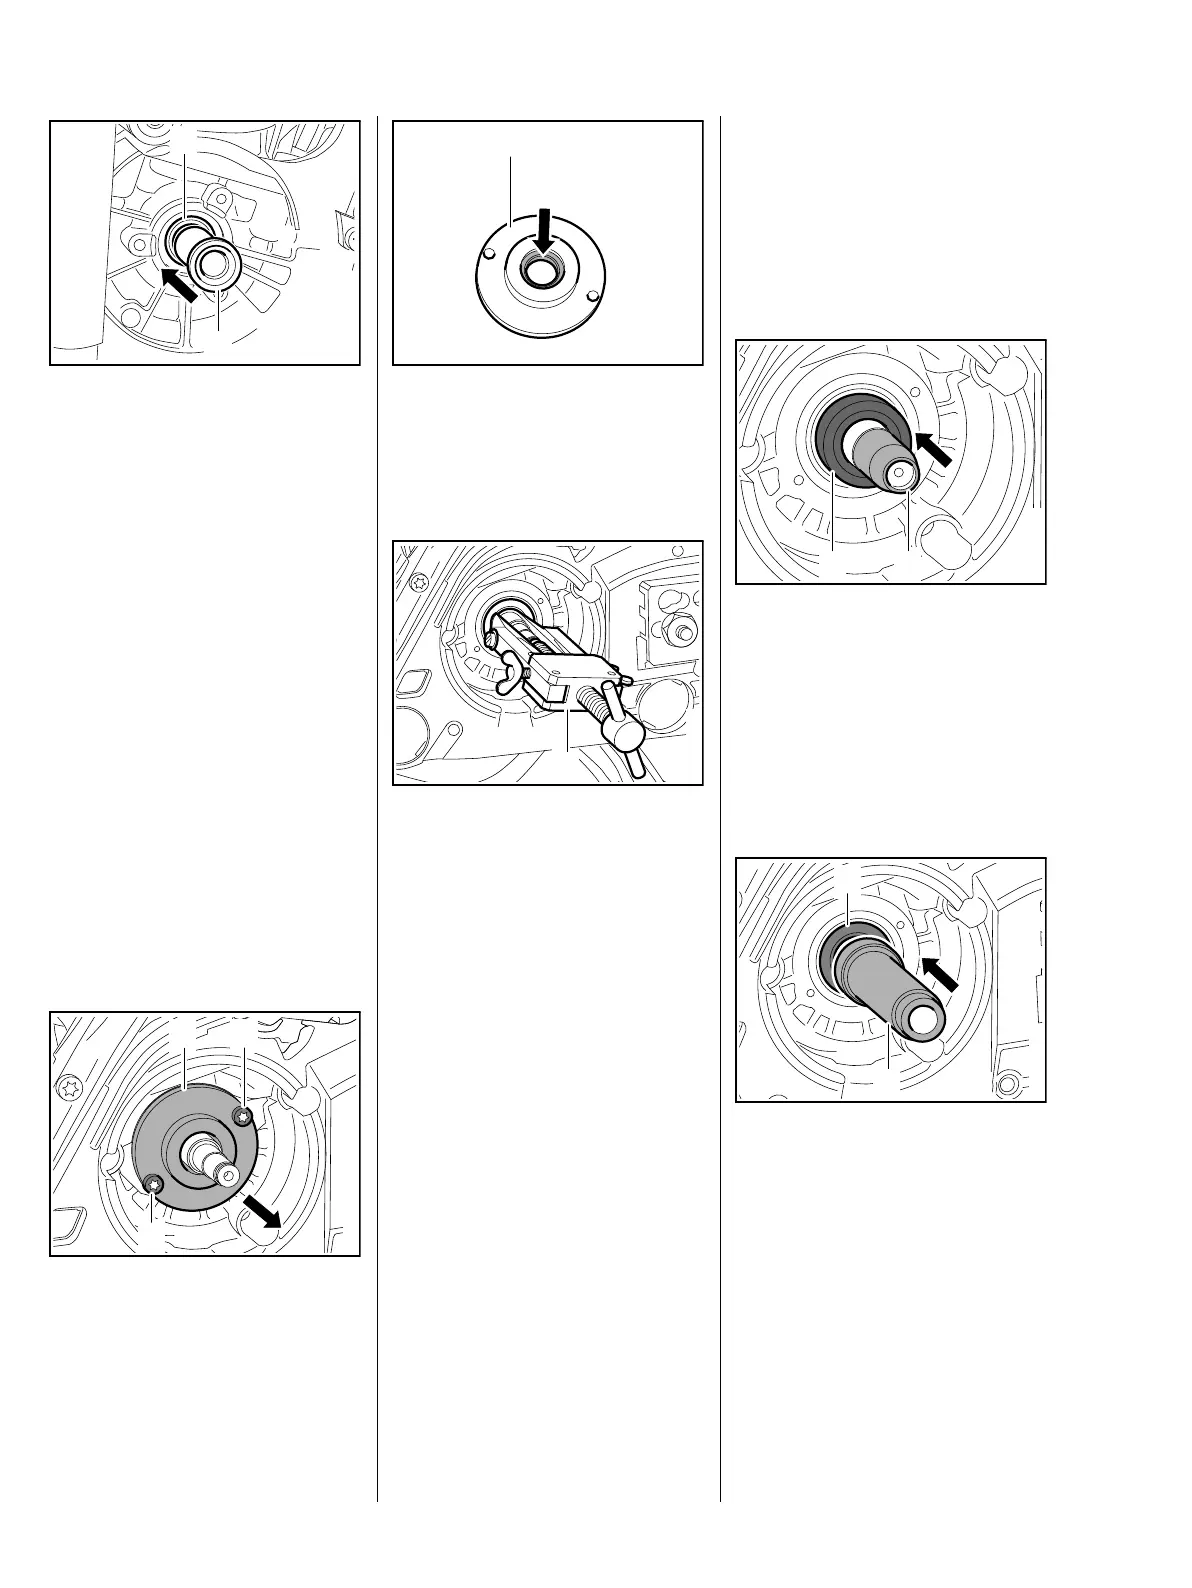
: Fit the assembly sleeve (1)
1118 893 4602
– Slide the oil seal over the
assembly sleeve with the sealing
lip facing the crankcase
: Remove the assembly sleeve (1)
: Use the press sleeve (1)
1118 893 2401 to install the oil
seal (2)
1
2411RA041 TG
2
1
2411RA042 TG
2

 Loading...