24
of a main theater except that channels are always
“large”, they cannot include subwoofer channels,
and they are limited to mono or stereo. In order
to control a zone, it must be included in the preset
that is currently selected in the remote control. See
“Presets” on page 29 for more details.
Dirac Live
Dirac Live is a highly advanced calibration tool
which uses sophisticated mixed-phase lters to
compensate for loudspeaker and room deciencies
in order to provide optimal acoustic performance
of your theater. The Dirac Live 2.x license is free
of charge and available on Dirac Website aer
registering on Dirac Live website (https://live.
dirac.com/register/) and calibration kit are usually
purchased by the installer through their dealer.
All Theaters, zones, and child theaters can be
calibrated with Dirac Live. Presuming you have a
calibration kit, prepare your ISP for calibration by
following the steps below.
1. Dene Speakers
For each theater or zone (except Headphones
and Downmix) you will calibrate using Dirac
Live, ensure that you have correctly dened
each speaker’s Size/Filter, Frequency and
Slope, multi-way speaker denitions and other
Bass Mangement parameters. (“Individual
Channel Adjustments” on page 17)
2. Download and install Dirac Live 2.x
Calibration Tool Soware
You can download a Mac or PC version of the
soware at https://live.dirac.com/my-account-
download/ or on the StormAudio Client Portal
(www.stormaudio.com).
Install the soware on the laptop you will use
to calibrate the ISP. Use the Dirac account
credentials as login in the tool.
3. Prepare Calibration Hardware
Although we recommend using the kit
we provide which includes the UMIK-1
USB microphone, other hardware may be
compatible with the Dirac Live Calibration Tool.
This guide will only cover our hardware.
Connect the UMIK-1 to your laptop. Note the
serial number on the microphone. Navigate to
https://www.minidsp.com/products/acoustic-
measurement/umik-1. Enter the serial number
to obtain your unique calibration les.
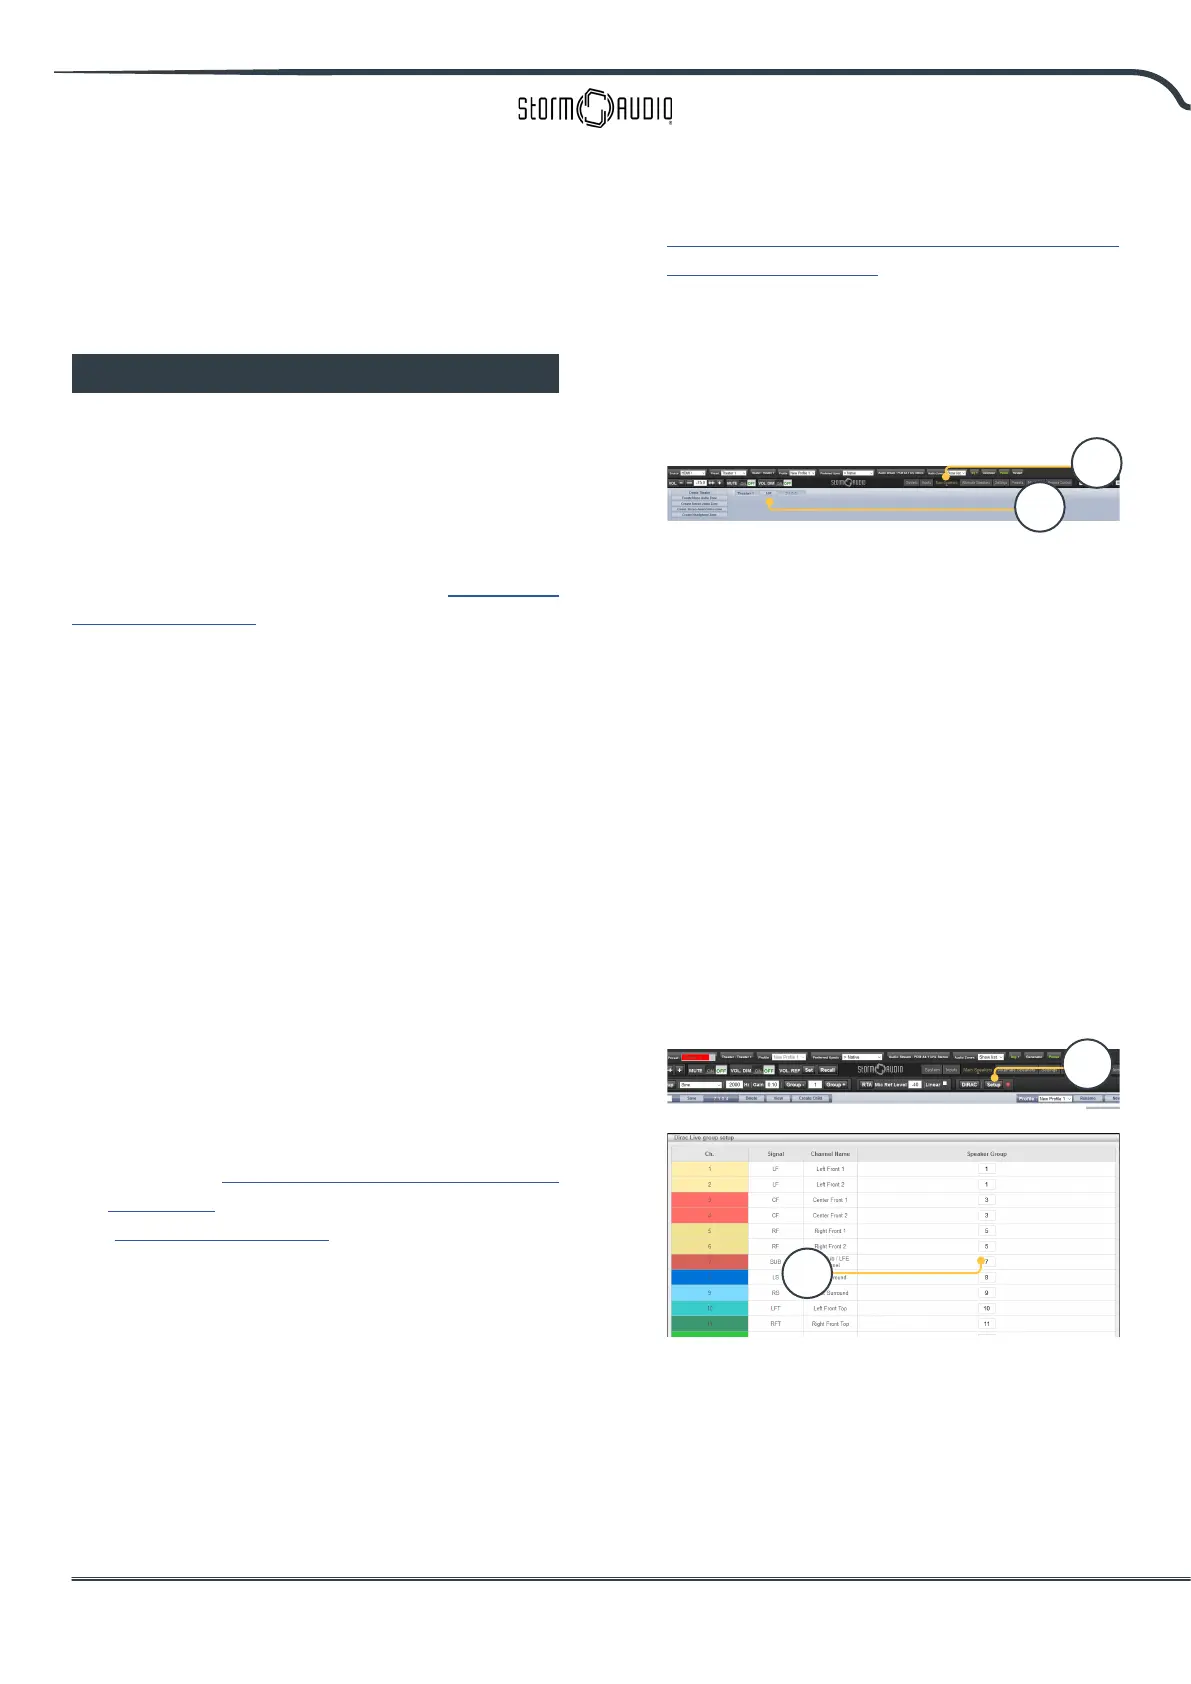
4. Choose Theater or Zone to Calibrate
From the Main Speakers (A) menu in the ISP
web UI, EDIT (B) the theater or zone you wish
to calibrate.
5. Select Base Prole
Select the prole which will serve as the
basis for your Dirac Live calibration from the
dropdown menu.
6. Setup Dirac Groups
It is recommended that if your theater includes
multiple subwoofers, manually correct levels,
EQ, and delay for each. Then, group all the
subwoofer channels together for the purposes
of Dirac Live calibration. Also, manually build
any crossover and EQ settings for active
loudspeakers. Group separate elements of a
single active loudspeaker together e.g. Low,
Mid, and High components of the LEFT FRONT
should be in a single generator group. Click the
SETUP button (C) beside the Dirac button.
Channels that should play together during
calibration should share a group number (D).
A
B
C
D