ISP Immersive Sound Processor
27
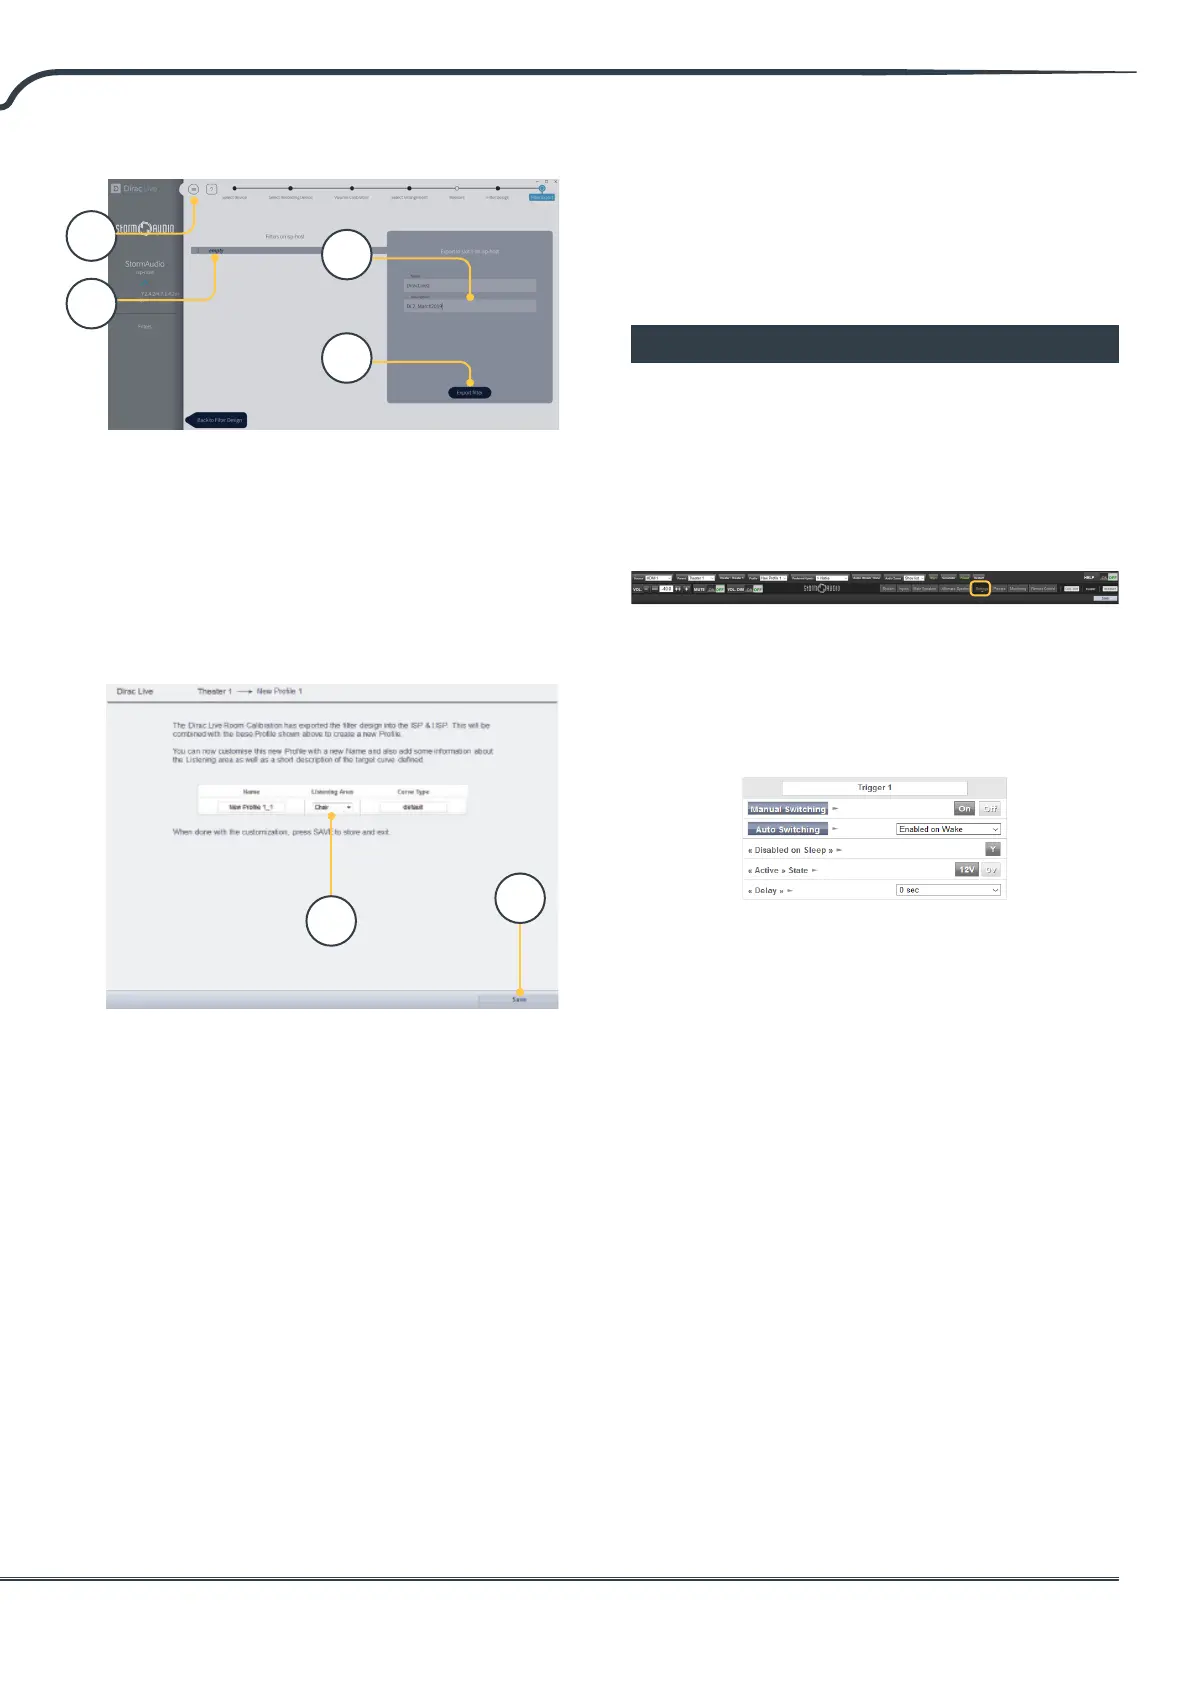
Select the “empty” slot 1 (A), give a name and a
description to your new Dirac prole (B). Save
your project for future use (C) before selecting
Export lter (D) and return to the ISP Web UI.
15. Return to ISP web UI
A popup has been updated to conrm
that you wish to combine the Dirac
Live corrections with the base prole.
The Name and Description Target curve can
be changed. We also recommend to select the
correct listening area that you used to make
the Dirac Live corrections (A). Click save (B)
to continue. For corrections made to a zone,
options are not available. Simply click save.
Note that each time you go through the Dirac Live
process, the former lter design gets replaced. Each
time the calibration is run, a new prole is created
with the new Dirac Live correction.
16. Return to Speakers Page
Now that you are back at the page where
individual speakers can be edited, you will
notice the new Dirac reference prole you
named in the previous step is selected. New
columns created indicate the calculated Dirac
Delay and Dirac Level. No changes can be
made to this reference prole. Should you wish
to make changes, duplicate the prole, make
desired changes to the duplicate, save changes
to the prole and the theater. See “Proles” on
page 15.
Settings Menu
The ISP includes a variety of system wise settings
that are set in this menu that govern behavior of
the unit. Ensure these are set as required for easy
operation of the ISP and any attached devices.
These are only accessible to those with Installer
level access or Expert User if assigned by the
Installer.
Triggers
The ISP has 4 independent DC voltage triggers
which can be congured to modulate the power/
standby status of connected equipment such as
projectors, source components, or ampliers.
You may keep the default name for each trigger, or
rename them to something more descriptive. Each
trigger has the following options available:
• Manual Switching: Turn on to enable a button on
the remote control interfaces that allows a user to
toggle the trigger manually.
• Auto Switching: Enabled on Wake activates the
trigger when the ISP is powered on from standby.
It will not automatically deactivate the trigger when
the ISP is placed into standby. Enabled on Input
makes the trigger available in the Input Menu. When
set to Y for an input, the trigger activates when that
input is selected from a remote interface. See “9.
Triggers” on page 13. Enabled on Preset makes
the trigger available in the Preset menu. When a
preset is selected in which a trigger is marked Y,
the trigger is activated. Note that Auto Switching
trigger behavior will override any Manual Switching
behavior.
• Disabled on Sleep: Select Y if the trigger should
deactivate when the ISP is placed into standby.
• Active State: Select whether the active state for the
trigger is 12V or 0V.
B
A
A
D
B
C