US-10
DE
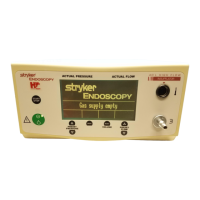
Adjustment
Use the adjustment screw 1 of the high-pressure
controller for any adjustments.
2-4 Testing the Low Pressure Regulator LPR
1. Open the gas supply line.
2. In the service menu, open the LPR Adjust menu option and
check the settings. (Adjust with adjustment screw, Fig. 2-4-1)
Fig. 2-4-1: F105 Low Pressure Controller Settings
2-5 Low Pressure Safety Valve LSV
Close device exit using a tube clamp (Fig. 2-6-1 , 4).
In the service menu, open the LSV Adjust menu option and
check the settings.
Adjustment
Use the adjustment screw of the low-pressure safety valve for
a slight adjustments.
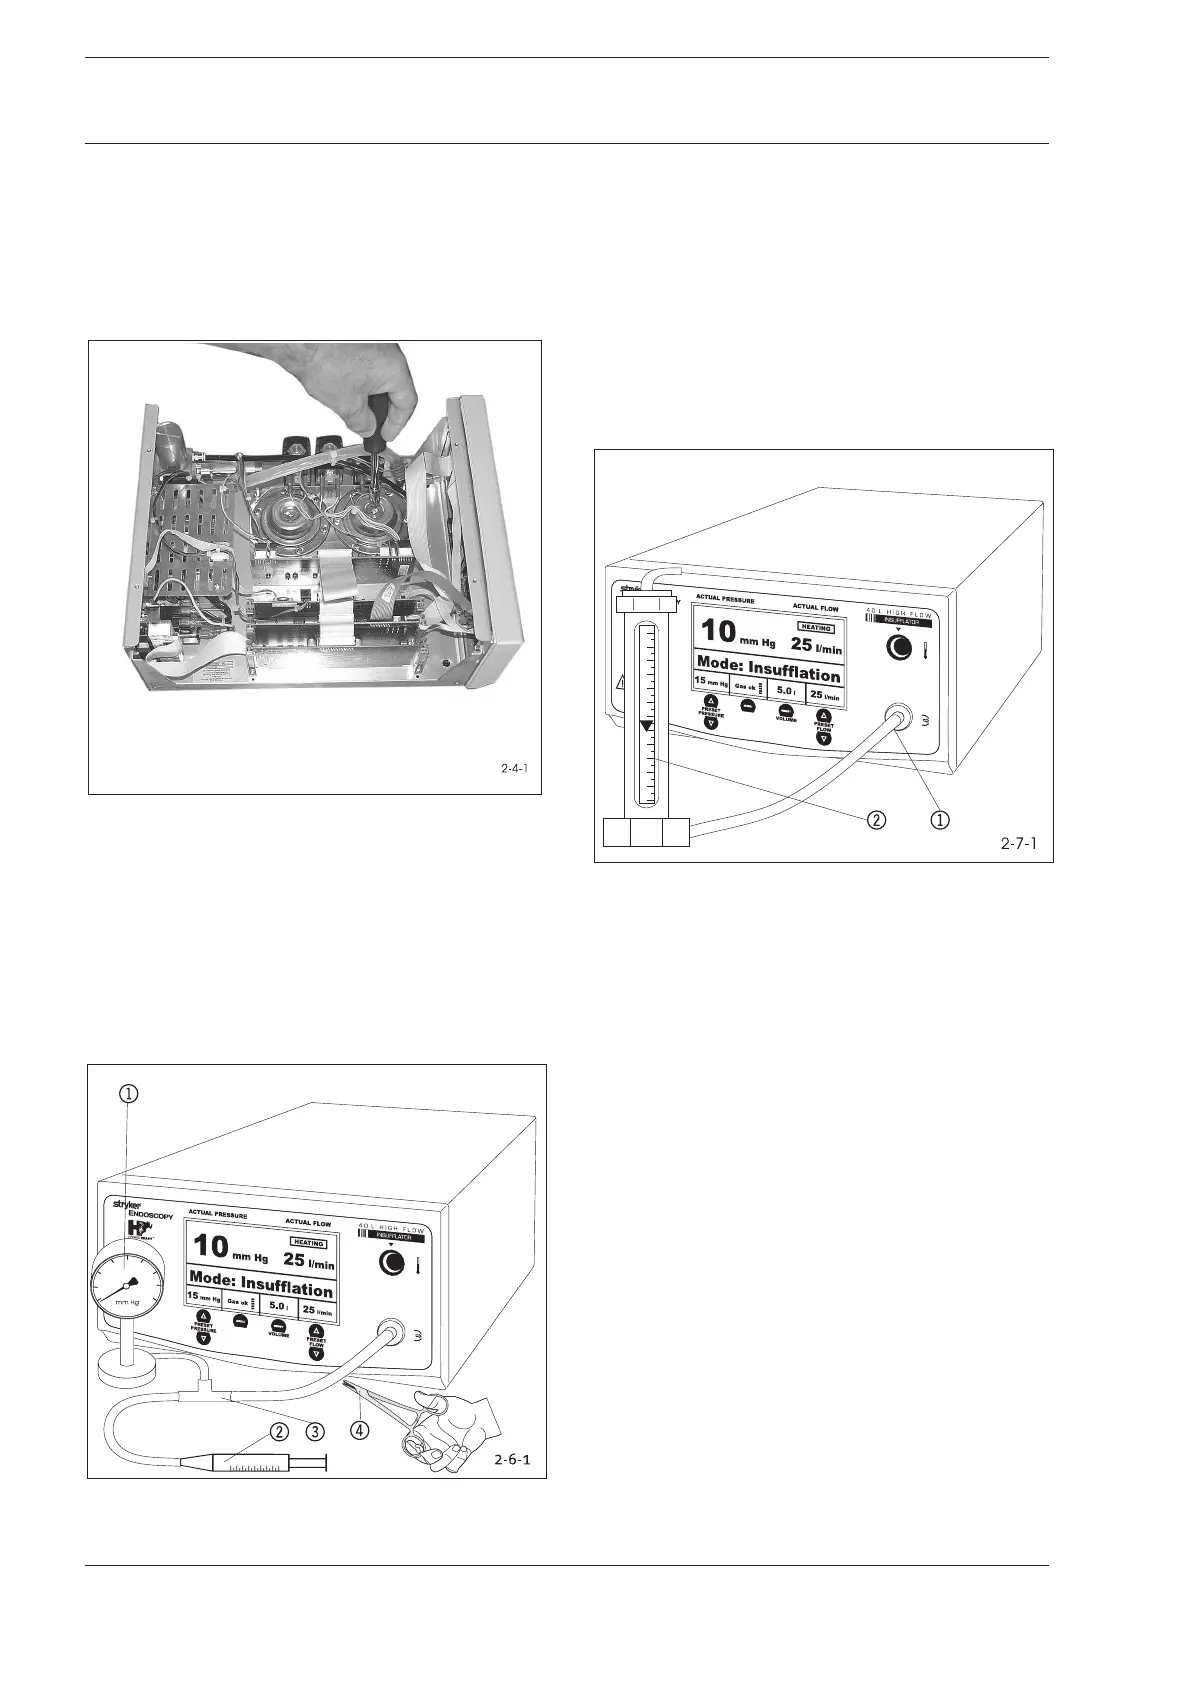
2-6 Testing Low Pressure Unit for Leaks
Fig. 2-6-1: Test Layout: Low Pressure Unit Leakage Test
1 Manometer (0-70 mm Hg)
2 Syringe
3 T-Connector
1. Attach manometer 1, air-filled syringe 2, tube, and T-
connector 3to the insufflation tube connection.
2 Use the syringe to generate a pressure of at least 50 mm
Hg. Clamp tube at 50 mm Hg.
3. Wait 30 seconds. Pressure at manometer may not have
dropped more than max. 2 mm Hg.
Adjustment
Check fluid sensor and low-pressure unit tube(and replace
if necessary).
2-7 Testing Flow Volume
Fig. 2-7-1: Test Layout: Flow Volume
1 Tube Connection
2 Flow Column (40 l/min)
1. Attach a tube and a flow column to insufflation tube
connection (Fig. 2-6-1).
2. Turn on device.
3. Set a nominal pressure of 15 mm Hg.
4. Press the Start/Stop key.
5. Check flow volume of device in gas flow levels 2 and 3. The
value of the nominal flow indicator may not exceed a
tolerance of ±2,0 l/min.
The flow column value is not to be considered until after
gas flow fluctuations have stabilized.
6. Press the Start/Stop key to end test.
7. Remove all measuring tools and resources.
Adjustment
Service menu option Flow Calibration.
2 Function Test
2 Function Test