US-27
4-4 Power Pack
Replace power pack if malfunctioning and in case of repeated
safety defect.
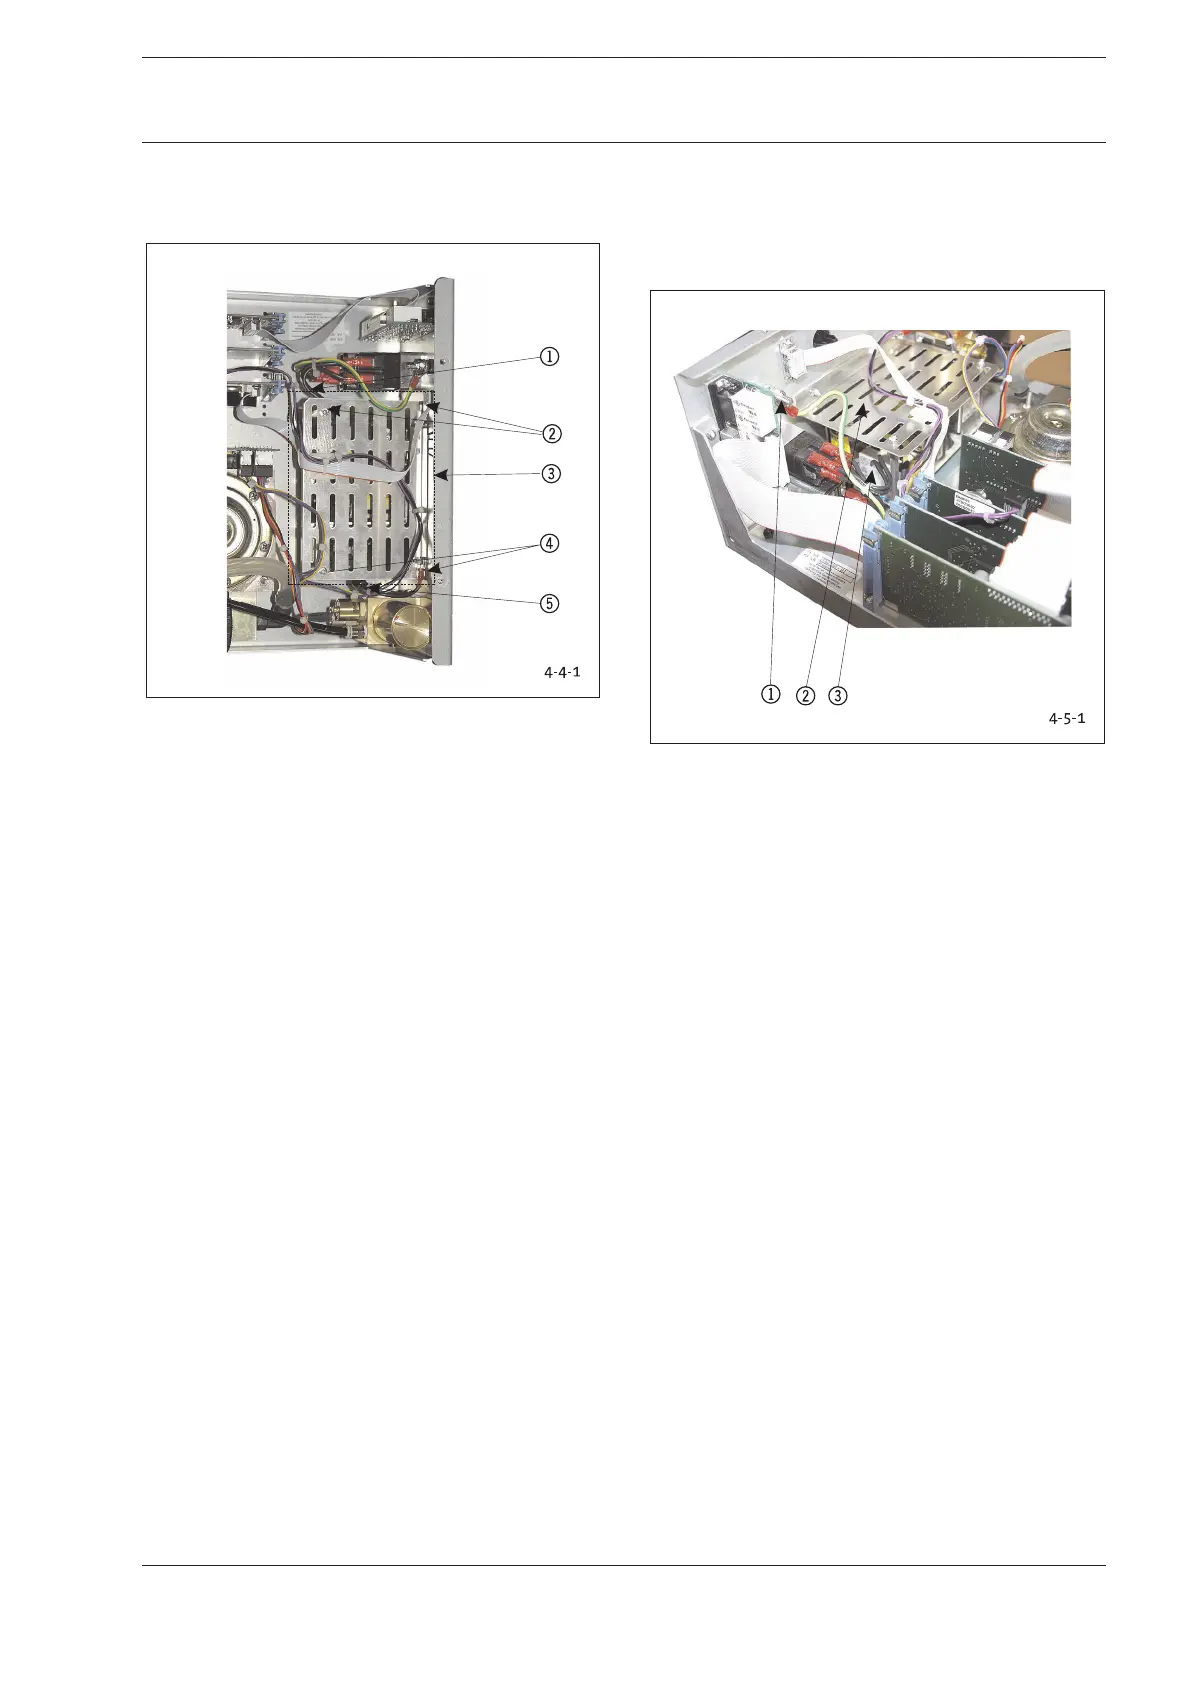
Fig. 4-4-1: Position Power Pack
1 Voltage Input Cable/Plug-in Connection
2 Fastening Nuts/Tooth Lock Washers for Cover
3 Entire Power Pack
4 Fastening Nuts/Tooth Lock Washers for Cover
5 Voltage Output Cable/Plug-in Connection
1. Remove the electrical plug-in connectors 15.
2. Use SW 5.5 adjustable wrench to Unscrew four fastening
nuts 24 on cover and remove cover.
3. Unscrew two bolt screws on front of power pack board and
two nuts in rear and lift power pack from case.
Reverse instructions to install elements.
Conduct the following tests after replacing modules or
components:
1. Use a multimeter to check voltage at input and output of
power pack.
2. Switch on device and perform function check.
3. Safety test according to Chapter 2-1.
4-5 Non-Heating Device Plug
Replace non-heating device plug if malfunctioning and in case
of defects.
The non-heating plug is available as a complete kit including
screws, cables with plugs, and fuse holder with fuse.
Fig. 4-5-1: Position Non-Heating Device Plug
1 Bolt Screw for Mass Connection/Potential Equalization
Line
2 Power Pack
3 Power Pack Connector Plug
1. (Fig. 4-5-1) Unscrew PE connection 1.
2. Remove plug-in connector at cable of non-heating device
plug of power pack 2 by pulling towards top.
3. (Fig. 4-5-2) Unscrew two fastening screws 1at rear plate
and remove non-heating device plug by pulling towards
rear.
4. Reverse instructions to install elements.
4 Replacing Components 4 Replacing Components