US-31
4-12 Front Panel
Replace front panel or operating key if either are damaged or a
front panel malfunction occurs.
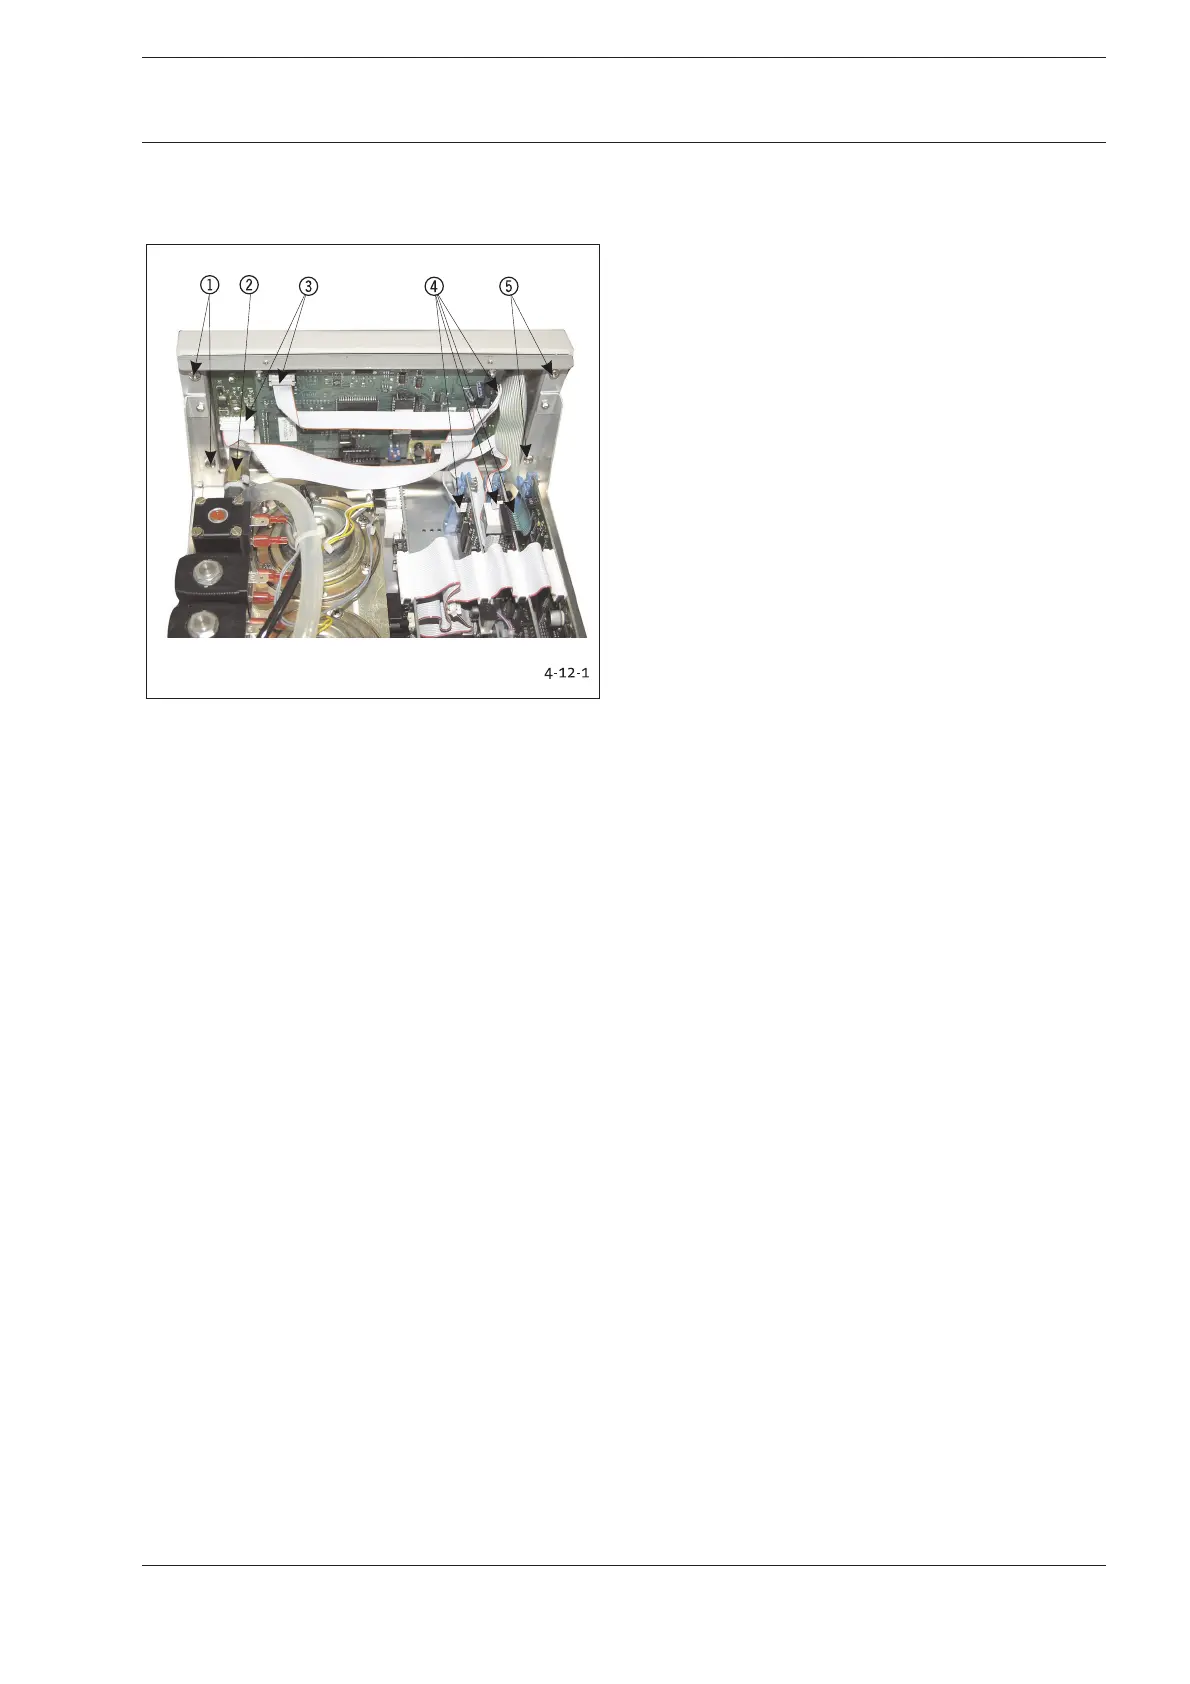
Fig. 4-12-1: Fastening Front Panel
1 Mounting Screws
2 Insufflation Tube Connection
3 Plug-in Connection
4 Plug-in Connection
5 Mounting Screws
1. Remove the electrical plug-in connectors 34.
2. Unscrew 2 cross-recessed screws 15 on the left and
right.
3. Remove tube connection to the insufflation tube connector.
4. Carefully remove front panel by pulling towards front.
5. Detach elements attached to the inside of the front panel.
Reverse instructions to install elements.
Conduct the following tests after replacing modules or
components:
1. Function test of replaced components.
2. Safety test according to Chapter 2-1.
4 Replacing Components