FFiigguurree 1166 –– DDrraaggeerr®® iinnccuubbaattoorr
FFiigguurree 1177 –– UUnnlloocckkeedd ppoossiittiioonn
FFiigguurree 1188 –– LLoocckkeedd ppoossiittiioonn
IInnssttaalllliinngg tthhee AAiirrbboorrnnee iinnffaanntt ttrraannssppoorrtt iinnccuubbaattoorr aaddaappttoorr iinn tthhee ssttaacckkaabbllee
ccoonnffiigguurraattiioonn
WWAARRNNIINNGG
• Do not install these incubator adaptors on any other Stryker cot or on any cot from another manufacturer. These
incubator adaptors are for use only on the PPoowweerr--PPRROO IT cot.
• Always make sure that the incubator adaptor is properly installed on the cot and the incubator is securely fastened to the
incubator adaptor before use.
Before you install an incubator adaptor on the PPoowweerr--PPRROO IT cot, read and understand this manual and the manual that
was supplied with the incubator adaptor.
To install the incubator adaptor:
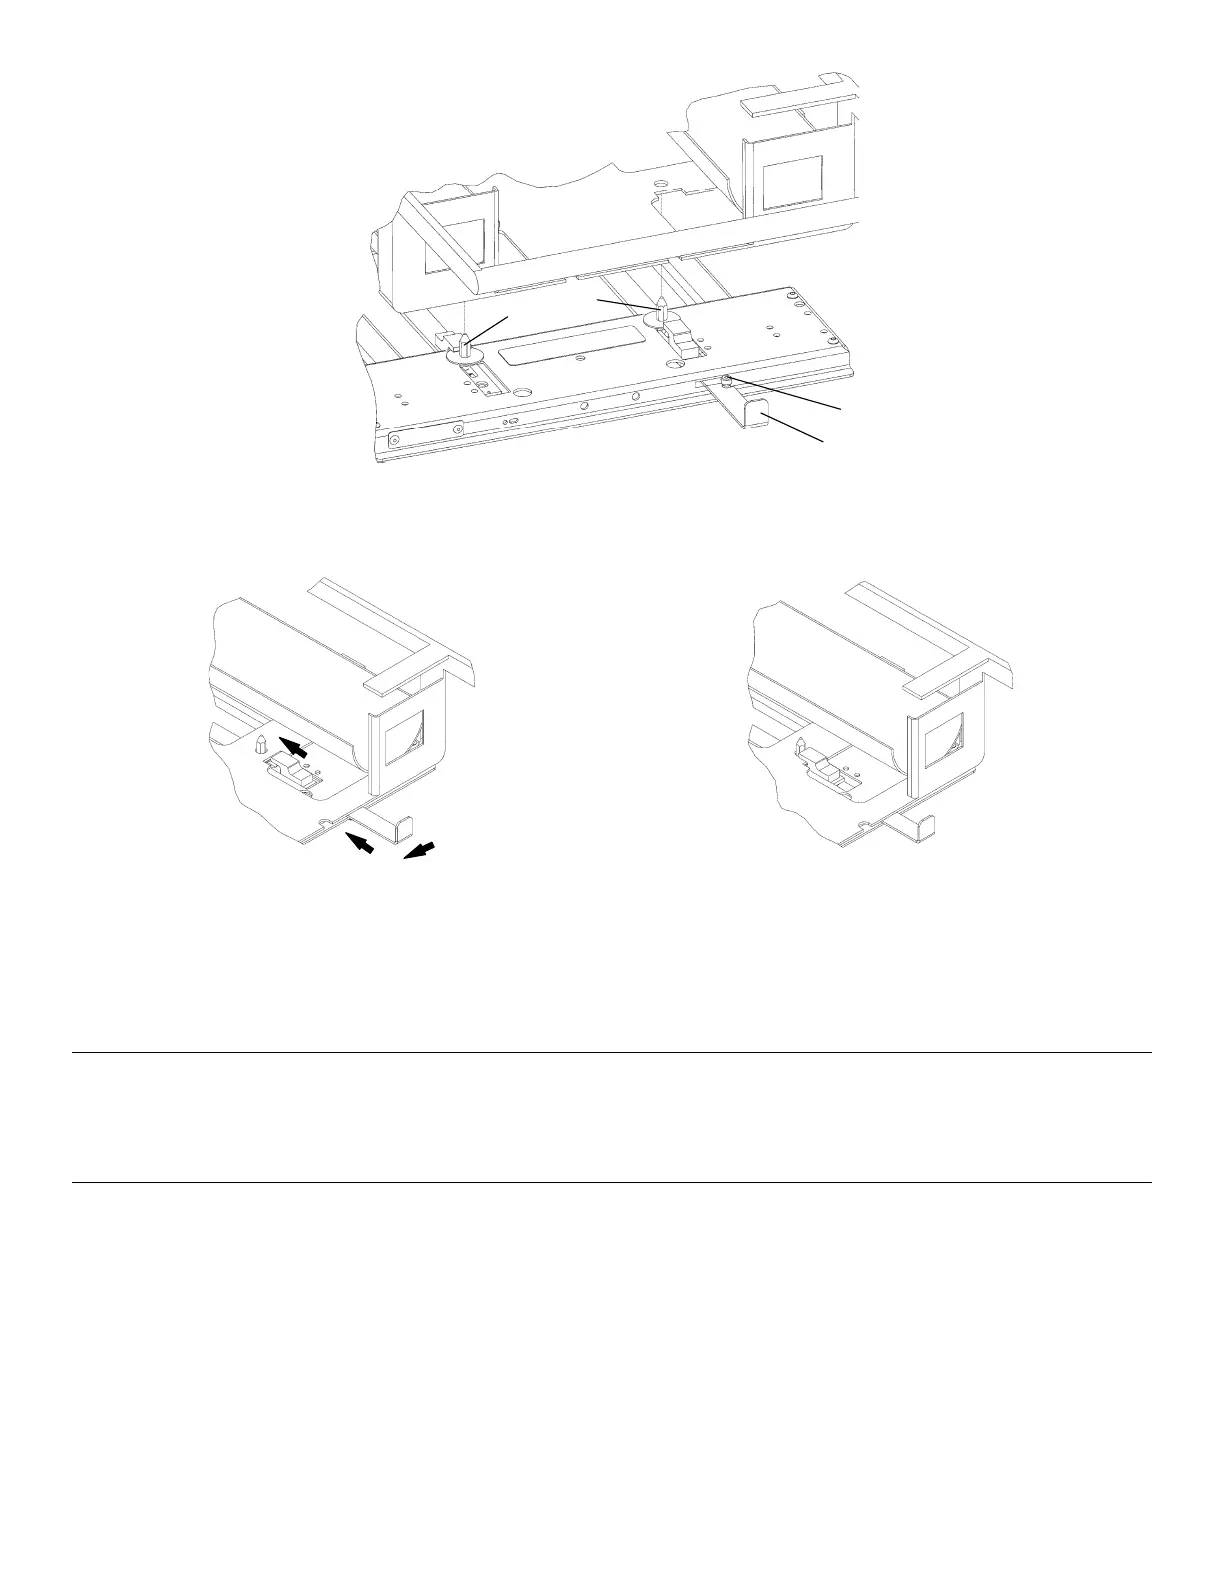
1. Using a 1/2" socket and ratchet, remove the four 5/16" hex nuts and washers (A) from the mounting studs (B) on the
incubator adaptor (Figure 41). Save the nuts and washers.
2. Locate the mounting holes in the bottom of the oxygen bottle module (C).
3. Install the oxygen bottle holder on the incubator adaptor mounting studs (B) with the bottle openings facing toward the
retractable head section. Place all four mounting studs into the mounting holes of the oxygen bottle holder.
6516-209-001 Rev D.0 35 EN