4. Using a 1/2" socket and ratchet, install the four 5/16" hex nuts and washers (A) that you removed in step 1. Tighten all
four nuts.
FFiigguurree 1199 –– AAiirrbboorrnnee™™ ssttaacckkaabbllee
IInnssttaalllliinngg tthhee nnoo aaddaappttoorr ooppttiioonn aaiirrsslleedd ttrraannssppoorrtt iinnccuubbaattoorr wwiitthh aa sslleedd rreecceeppttaaccllee
The no adaptor option airsled secures incubators without an adaptor to the PPoowweerr--PPRROO IT cot.
WWAARRNNIINNGG
• Do not install the sled receptacle on any other Stryker cot or on any cot from another manufacturer. These sled
receptacles are for use only on the PPoowweerr--PPRROO IT cot.
• Stryker is not responsible for specification or option changes to airsled compatible incubators.
Before you install a sled receptacle (6516-142-000) on the PPoowweerr--PPRROO IT cot, read and understand this manual and the
manual that was supplied with the sled receptacle. These instructions explain how to install the airsled with the
manufacturer’s supplied sled receptacle (not included).
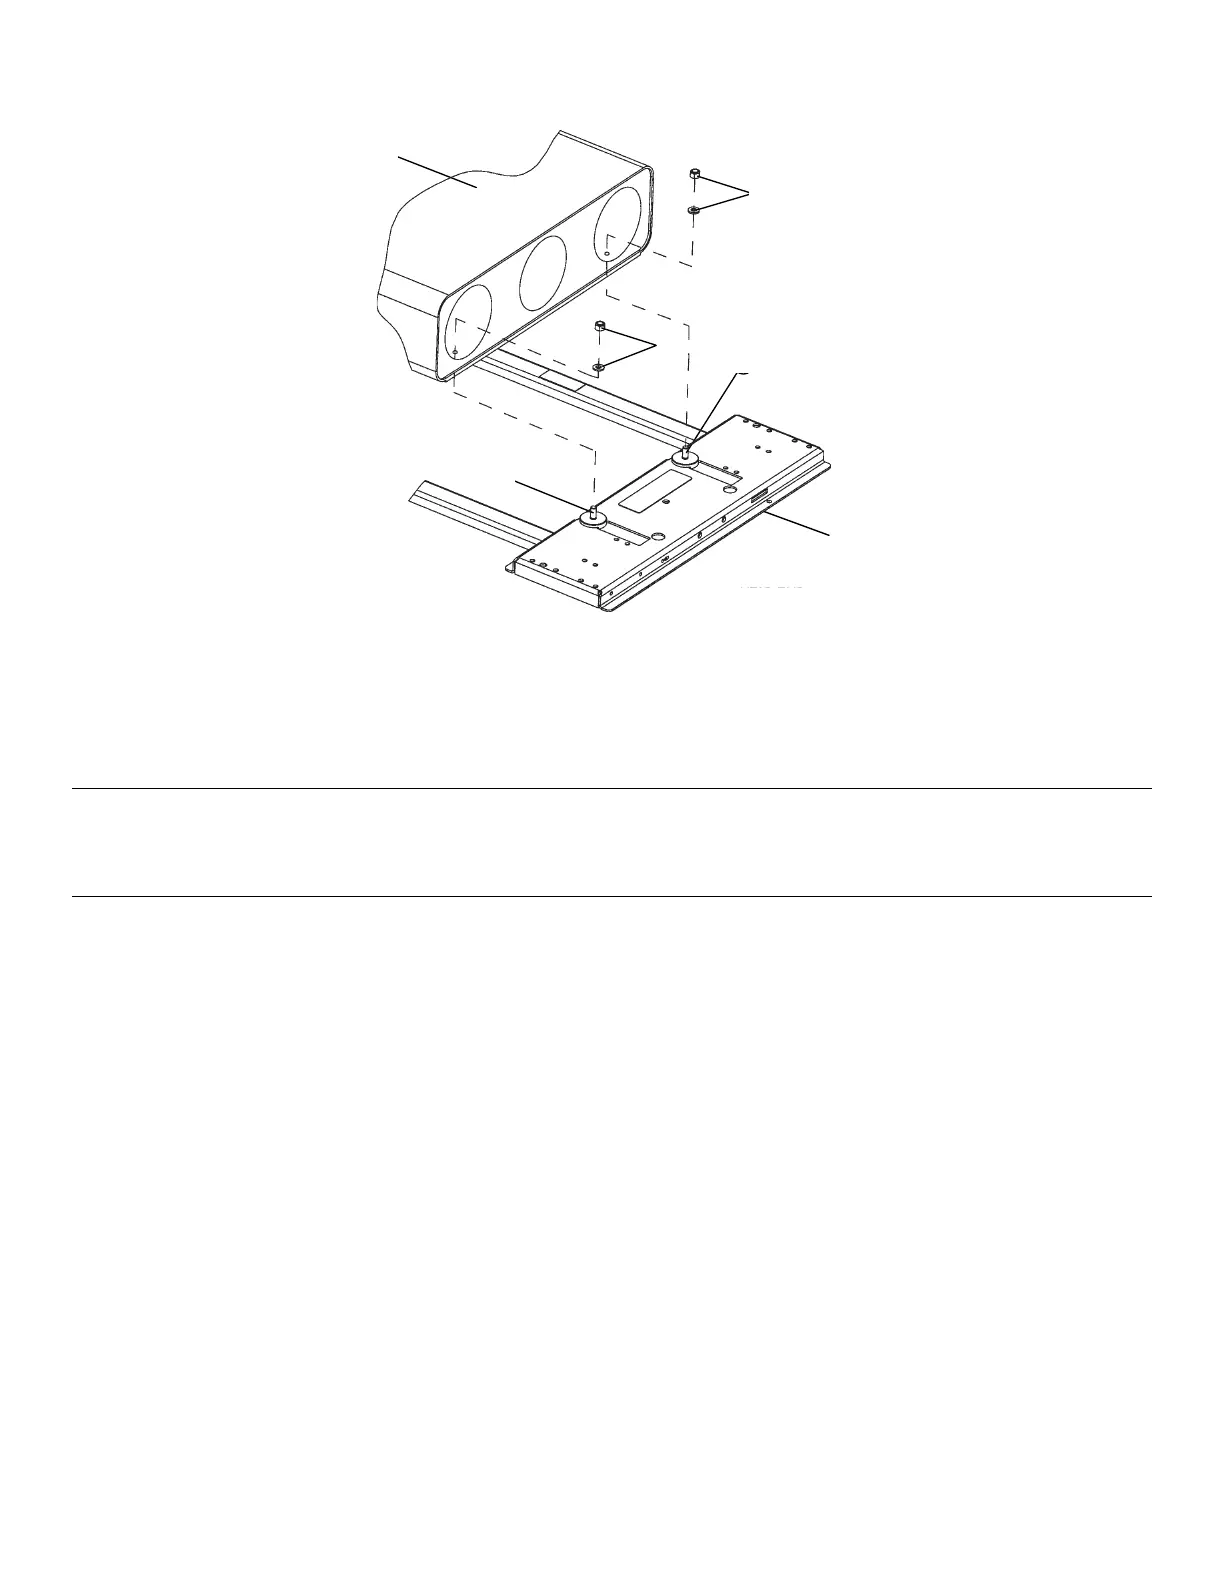
To install the sled receptacle:
1. Secure the sled receptacle to the litter frame with the supplied fasteners (Figure 42).
2. Insert the airsled (A) into the sled receptacle (B) with the latching system that is included as part of the airsled
EN 36 6516-209-001 Rev D.0