71OCH0006F08/13/2024
CEILAIR
®
CW & DX IOM
4.2 TROUBLESHOOTING
units in winter, do not permit snow to accumulate on or around the condensing unit. Check all refrigerant lines
and capillaries for vibration isolation and support as necessary. Check all refrigerant and coolant lines for
signs of leaks.
CAUTION
If the main power is disconnected for a long period, do not attempt to start a condensing unit until eight
hours after applying power. This allows time for all liquid refrigerant to be driven out of the compressor.
This is especially important at low ambient temperature conditions.
4.2 Troubleshooting
Troubleshooting steps are listed below in Table 14. Turn off all power to the unit before conducting any
troubleshooting procedures unless the procedure specifically requires the system to operate. Keep hands,
clothing and tools clear of the electrical terminals and rotating components. Equipment located in the ceiling
can pose unusual difficulties. Ensure that your footing is always stable.
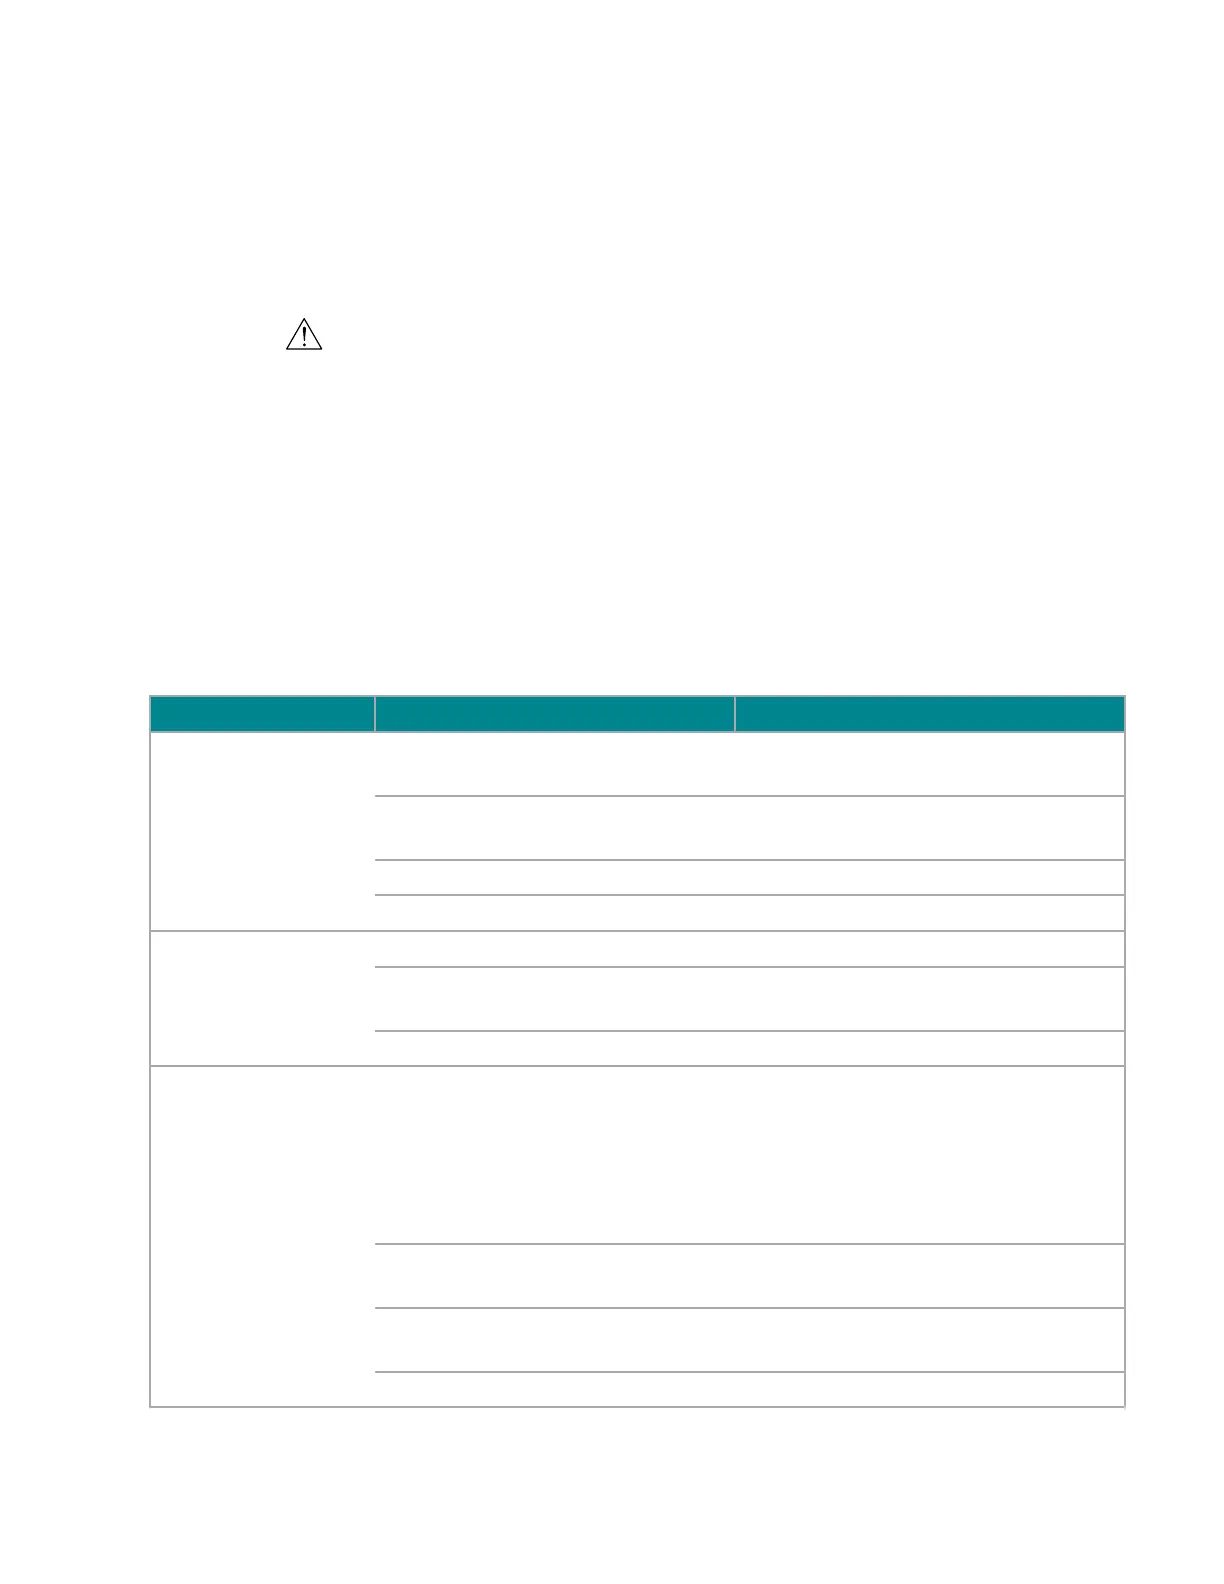
Table 14. Troubleshooting Table
Symptom Probable Cause Recommendation
Suction Pressure
Too Low
a. Loss of refrigerant (excessive
bubbles in sight glass).
Locate leak and repair. Recharge system.
b. Expansion valve stuck or obstructed
(short cycle or continuous running).
Remove and clean or replace valve.
c. Clogged drier/strainer (feels cold). Replace with new drier/strainer.
d. Dirty air filters. Clean/replace filters.
Chilled Water Valve
Fails to Open or
Close
a. Temperature setpoint too high/low. Adjust to correct temperature setting.
b. No control power to the chilled water
valve.
Thermostat wired incorrectly. Check
wiring diagram and rewire if required.
c. Actuator failed. Replace actuator.
Evaporator Coil Ices a. Low airflow. 1. Check filters. Replace as needed.
2. Check for and clear any obstructions
across or in the (supply) discharge
air-stream.
3. Check correct rotation of evaporator
blower.
b. Temperature setting too low. Increase temperature setpoint (68 °F
minimum.).
c. Discharge air short cycling back to
return.
Check discharge grille orientation.
d. Low refrigerant charge. Find leak, repair and recharge system.