18 Operation & Maintenance Manual
Cyclo® HBB
Cyclo® HBB
2
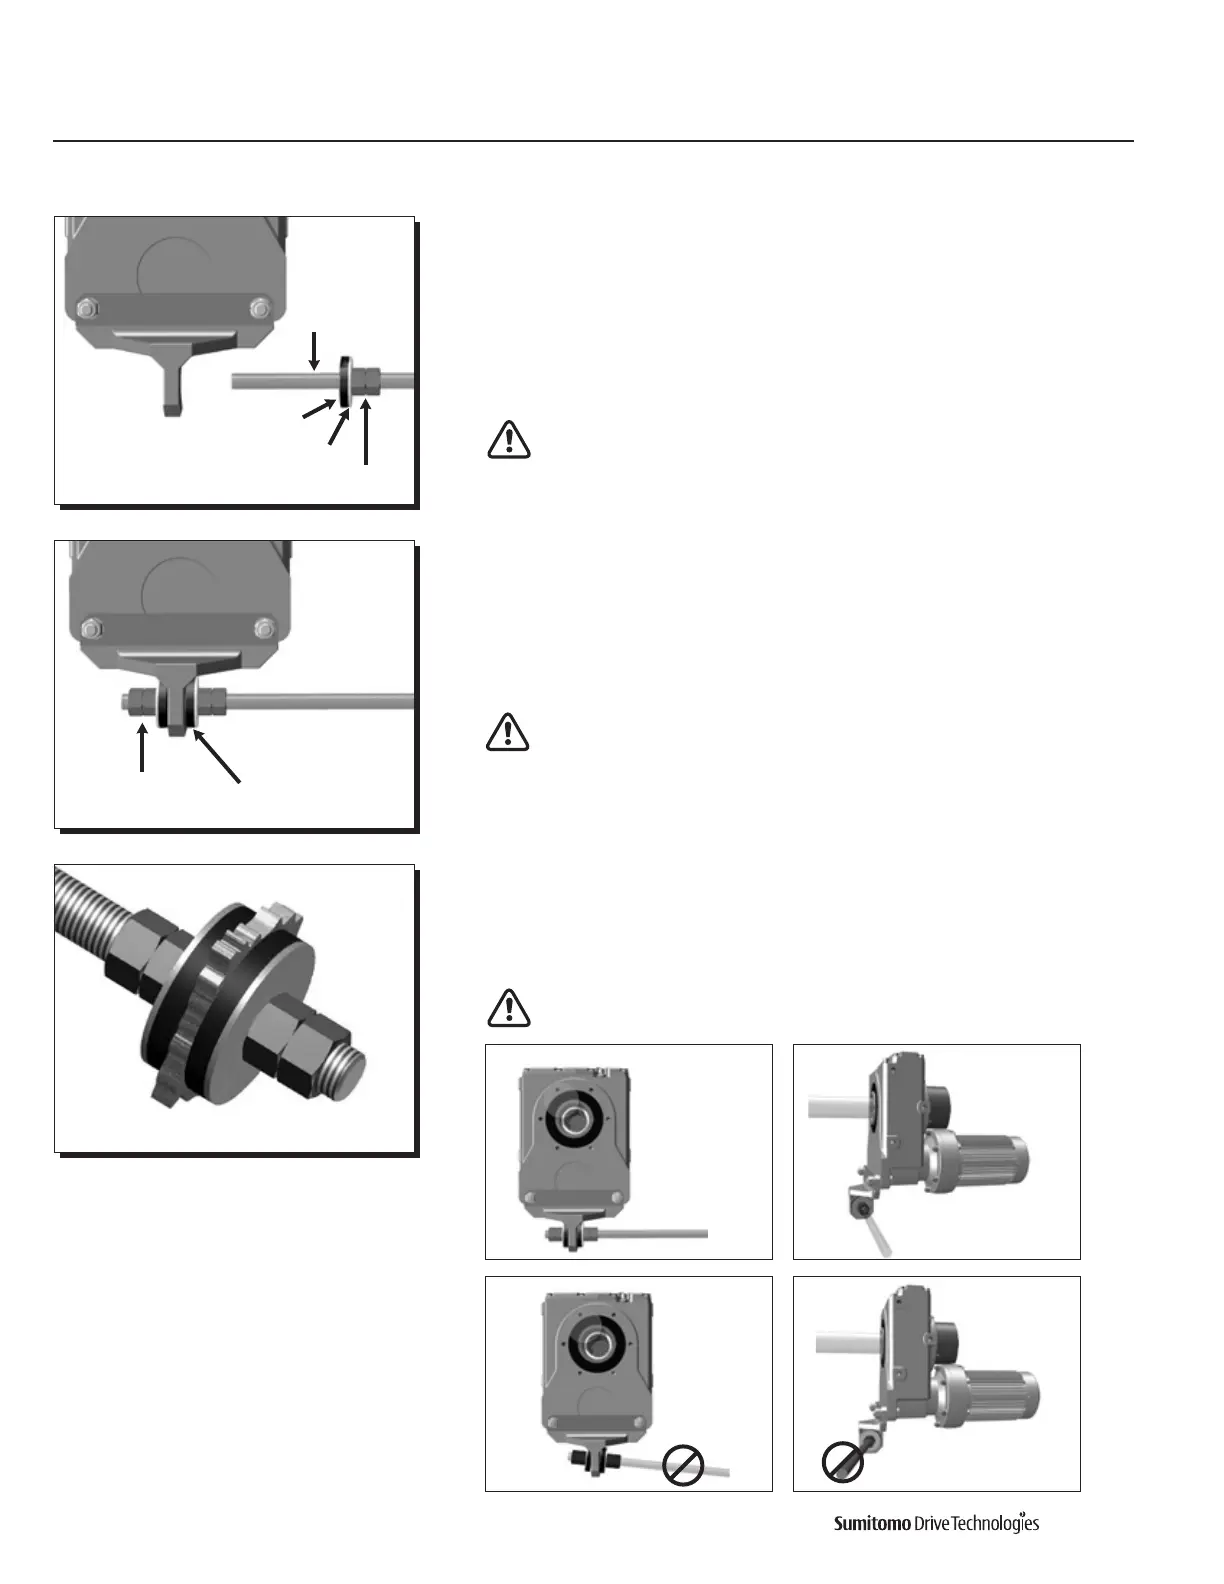
Place two nuts, washer, and rubber bushing on threaded rod.
InsertrodthroughmountingtabonT-Bracket.
MakesurerodisparalleltoHBBwhenfullyinstalled.
3
Place remaining two nuts, washer, and rubber bushing on rod.
Do not overtighten nuts. Tighten only to point where rubber bushings can
still be hand rotated.
4
Place free end of rod into rigid and stable mounting surface and secure with washers
and nuts.
Before starting the unit, ensure that the torque arm is properly aligned:
Rod
(customersupplied)
Rubber bushing
Washer
Two nuts
Remaining two
nuts, washers,
rubber bushing
Do not overtighten nuts.
Tighten to point where
rubber bushing can still
be hand rotated.
Make certain that
the threaded rod is
parallel to housing
Check that the
rod is not skewed
when viewed from
the sides.
Skewed and not
aligned with housing
Not parallel
P
P
Torque Arm Installation
T-Type Torque Arm Installation Procedure

 Loading...


