SunFounder PiCrawler Kit
• Do not unplug this servo cable before fixing it with the servo screw, you can unplug it after fixing it.
• Do not rotate the servo while it is powered on to avoid damage; if the servo shaft is not inserted at the right angle,
pull the servo out and reinsert it.
• Before assembling each servo, you need to plug the servo cable into PWM pin and turn on the power to set its
angle to 0°.
Note: Hello, welcome to the SunFounder Raspberry Pi & Arduino & ESP32 Enthusiasts Community on Facebook!
Dive deeper into Raspberry Pi, Arduino, and ESP32 with fellow enthusiasts.
Why Join?
• Expert Support: Solve post-sale issues and technical challenges with help from our community and team.
• Learn & Share: Exchange tips and tutorials to enhance your skills.
• Exclusive Previews: Get early access to new product announcements and sneak peeks.
• Special Discounts: Enjoy exclusive discounts on our newest products.
• Festive Promotions and Giveaways: Take part in giveaways and holiday promotions.
Ready to explore and create with us? Click [] and join today!
3.2 Calibrate the PiCrawler
Due to possible deviations during PiCrawler installation or limitations of the servos themselves, some servo angles may
be slightly tilted, so you can calibrate them.
Of course you can skip this chapter if you think the assembly is perfect and doesn’t require calibration.
The specific steps are as follows:
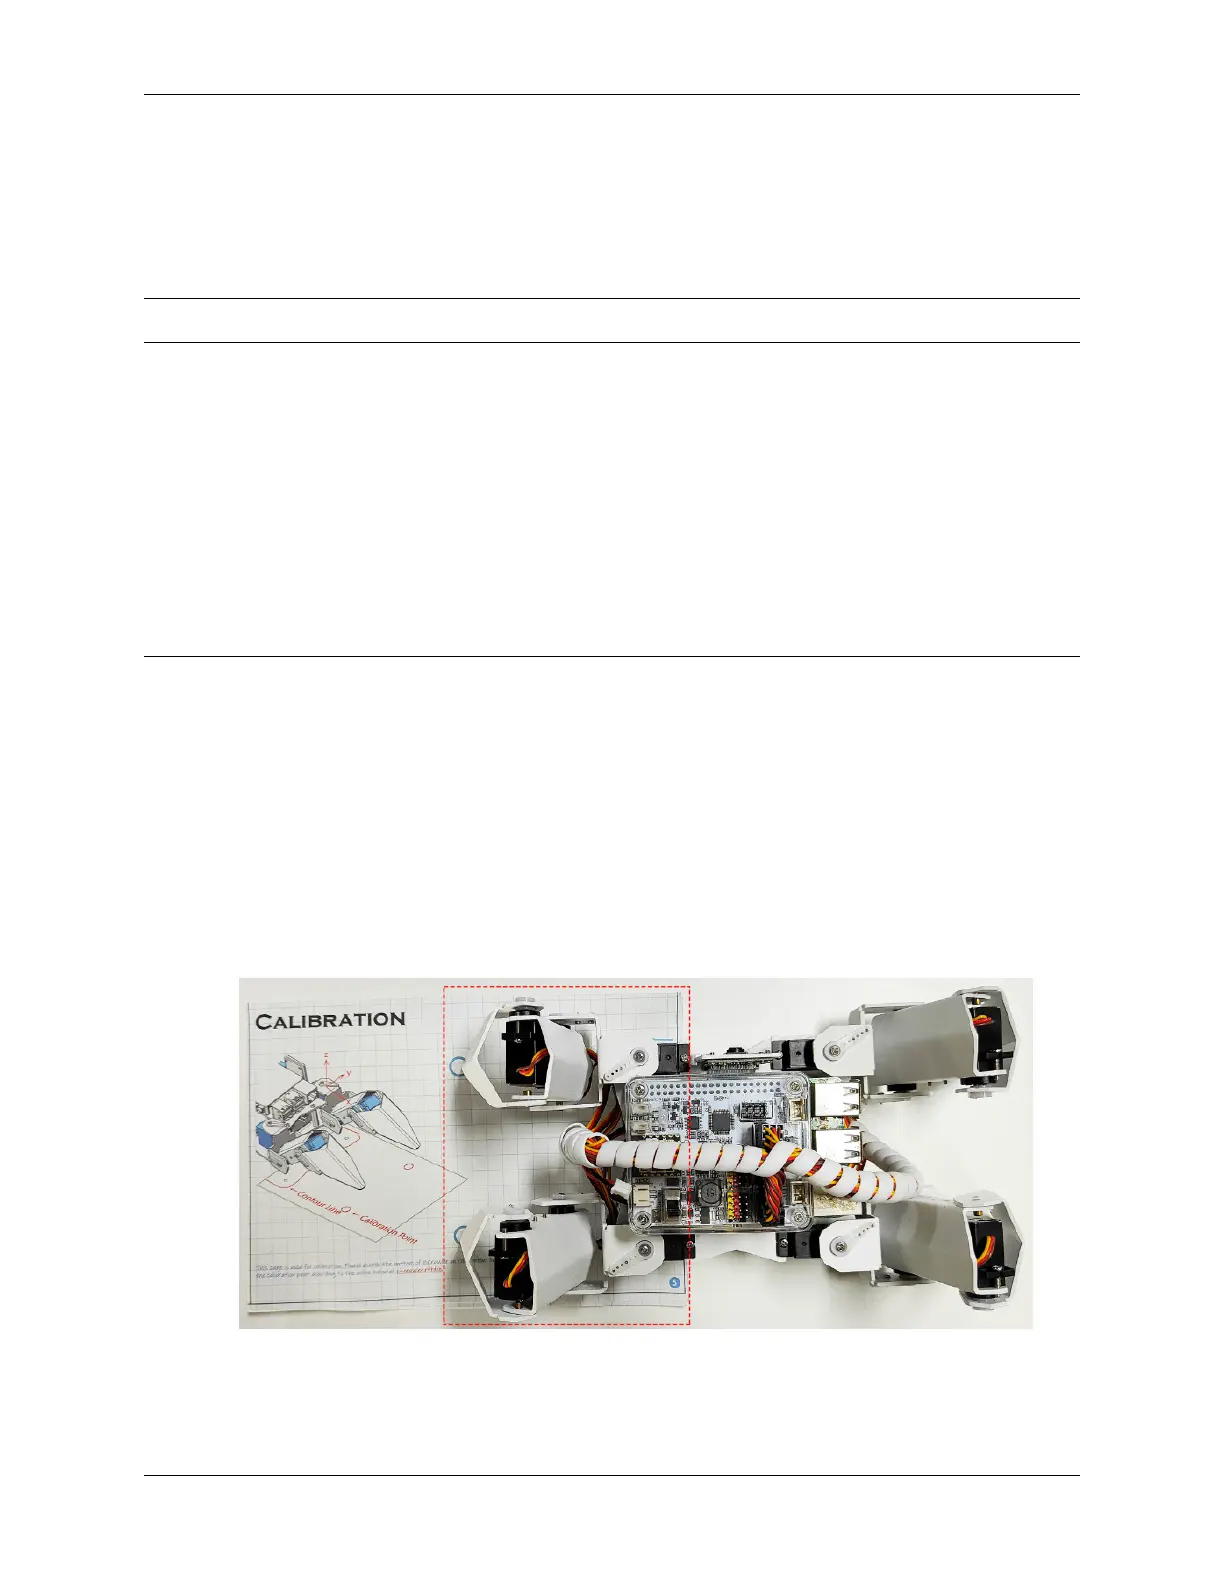
1. Take out the assembly leaflet, turn it to the last page, and lay it flat on the table. Then place the PiCrawler as
shown below, aligning its bottom with the outline on the calibration chart.
2. Run the calibration.py.
3.2. Calibrate the PiCrawler 37