22
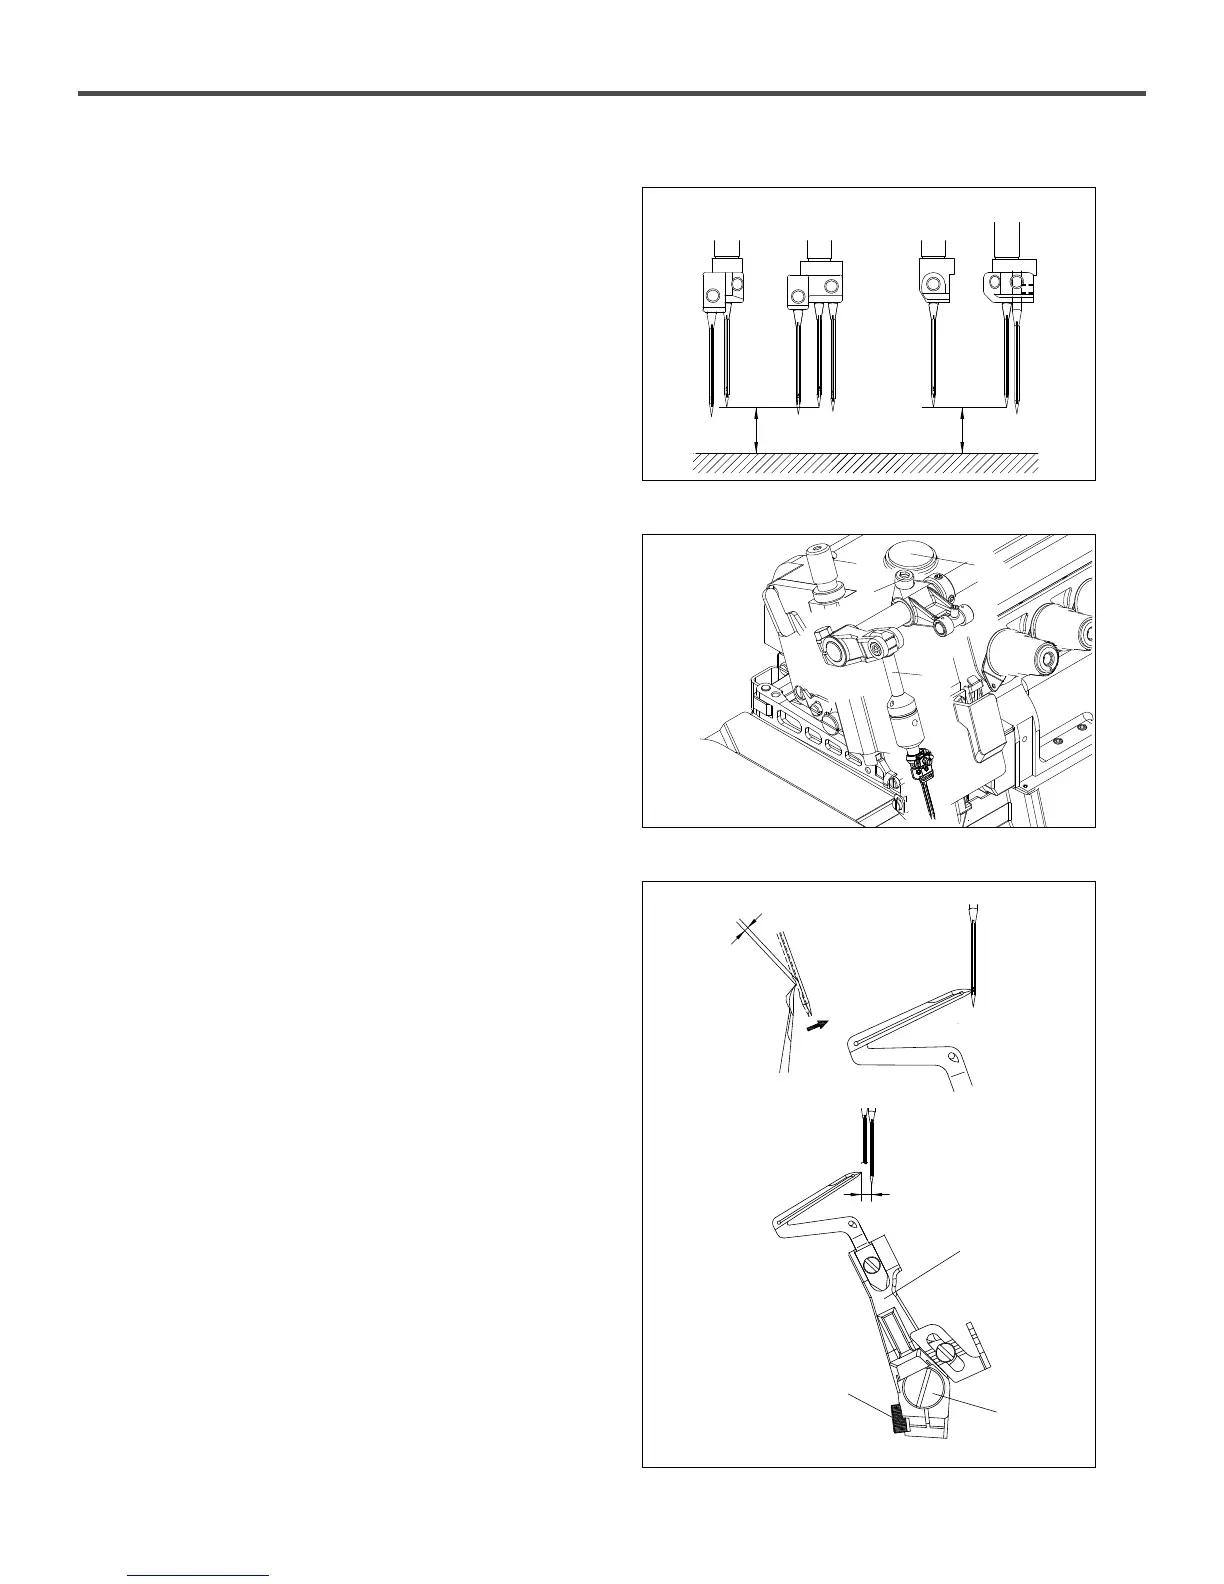
13) HEIGHT OF NEEDLE
1) Turn the hand pulley until the needle reaches to the highest
position.
2) Adjust the vertical height (a) between the front face of the
needle plate and the end of the needle as follows.
SC(D)(T)92◇◇-◇◇/◆◇◇
SC(D)(T)93◇◇-◇◇/◆◇◇
◆ - 2,3 type : (a) → 10.4~10.6mm
- 4 type : (a) → 11.8~12mm
- 5 type : (a) → 14.4~14.6mm
To do this adjustment, remove the rubber stopper② on the top
cover. Set the height by loosening the screw① and adjusting
the needle bar③ up/down. Fix it with the screw①.
14) LOWER LOOPER ADJUSTMENT
1) Lower looper setting distance
When the lower looper is farthest from the left (the bottom of
the needle bar), adjust the distance (b) between the end of the
lower looper and the center-line of the needle bar as follows.
SC(D)(T)9200, SC(D)(T)9300 series : b (3.7~3.9mm)
SC(D)(T)9316-04/435, SC9344-04/435 : b (4.1~4.3mm)
To do this adjustment, loosen the screw⑤, adjust the looper
holder⑦ left/right then fix it by screw⑤.
2) Front/rear of lower looper adjustment
When the end of the lower looper reaches to the center-line,
the needle should be lain aslant about 0~0.03mm from the
lower looper toward the operator.
To do this adjustment, loosen the screw⑤ and adjust the
looper holder⑦ back/forth slightly by turning the adjusting
screw⑥ back/forth then fix it by screw⑤.
[Figure 28]
[Figure 29]
[Figure 30]
SC 9300 Series SC 9200 Series
aa
①
②
③
⑦
⑥
⑤
b
0.03~0.05mm
 Loading...