26
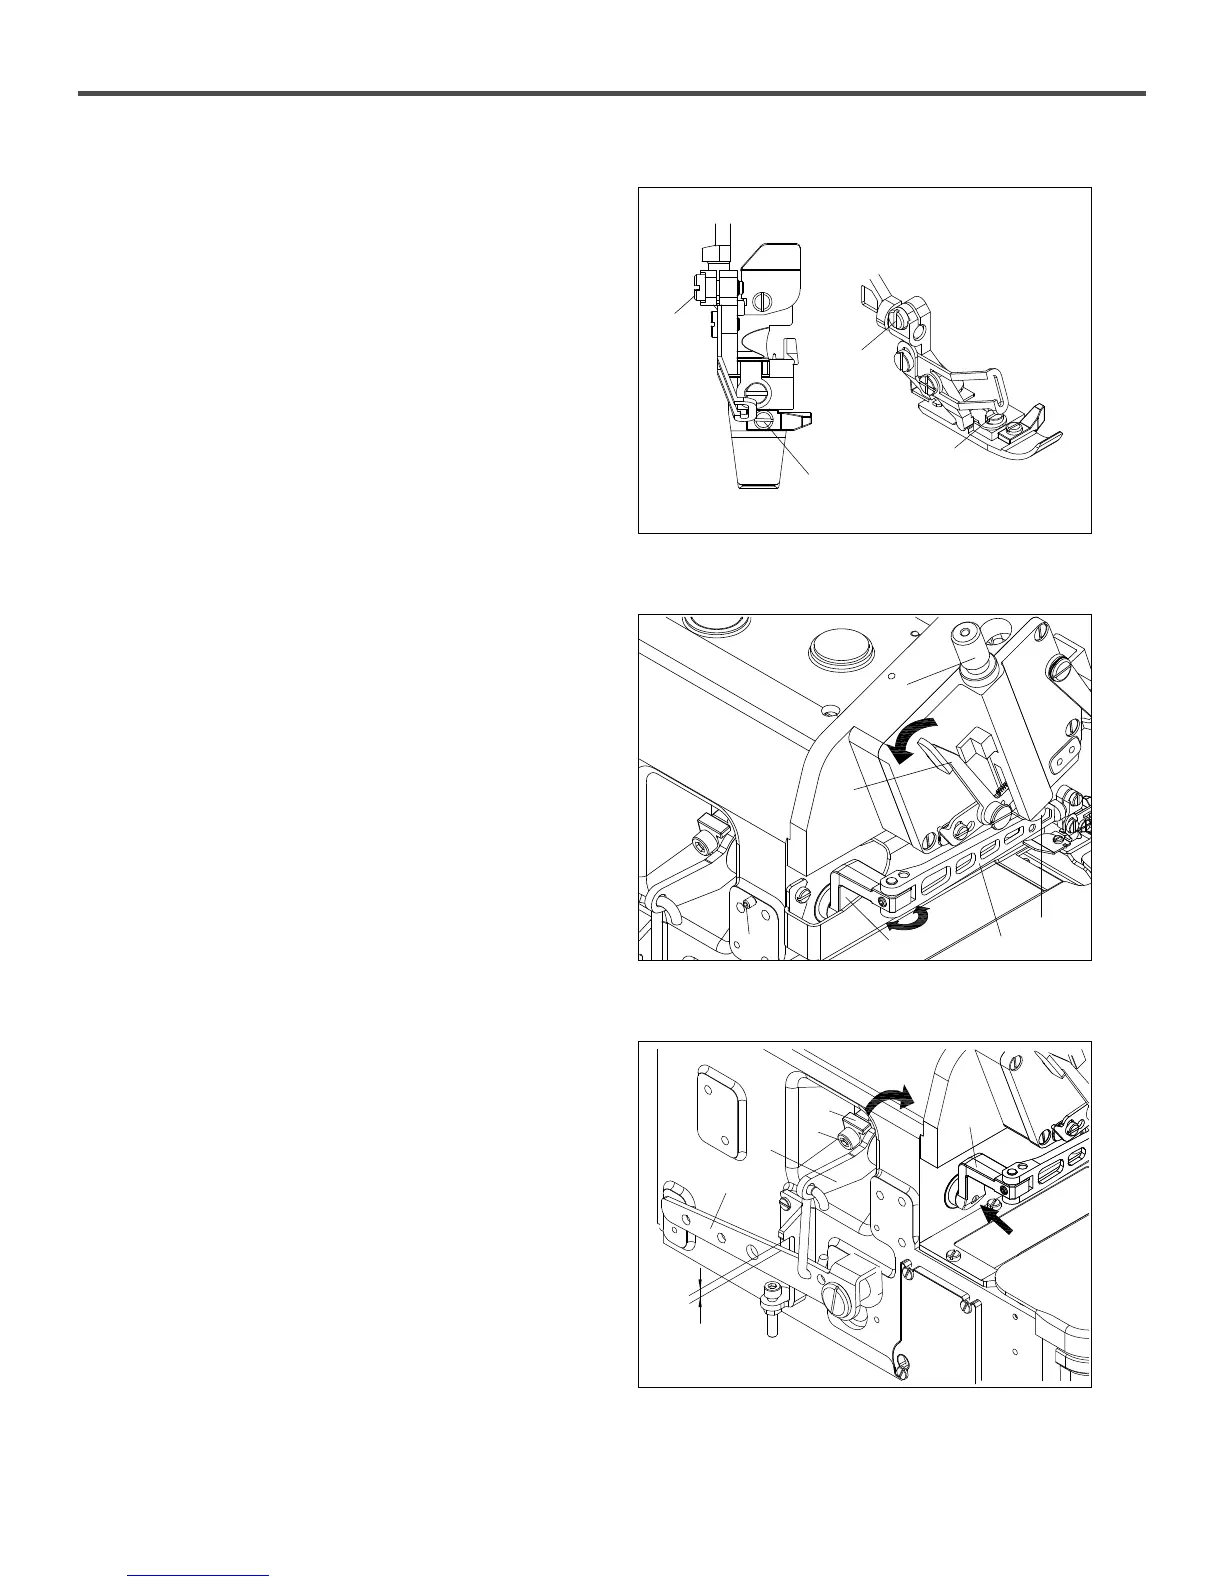
18) PRESSER FOOT INSTALLATION
1) Loosen the adjusting screw⑤ until the pressure of presser
foot arm spring decreased.
2) Turn the manual pulley when the needle reaches to the
highest position.
3) Install the presser foot to make the presser foot and the front
face of the needle plate to be in contact exactly for the
correspondence between the needle groove of the needle plate
and the presser foot.
To do this, loosen the screw①,② of SC(D)9300 Series and
loosen the screws ③, ④ of SC(D)9200 Series
4) Tighten the presser foot pressure adjusting screw⑤ when
adjusting the pressure.
19) PRESSER FOOT ARM LEFT/RIGHT ADJUSTMENT
1) Loosen the screw⑥.
2) Move the manual lifting lever⑦ up and down. Remove the
presser foot bar⑧ from the arm⑨ smoothly.
To do this, adjust the presser foot arm shaft⑩ from side to
side.
3) Tighten the screw⑥.
20) PRESSER FOOT LIFTING LEVER ADJUSTMENT
1) Fix the feed dog on the needle plate.
2) Loosen the screw⑪.
3) When pressing the collar⑫ and the presser foot arm shaft⑬
(make them not rock from side to side), turn the collar⑫ to
the arrow direction. Set the distance between the presser foot
lifting lever⑭ and the stopper⑮ to about 1mm.
4) Tighten the screw⑪.
[Figure 38]
[Figure 39]
[Figure 40]
①
③
④
⑭
⑮
⑪
⑫
⑬
1mm
②
⑤
⑦
⑧
⑨
⑩
⑥
 Loading...