34
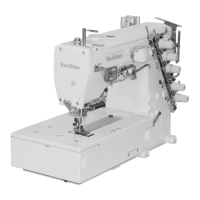
31) Pressure foot change
1) Turn the pulley until the needle is on the highest position.
2) Press the lever① and rotate the pressure foot arm② to the
side of the cloth plate.
3) Loosen the screw③. Change the pressure foot.
Then tighten the screw③.
4) Press the lever① and then the pressure foot arm② is
returned.
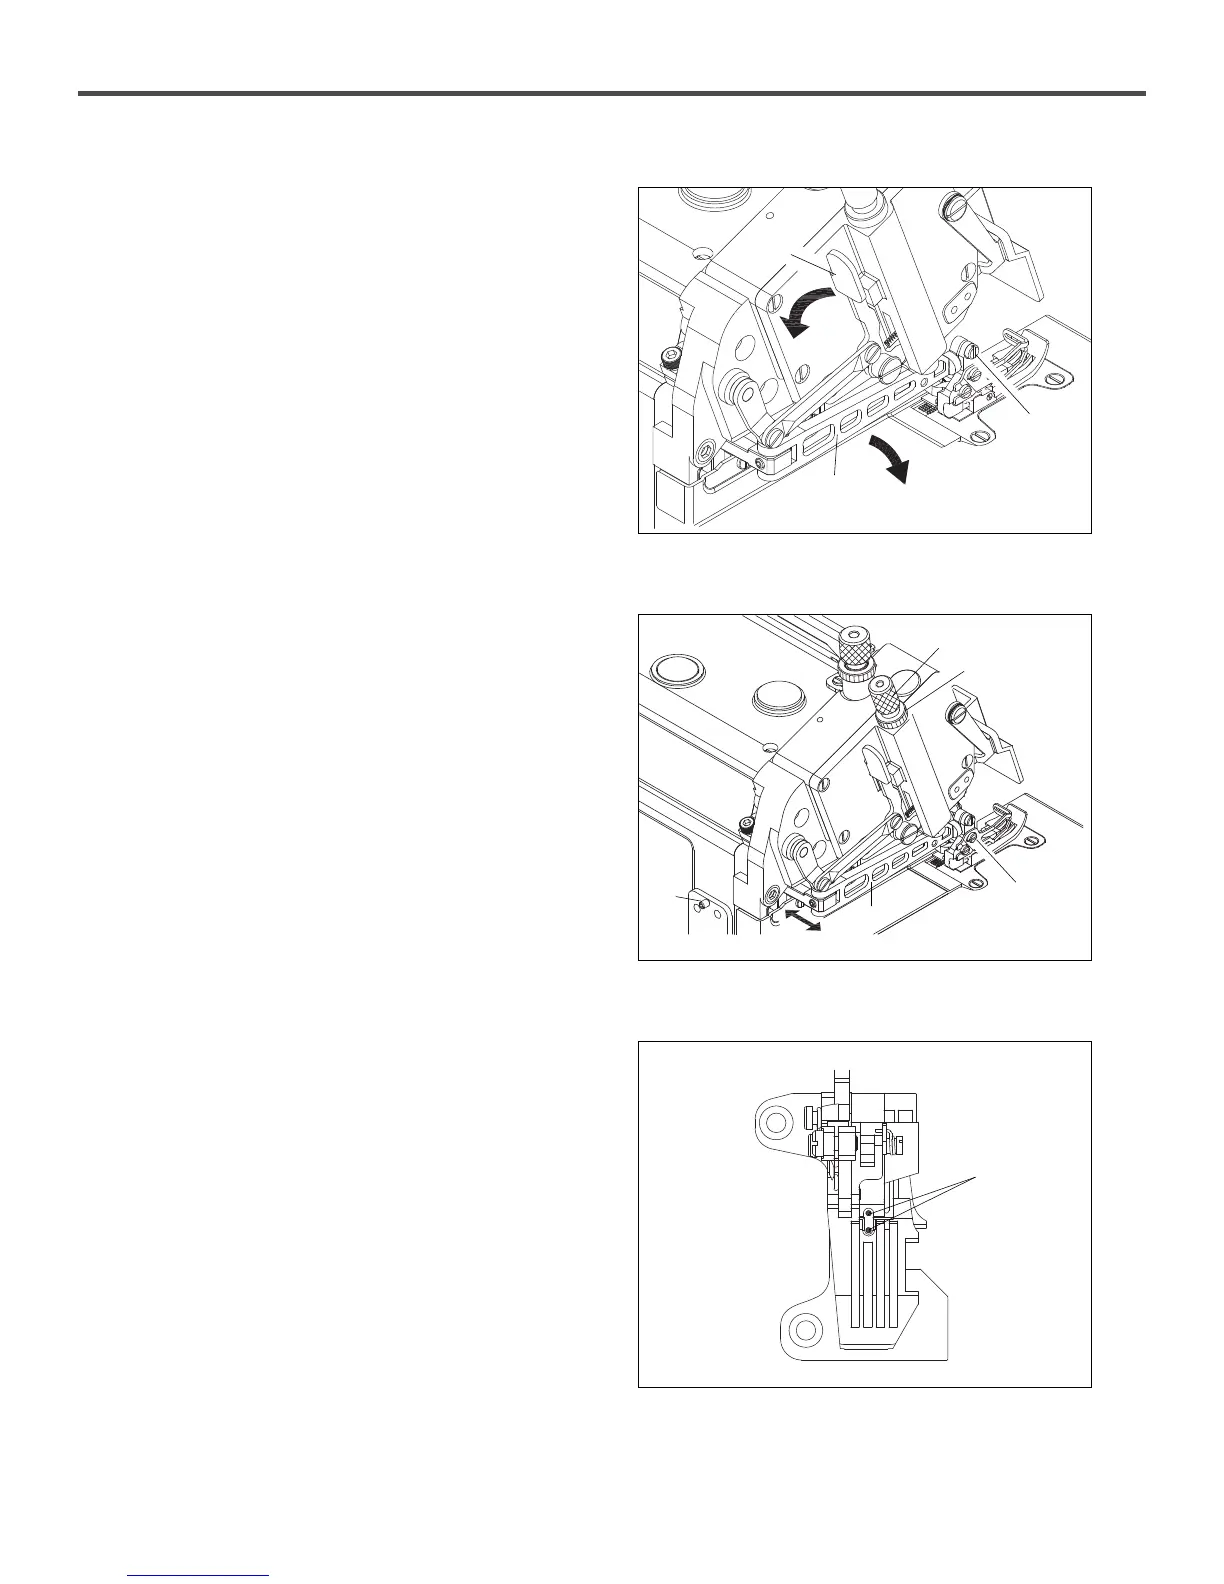
32) Pressure foot position adjustment
1) Loosen the nut④. Loosen the screw⑤ to eliminate the
pressure of the pressure foot arm②.
2) Turn the pulley until the needle is on the lowest position
3) Loosen the screw③. Match the part that the needle passes
through of the pressure foot and the needle hole on the needle
plate. Adjust the pressure foot to make the pressure foot and
upper side of the needle plate in parallel. Then tighten the
screw③.
4) Loosen the screw⑥. Move the pressure foot arm② for the
slight adjustment.
5) tighten the screw⑥.
6) Tighten the screw⑤ during pressure adjustment.
Then tighten the nut④.
[Figure 69]
[Figure 70]
[Figure 71]
needle
①
②
⑤
④
⑥
②
③
③
 Loading...