20 SUPERBRUSH OWNER’S MANUAL
CHANGING OR REPLACING BRUSH
Changing the brush on the SUPERBRUSH is relatively
simple. To begin, first disconnect power source to
the machine. Lower the motor to its lowest position
using the brush speed control handle. Raise the
motor to its highest position. This loosens the
V-belt tension so the V-belt can be lifted off the
driven pulley, pulled back and placed under the
control handle to hold it out of the way. Loosen
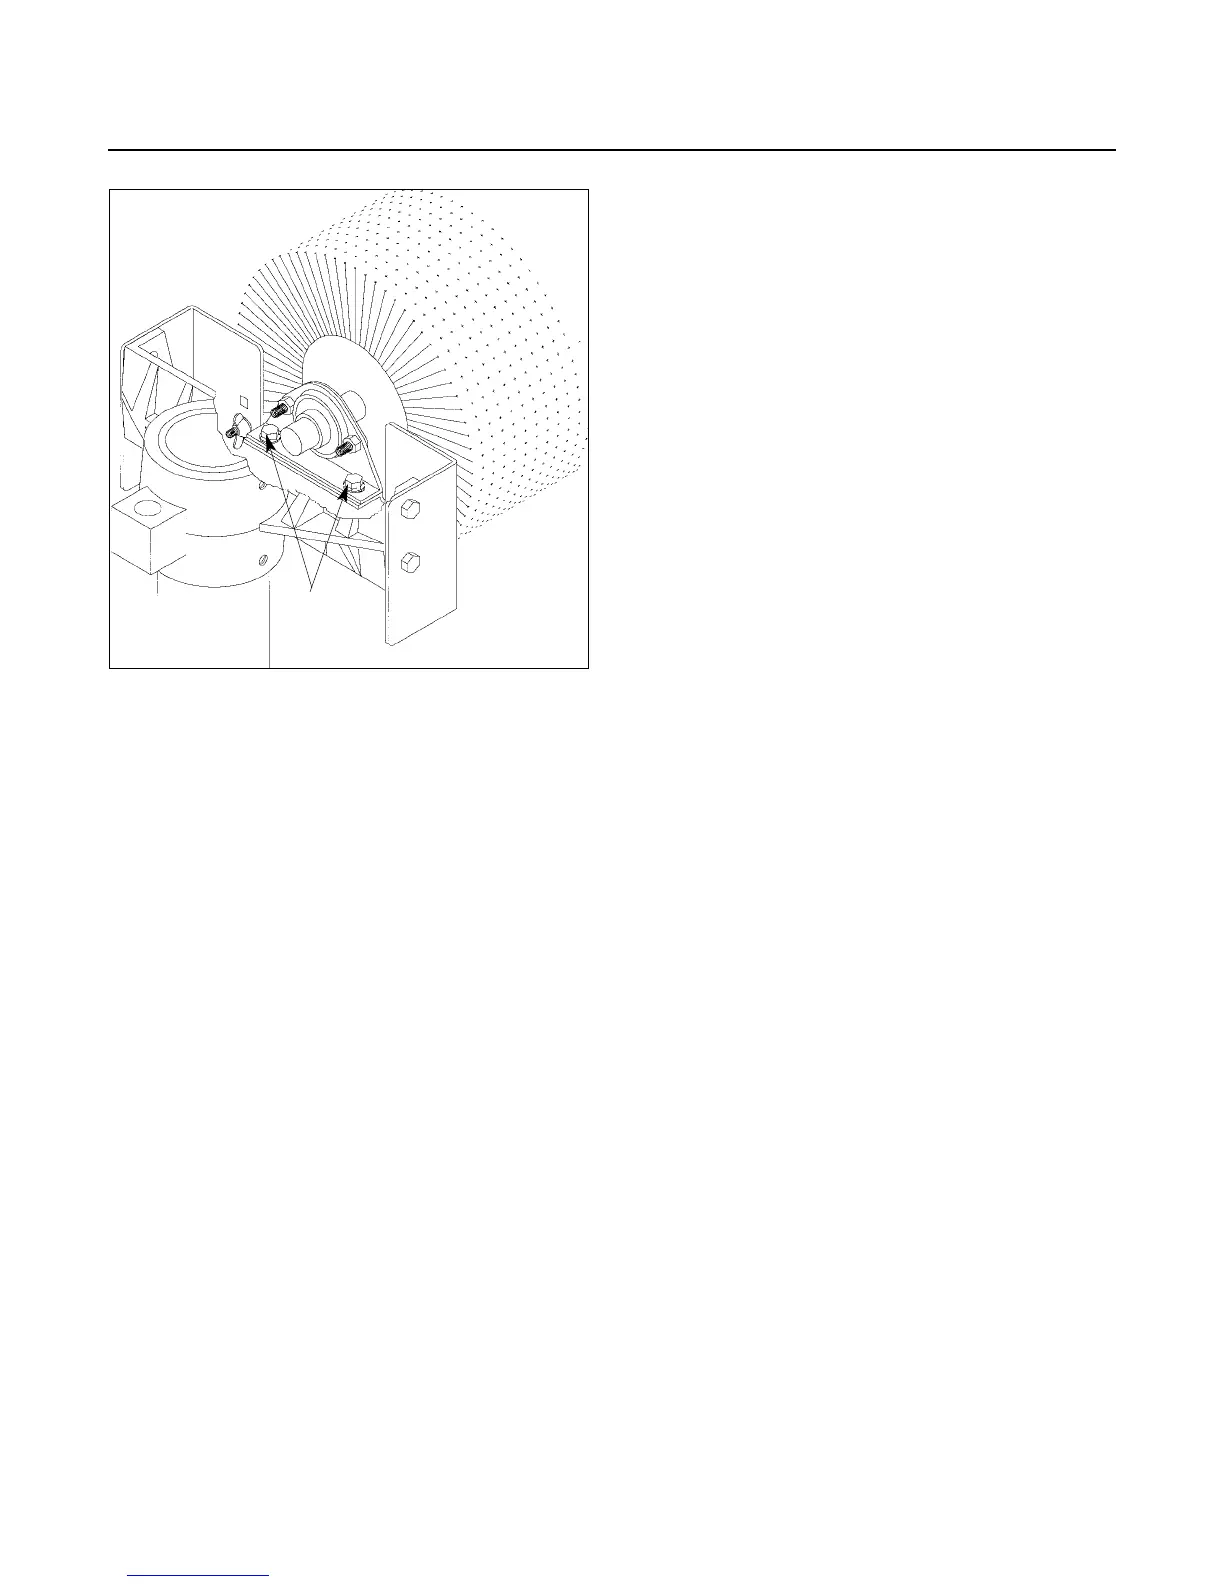
and remove bearing bolts (Fig. 19 and 19A,
depending on model. See also page 23 and Fig.
25.) Lift brush out of machine. Loosen set screws
of bearing collars and pulley. Remove bearings and
pulley and install on replacement brush.
Install replacement brush in machine and center
brush before tightening bearing bolts. Tighten
bearing set screws after bearing bolts are tightened.
Install V-belt on driven pulley and adjust pulley
for proper V-belt alignment before tightening
pulley set screw.
REPLACING CONVEYOR BELTS
To replace the conveyor belt, the conveyor assembly
must be removed from the machine. Lower the
conveyor table to its lowest position with the
height adjustment handle. Turn off power source
to machine. Place conveyor motor assembly on
top of dust cover (see #3, page 5). Loosen the
conveyor take-up screws (Fig. 21) to relieve belt
tension and slide the driven roller fully inward.
Remove the four bolts that attach the conveyor
assembly to the table mount brackets (see Fig. 21).
Lift the conveyor and remove it from the machine
by sliding the conveyor out toward the front of the
machine. Avoid tearing the belt on any edges
underneath the conveyor bed during removal.
Reverse the procedure for re-installation.
Note: If the conveyor belt continually tracks to
one side of the machine, first try reversing the belt
on the conveyor bed. If this doesn’t remedy the
problem, place a level on the conveyor bed to
make sure the conveyor bed is not twisted. If it is
twisted, see page 7 for instructions on squaring up
the bed. If squaring up the bed does not remedy
the problem, proceed with the steps below:
Step 1. Check the conveyor drive and driven roller
to make sure it is parallel to the surface of the
conveyor bed. To do this, first center the conveyor
belt on the bed. Then lay a straight-edge on the
exposed edge of the conveyor table on the left
(outboard) side, extending it over the drive or
driven roller. Note the distance between the drive
or driven roller and the straight-edge.
Step 2. Now repeat Step 1 on the right (inboard)
side of the conveyor. Compare the measurements
from side to side. If they are not equal, loosen one
of the brackets that hold the drive or driven roller
in place. Tip this bracket until the distance
between the drive roller and the straight-edge are
equal from side to side, then tighten the bracket.
Fig. 19A. Removing brush head (some models).
BRUSH
MOUNTING
BOLTS