22 SUPERBRUSH OWNER’S MANUAL
ROTATING/REPLACING BRUSH BEARINGS
Replacing the permanently lubricated bearings on
the S
UPERBRUSH is a relatively straight-forward
procedure. Bearings should be replaced when they
allow excessive play of the brush, make excessive
noise, or otherwise indicate failure.
Note that if clicking noises in the bearings are a
problem, rotating may be a solution instead of
replacement, as follows:
BEARING ROTATING
Step 1. Loosen the set screws in the bearing collar.
Leave the set screw wrench in one of the set
screws. Then rotate the brush within the bearing
and tighten the set screws (Fig. 19 and 20).
Step 2. If the clicking persists, or if the brush shaft
is tight in the bearing and cannot rotate, then
loosen the two bolts holding the bearing and the
flange for the bearing. Now repeat Step 1. After
the brush is rotated within the bearing, tighten the
flanges first and then the set screws. After the
machine has run for a half hour, stop to check that
the set screws and bearing bolts are tight.
Bearing Replacement:
1. Disconnect power source to the machine.
2. Lower motor to its lowest position using the
RPM adjustment handle. Then raise motor to its
highest position using the RPM adjustment han-
dle. This loosens the V-belt tension so the V-belt
can be lifted off the driven pulley.
3. Raise conveyor bed until the brush rests on
bed.
If replacing both bearings, begin with bearing on
the left (outboard) side.
Replacing Left (Outboard) Bearing:
Make sure power is disconnected to the machine.
1.Remove the outer half of the bearing flange.
Loosen the set screws in the bearing collars and
remove the bearing.
2. If the shaft of the brush is rough from the set
screws, use emery cloth or sandpaper to smooth
down any raised edges. Slide the new bearing on
the shaft, but do not tighten the set screws yet.
3. Install the outer half of the original bearing
flange and tighten the bolts. Then tighten the set
screw in the bearing collar.
If the left (outboard) bearing is the only one that
needs changing, proceed to reassemble the unit.
You can check the brush at this point by lowering
the conveyor bed and spinning the brush by hand.
This will help determine if the inboard bearing
needs to be changed to eliminate noise or excessive
play in the brush.
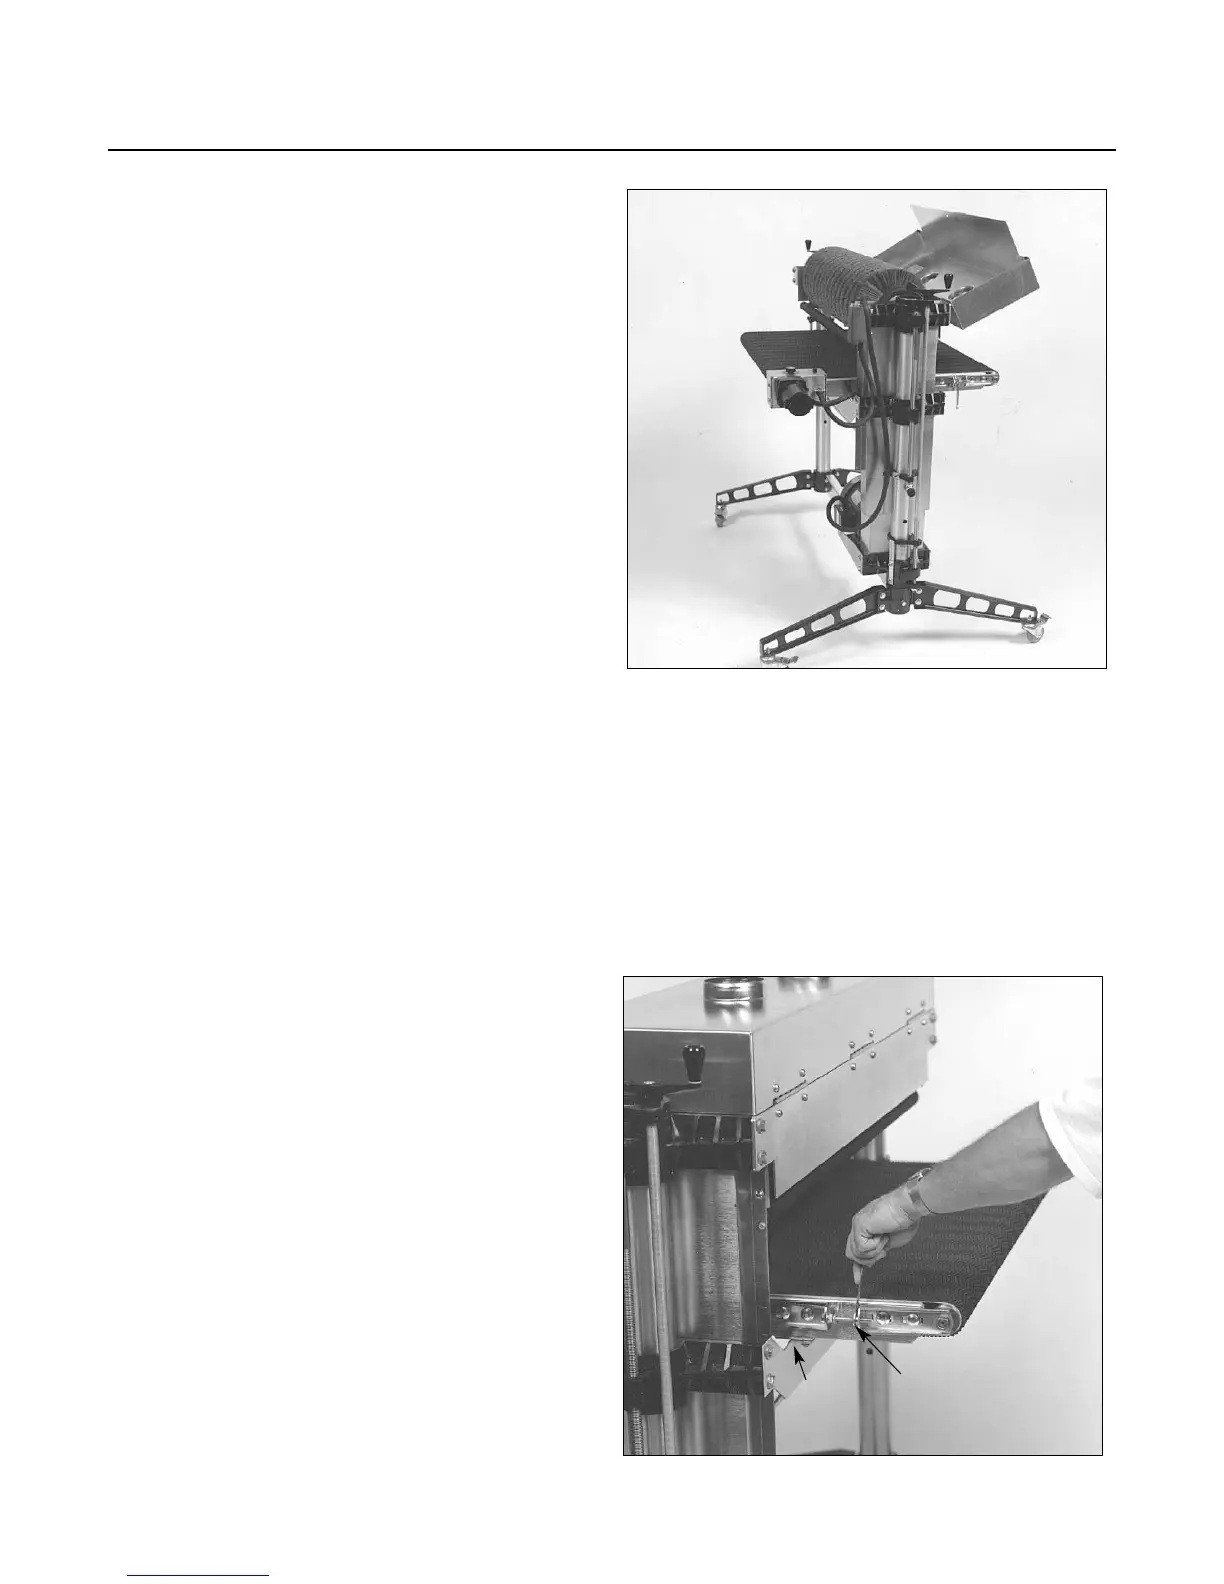
Fig. 20. Conveyor belt replacement.
Fig. 21. Tensioning and tracking conveyor belt.
CONVEYOR
MOUNTING
BOLTS
TAKE UP
SCREW NUT