16
Step 4- Use the right arrow again to move the cursor to the right side of the screen,
if the model of the modem you are going to use is different from the selected one, hit
the Enter key and select the correct one from the selection table that contains the list
of modems recognized by the system, other modems are not supported.
Step 5- Use the down arrow to get to the APN row. The APN is the Access Point
Name required by the cellular provider whose SIM card is placed in the modem.
Without the correct APN the cellular carrier will not permit GSM, GPRS, 3G or 4G data
transfer.
Step 6- The User name and Password fields will usually remain blank unless the
cellular provider requires using them. The Dial field should remain untouched. The
Status row indicates the status of the modem and the Signal field shows the signal
strength at the moment of connection. The range for normal signal level will be 10 to
30.
Notice that:
The function key F3=Connect can be used in order to force the modem to restart. We shall
use this option whenever we are sure that all the parameters are properly defined and still the
modem fails to connect.
Step 7- Continue with setting the Service parameters as explained starting from Step 5
of the previous paragraph 3.1
4. THE SYSTEM MANAGEMENT SCREENS
The System Management screens were already mentioned above however due to their
importance we shall devote a special chapter to describe their contents in details.
The System Management screens are usually hidden, but can be reached from any of the
DREAM 2 application screens by pushing simultaneously the PgDn (˅) and PgUp (˄)
buttons. Same two buttons will be used later on for getting back into the DREAM 2 application
screens.
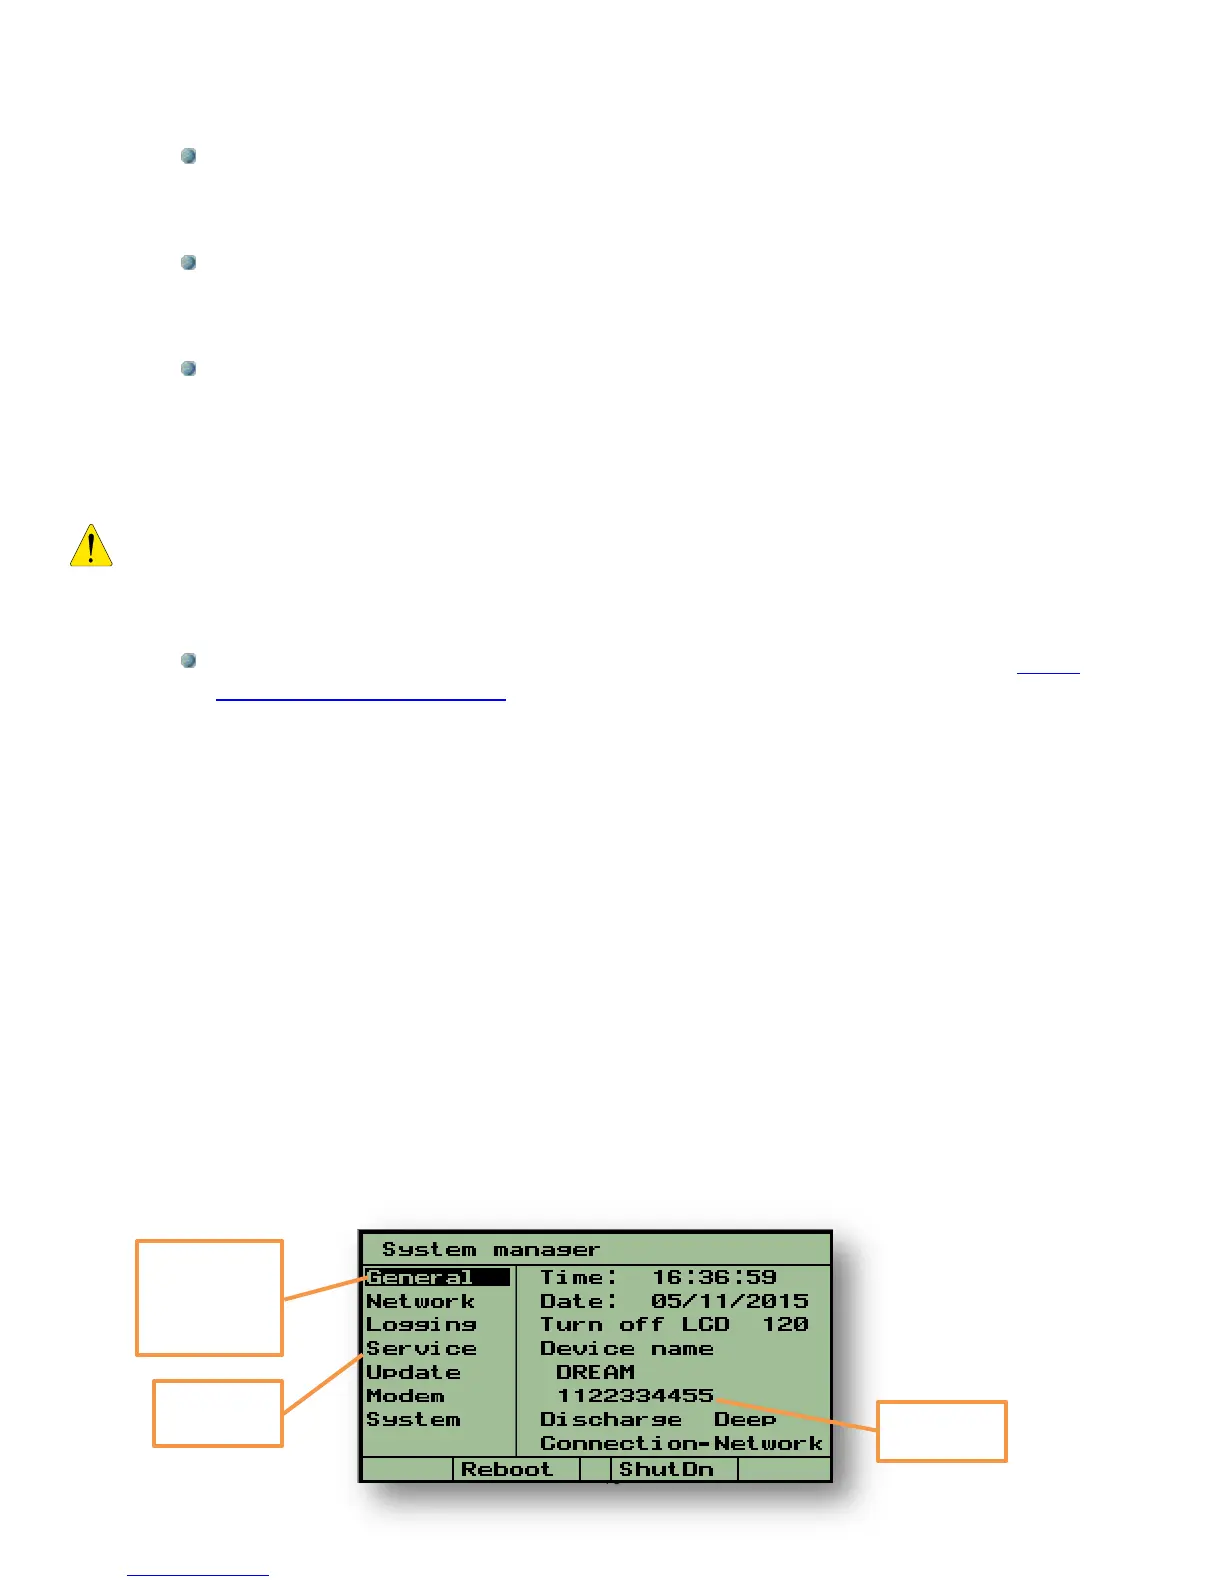
While being at the System Management screens, the left side of the display contains a menu
of subjects, and the right side shows the details of the selected subject. Selecting subjects is
done by moving the cursor up/down to the desired subject and then hitting the right arrow
key. The cursor moves right to the first editable parameter of the selected subject.
4.1 General
The subject “General”, deals with the information below:
The cursor is
placed on the
subject -
“General”