17
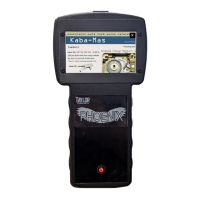
Step 2] Micro-Drill Lock Case Thru Spindle Hole
After selecting a lock, the Phoenix will display
the appropriate drilling depth along with a
spindle hole view indicating the recommended
drill position with a red circle. The Phoenix 4.0
includes a 3/32”x6” drill bit along a brass
sleeve and a Drill Depth Gauge. Place the drill
bit on the depth gauge and position the tip of
the bit at the depth indicated on the Phoenix.
Next, while holding the bit in position on the
depth gauge, slide the included brass sleeve over the shank of the drill bit until it
contacts the gauge. Chuck the drill bit into a keyless chuck equipped
cordless drill, sliding the bit into the chuck until the brass sleeve
contacts the jaws of the chuck then tighten. The sleeve now functions
as a drill depth stop which ensures a precise drilling depth into the
lock case and also protects the keypad cable from cable damage
while drilling. Double check the depth of the bit and sleeve once
chucked up then micro-drill into the lock case down the spindle hole at
the position indicated. Use light pressure and allow the bit to cut
cleanly into the lock case. Once complete, tap the screen to continue.
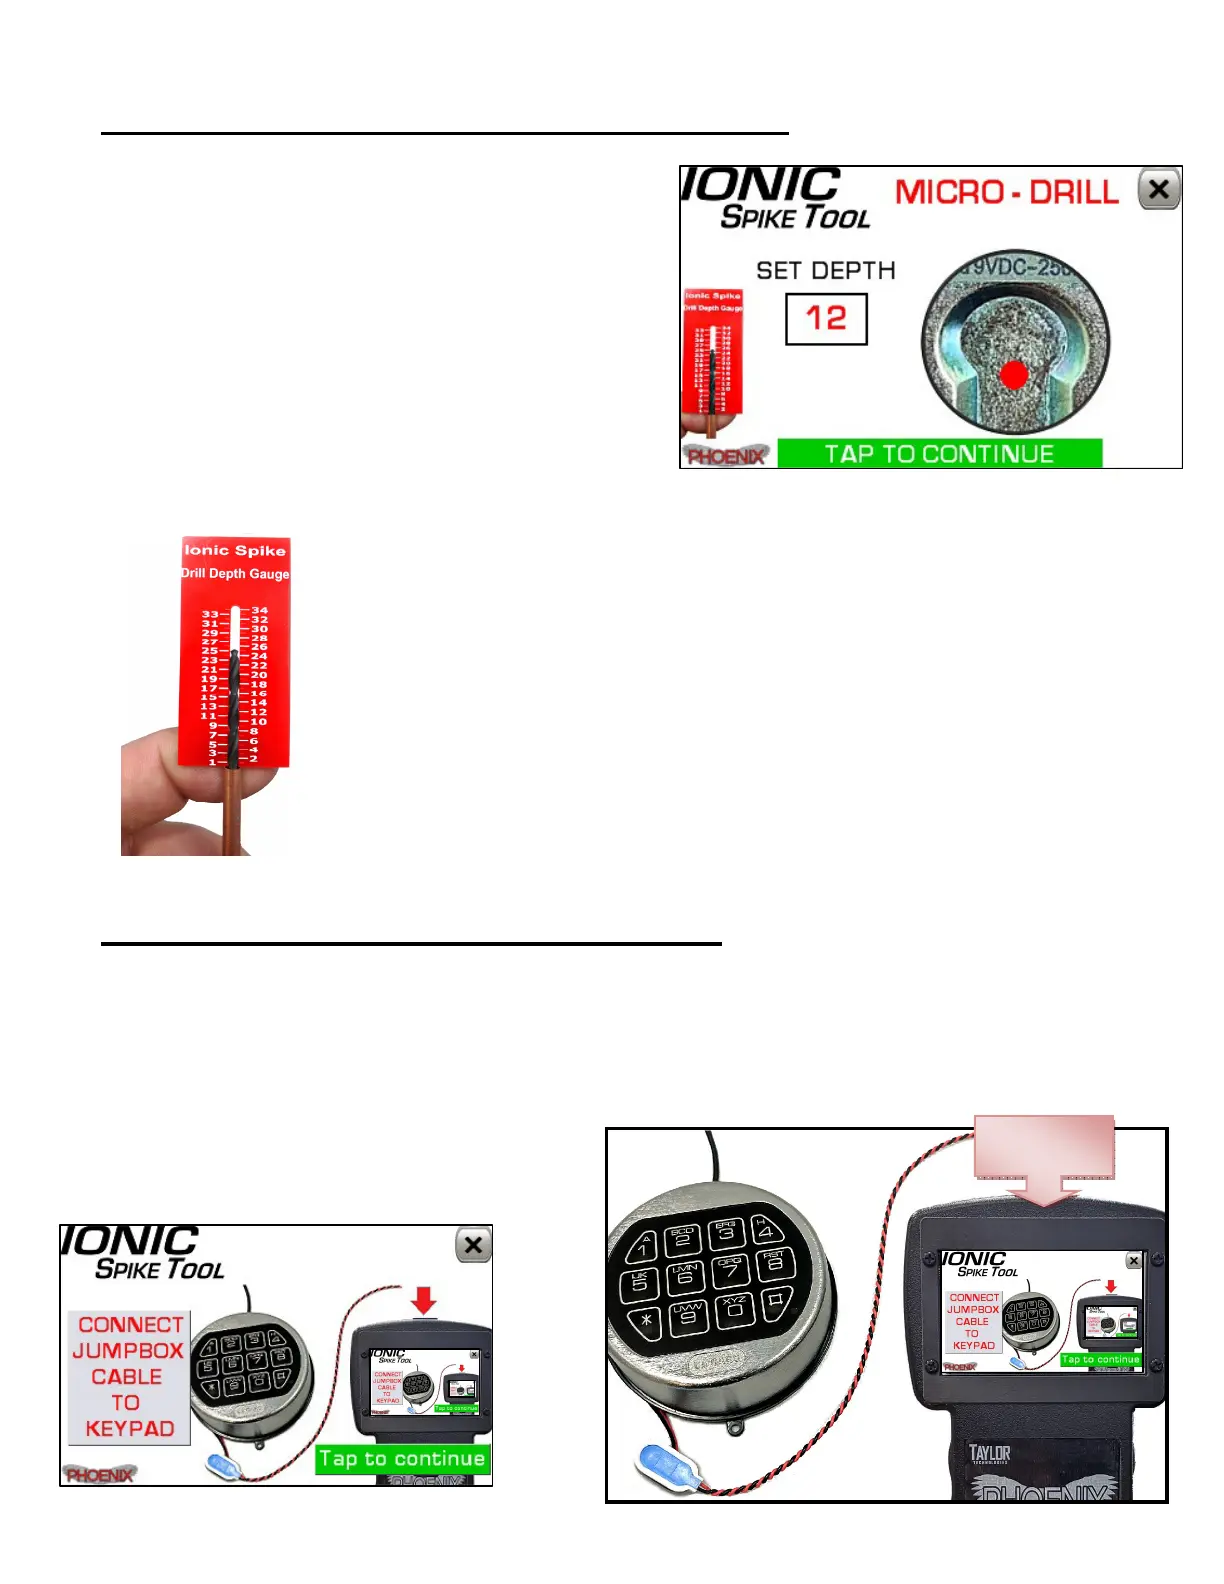
Step 3] Connect JumpBox cable to Keypad
Disconnect the Junction Box and all cables from the output jack on the Phoenix. Plug
the red and black JumpBox cable directly into the output jack on top of the Phoenix.
Connect the WHITE/BLUE 9-volt snap terminal from the JumpBox cable into the
keypad battery connector.
Tap the screen to continue.