16
IONIC
Spiking
IONIC spiking is a revolutionary approach to spiking electronic
safe locks through the spindle hole of the safe. Instead of
having the drill a ½” hole into the lock case, splice into wires and working to hit a tiny
spiking point buried inside the lock case with a custom formed probes, the IONIC spiking
method system allows you to simply poke a small 3/32” hole in the case, plug in the
keypad battery connector and insert a syringe needle. The specifically calibrated IONIC
spiking solution included with the Phoenix will work its way across the surface of the
circuit board inside the lock case, penetrating down through most factory applied
coatings and quickly establish a conductive path the lock’s motor drive circuitry. The
Phoenix tool will automatically detect when this connection has been made and then
deliver a non-damaging, low power signal that will effectively “trip” the motor driver over
into a fully conductive state which causes power to flow to the motor and opens the lock.
Spiking is accessible in Main Menu and is also shown as an option in the Lock Menu any
time a compatible lock is connected to the tool.
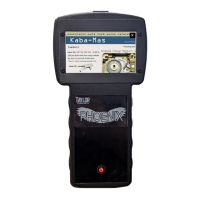
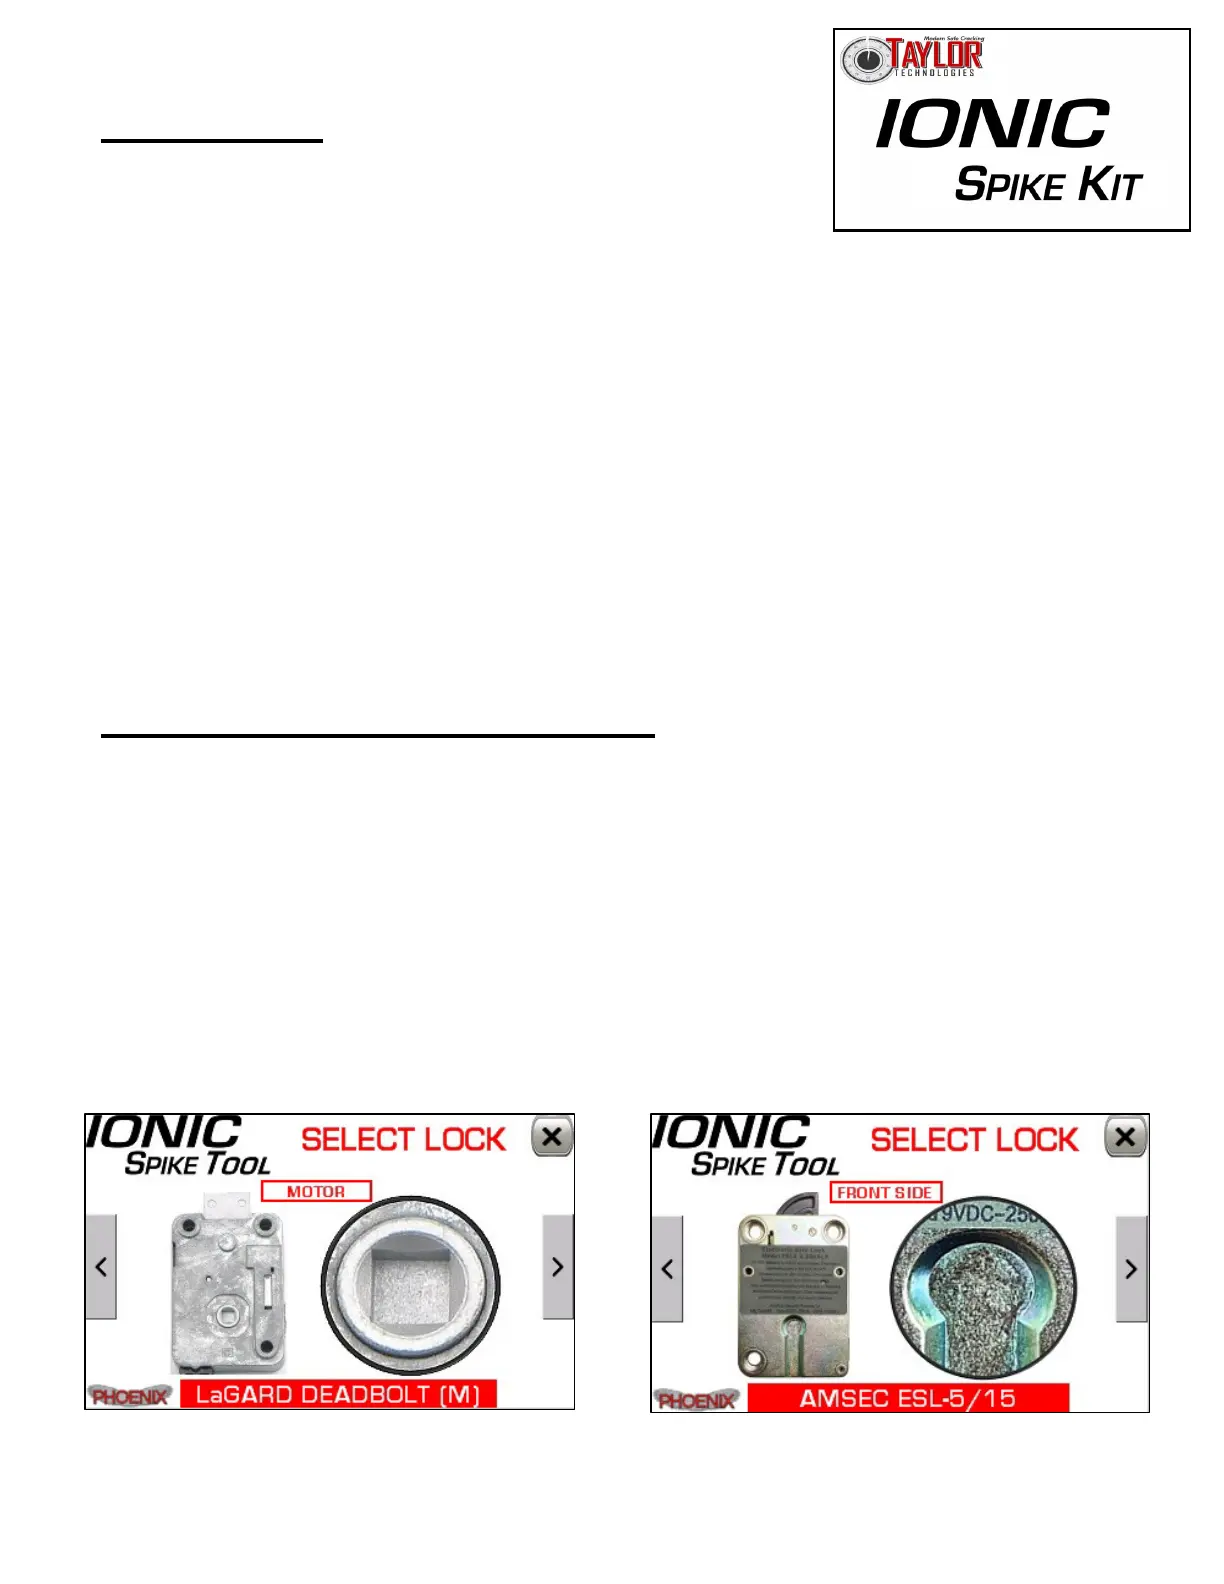
Step 1] Select Lock Type and Handing
When IONIC SpikeTool launches it begins by asking you to select the type of lock as
well as the handing of the lock. Many swingbolt-style locks are “dual-handed” and can
be flipped and installed with either side of the case facing the safe door. Flipping the
lock case also flips the circuit card inside the lock and this must be accurately taken
into account when spiking because we are targeting components located on one
particular side on the lock circuit board. The Phoenix simplifies this process by
providing a high resolution image of the spindle hole view for each lock shown. Use the
LEFT and RIGHT arrows on the side of the screen to navigate between the different
locks and mounting arrangements. Tap the screen to select the appropriate lock and
progress to micro-drilling.