ATP Operator Instructions
How to Replace the Printer Ribbon
A "Ribbon alarm" occurring during packaging means
that the ribbon needs to be replaced. If the “Ribbon
alarm” occurred during printing of a label (and the
printing of a label is not completed), replace the
ribbon and repack the medication and print it
again. Thus packages with incomplete printing may
sometimes occur.
[Step 1]
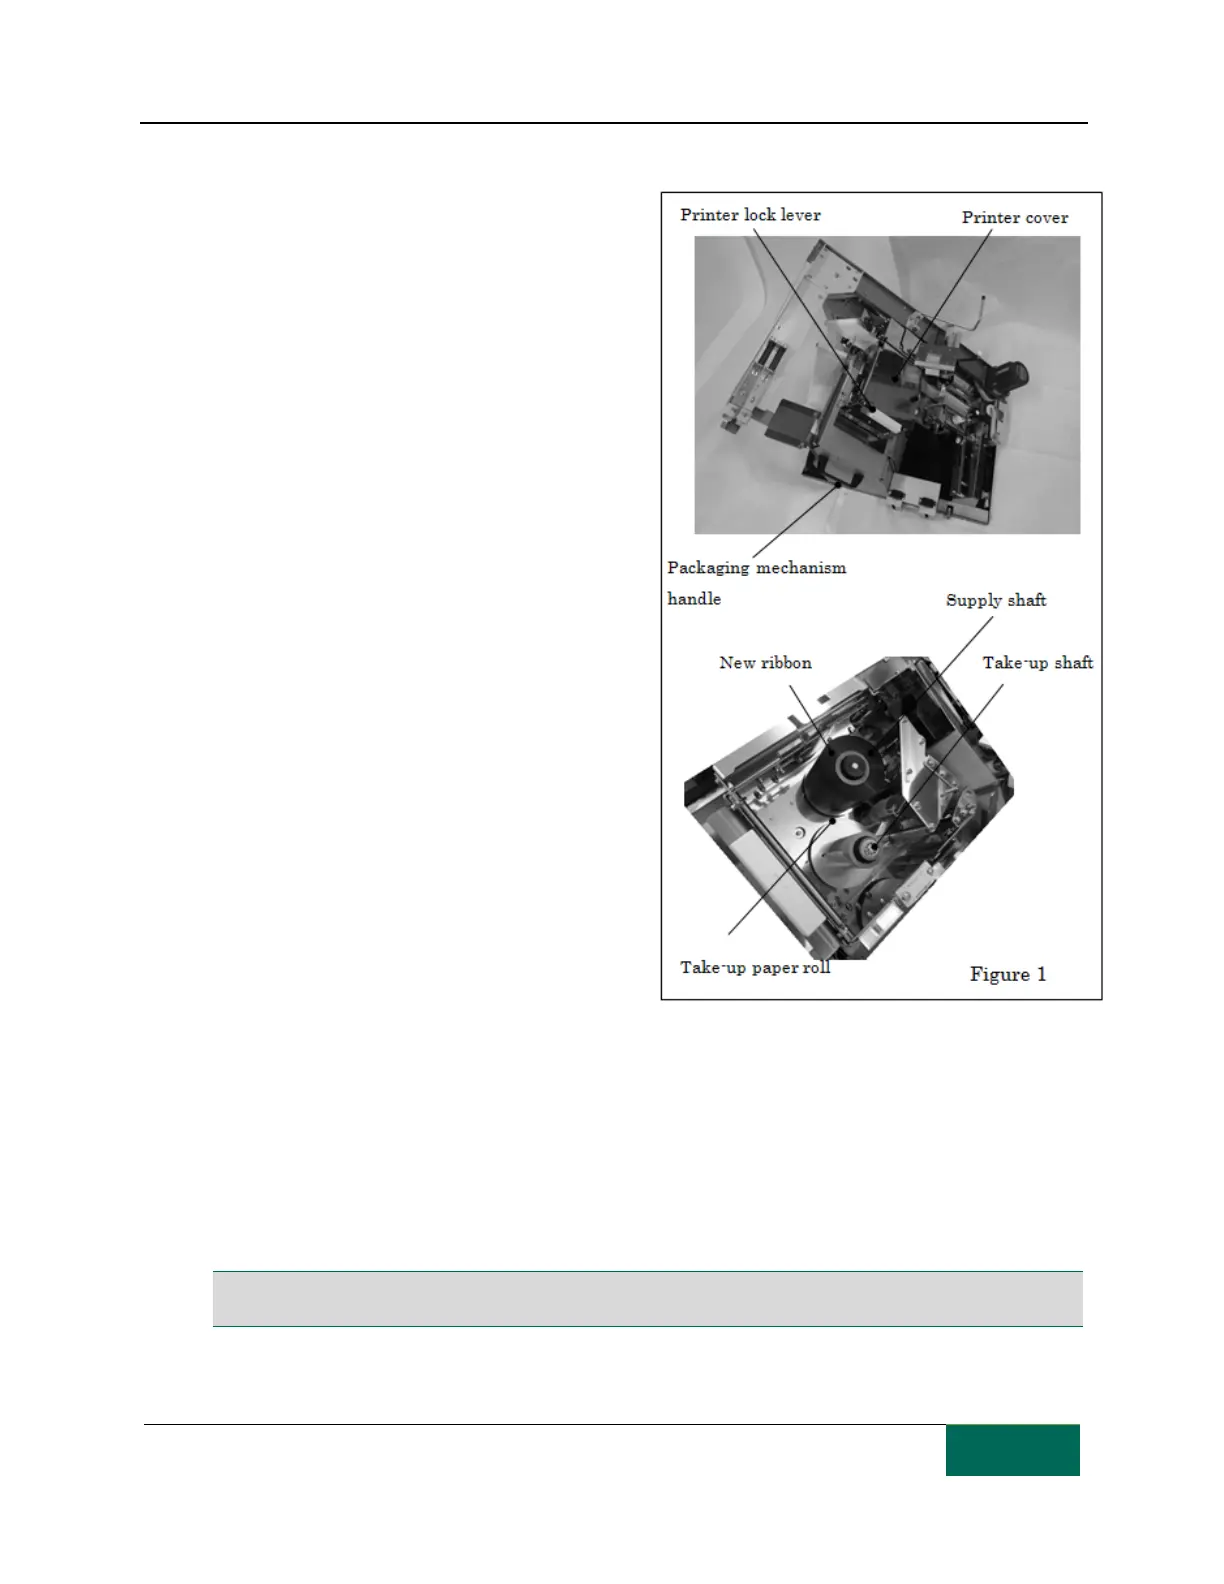
Open the front door and use the packaging
mechanism handle to pull out the packaging
mechanism. (There is no need to turn off the unit.)
[Step 2]
Release the printer lock lever and pull out the
printer.
[Step 3]
Open the printer cover and remove the ribbon from
the take-up and supply shafts.
[Step 4]
The paper roll of used ribbon is reused as a take-up
mechanism for the new ribbon. Wrap the end of
the new ribbon around the take-up paper roll
(securing it with adhesive tape).
[Step 5]
Insert the new ribbon on the supply shaft and
thread the ribbon along the path indicated in the
figure on the right and finally insert the take-up paper roll on the take-up shaft. Make sure that the new
ribbon and the take-up paper have been properly installed on respective shaft.
[Step 6]
Close the printer cover and close the printer lock lever. Make sure that the printer lock lever is properly
closed.
[Step 7]
Close the front door and use the "START" button on the control panel to start packaging.
Note: Only use ribbon purchased from TCGRx. Use of other ribbon may void the warranty. Printer ribbon is a
consumable item that cannot be reused. Reusing ribbon will result in poor printer quality.