6. MAIN UNIT REPLACEMENT EO18-11006A
6.9 Replacing the Receipt Printer Unit
6-16
6.9 Replacing the Receipt Printer Unit
1) Remove the Top Cover Ass’y. (Refer to Section 6.1 Removing the Top Cover Ass’y.)
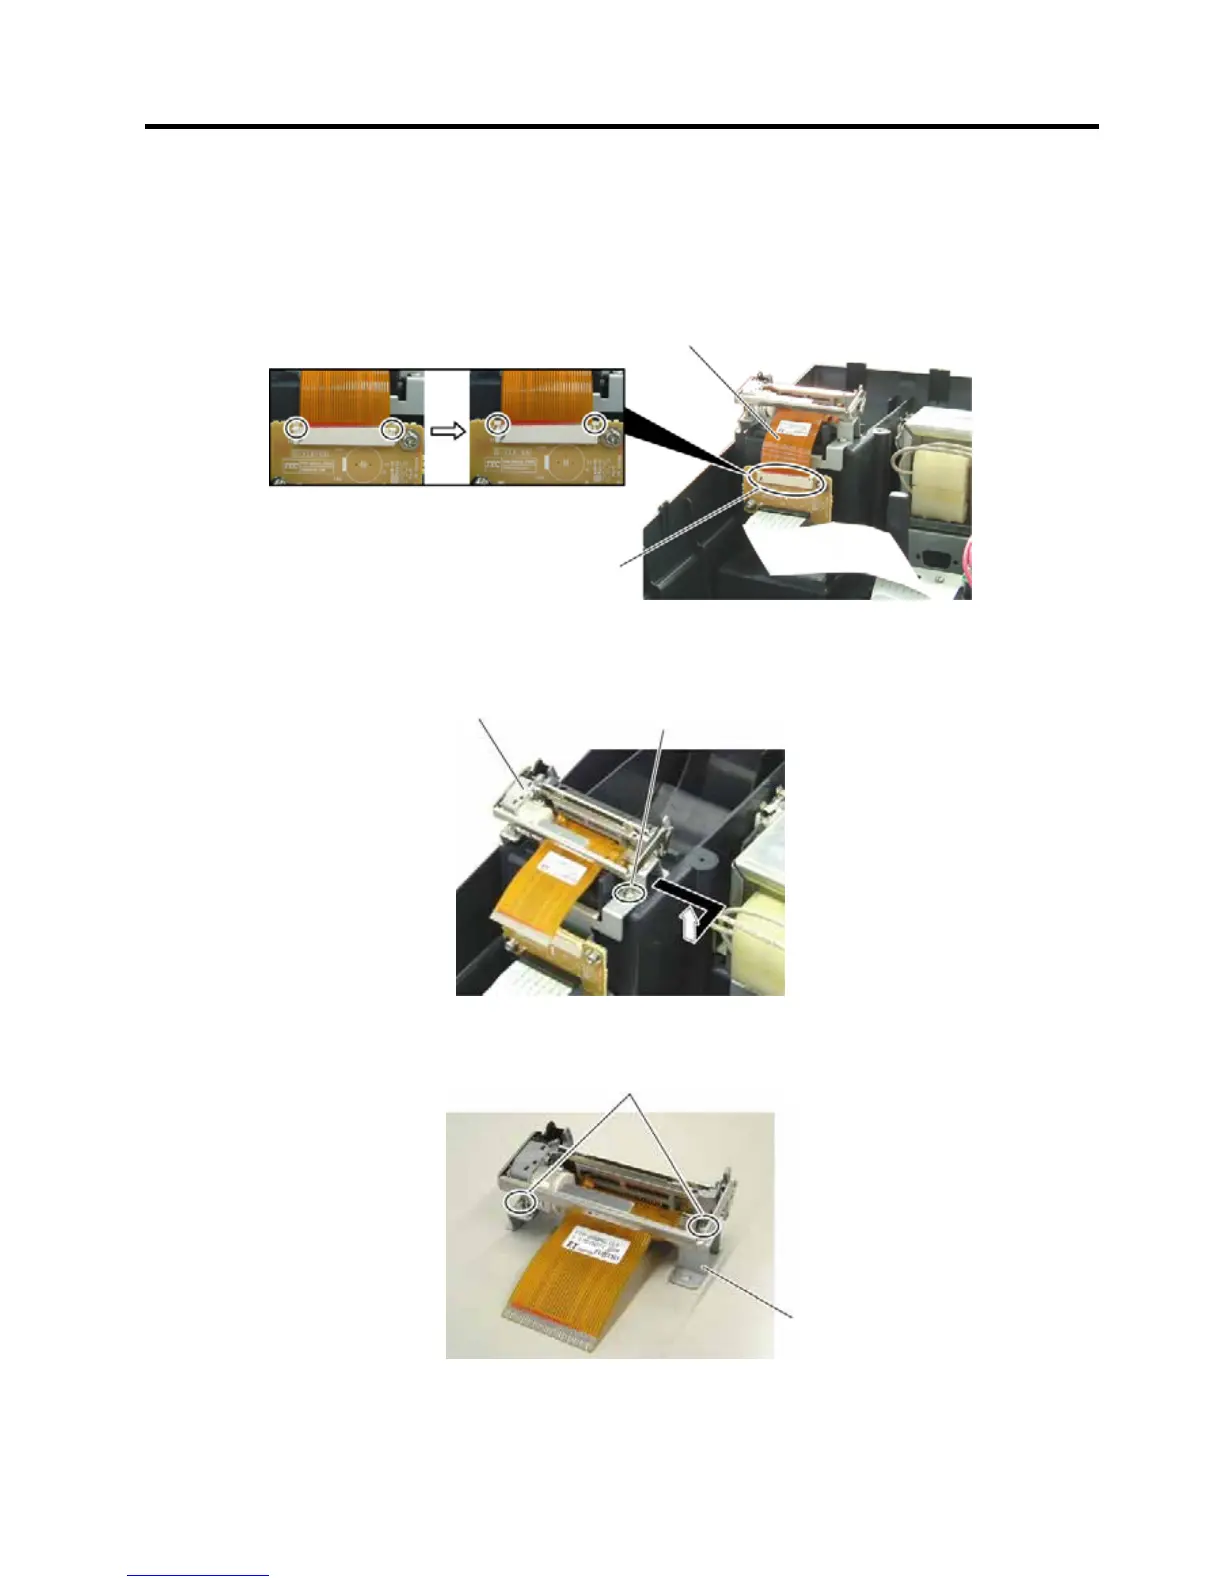
2) Disconnect the Printer FPC Cable from CN1 on the PRCN PC Board Ass’y.
When disconnecting the Printer FPC Cable, release the connector by pulling up the hooks, then disconnect
the Printer FPC Cable. If forcedly pulled, the cable may be damaged.
3) Remove the screw which secures the Receipt Printer Unit, then remove the Receipt Printer Unit while
moving in the direction as indicated by the arrow.
4) Remove the two screws which secure the Printer to the Printer Base L, then remove the Printer Base L.
Printer FPC Cable
CN1
Screw
Receipt Printer Unit
Screw
Printer Base L
 Loading...