Disassembly
7-12
TCPA300/400 Amplifiers and TCP300/400 Series Current Probes Instruction Manual
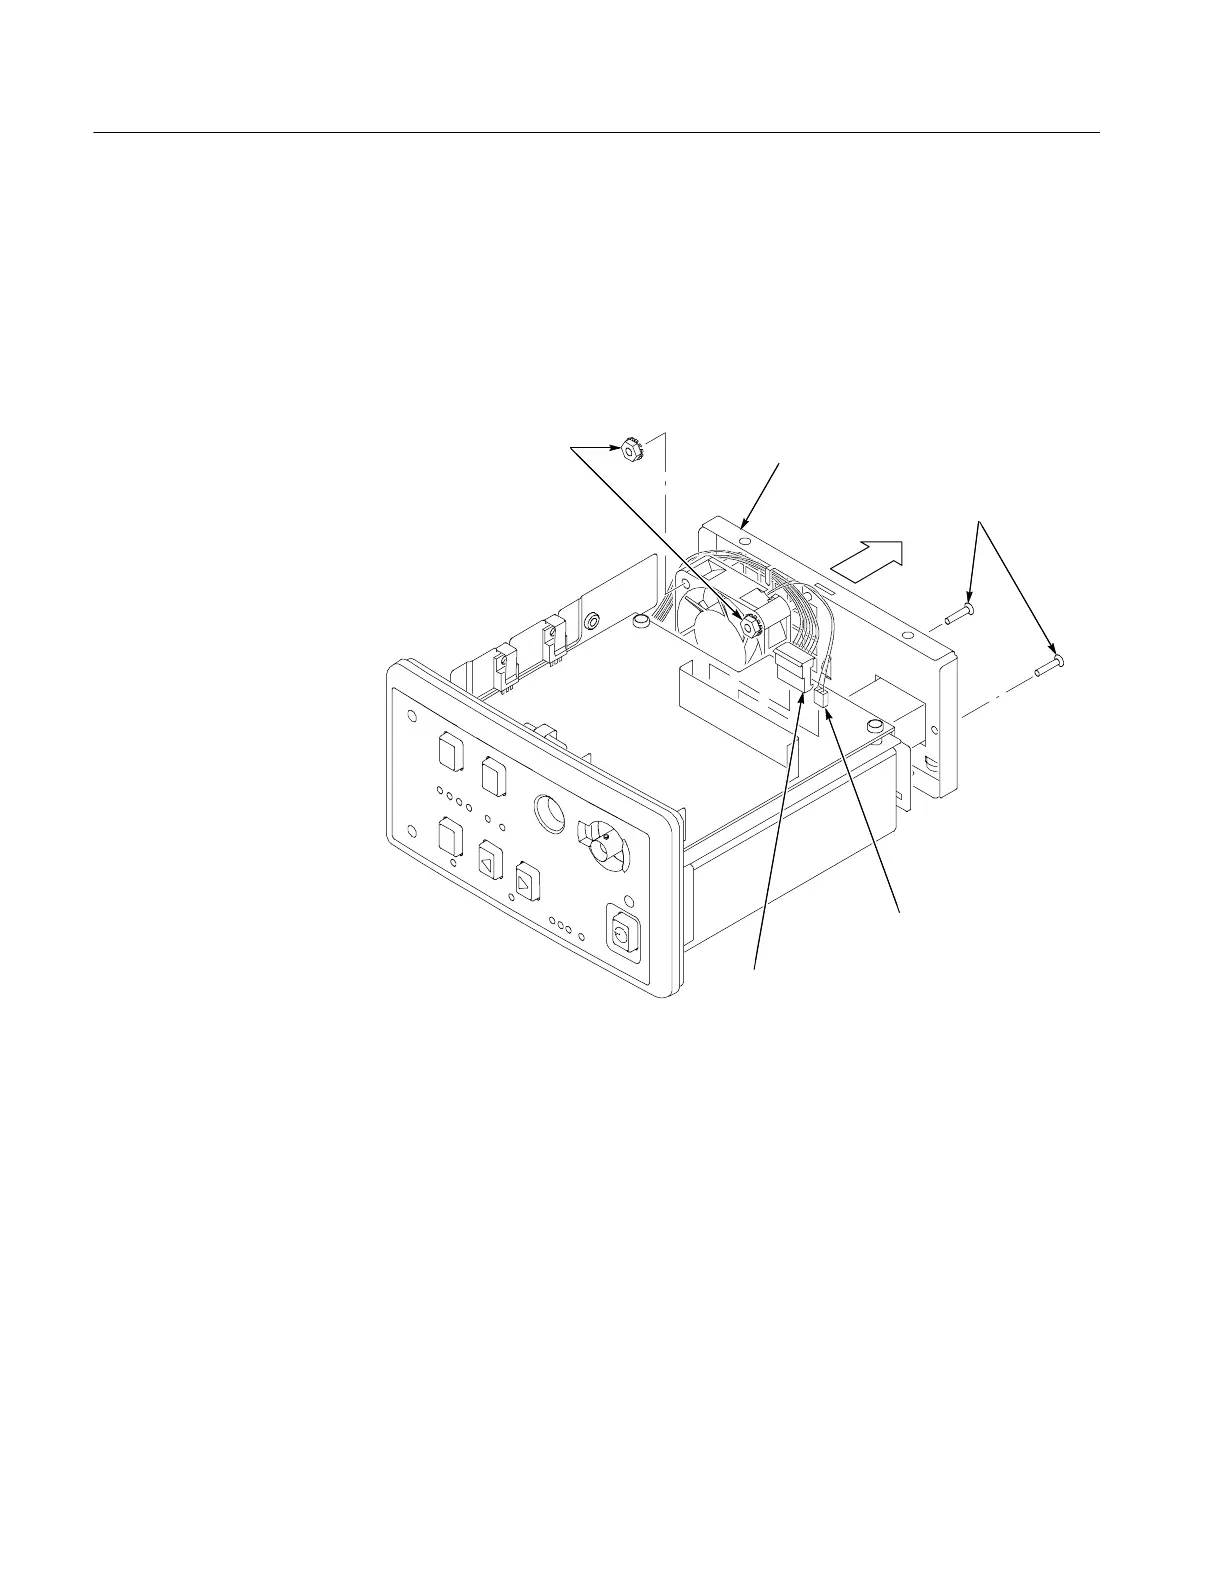
2. Disconnect the DC power supply connector from J2 on the amplifier board.
See Figure 7--9.
3. Disconnect the fan connector from J3 on the amplifier board.
4. Gently pull back the rear panel enough to allow access to the four nuts that
secure the fan to the rear panel.
Nuts (4)
J3 connector
J2 connector
Move the rear
panel back
Screws (2) from power connector.
Torque screws to 4 in-lbs when
reassembling
Figure 7- 9: Removing the fan
5. Remove the four 3/8-inch nuts that secure the fan to the rear panel.
6. Lift the fan off of the four studs on the rear panel.
7. Do in reverse steps 6 through 1 to install a new fan. B e careful not to pinch
the power supply cable wires under the fan.
 Loading...