Disassembly
TCPA300/400 Amplifiers and TCP300/400 Series Current Probes Instruction Manual
7-7
Replacing the Front Panel Assembly
If you need to replace the Front P anel Assembly, do the following:
1. Wear an antistatic wriststrap when handling the circuit assemblies.
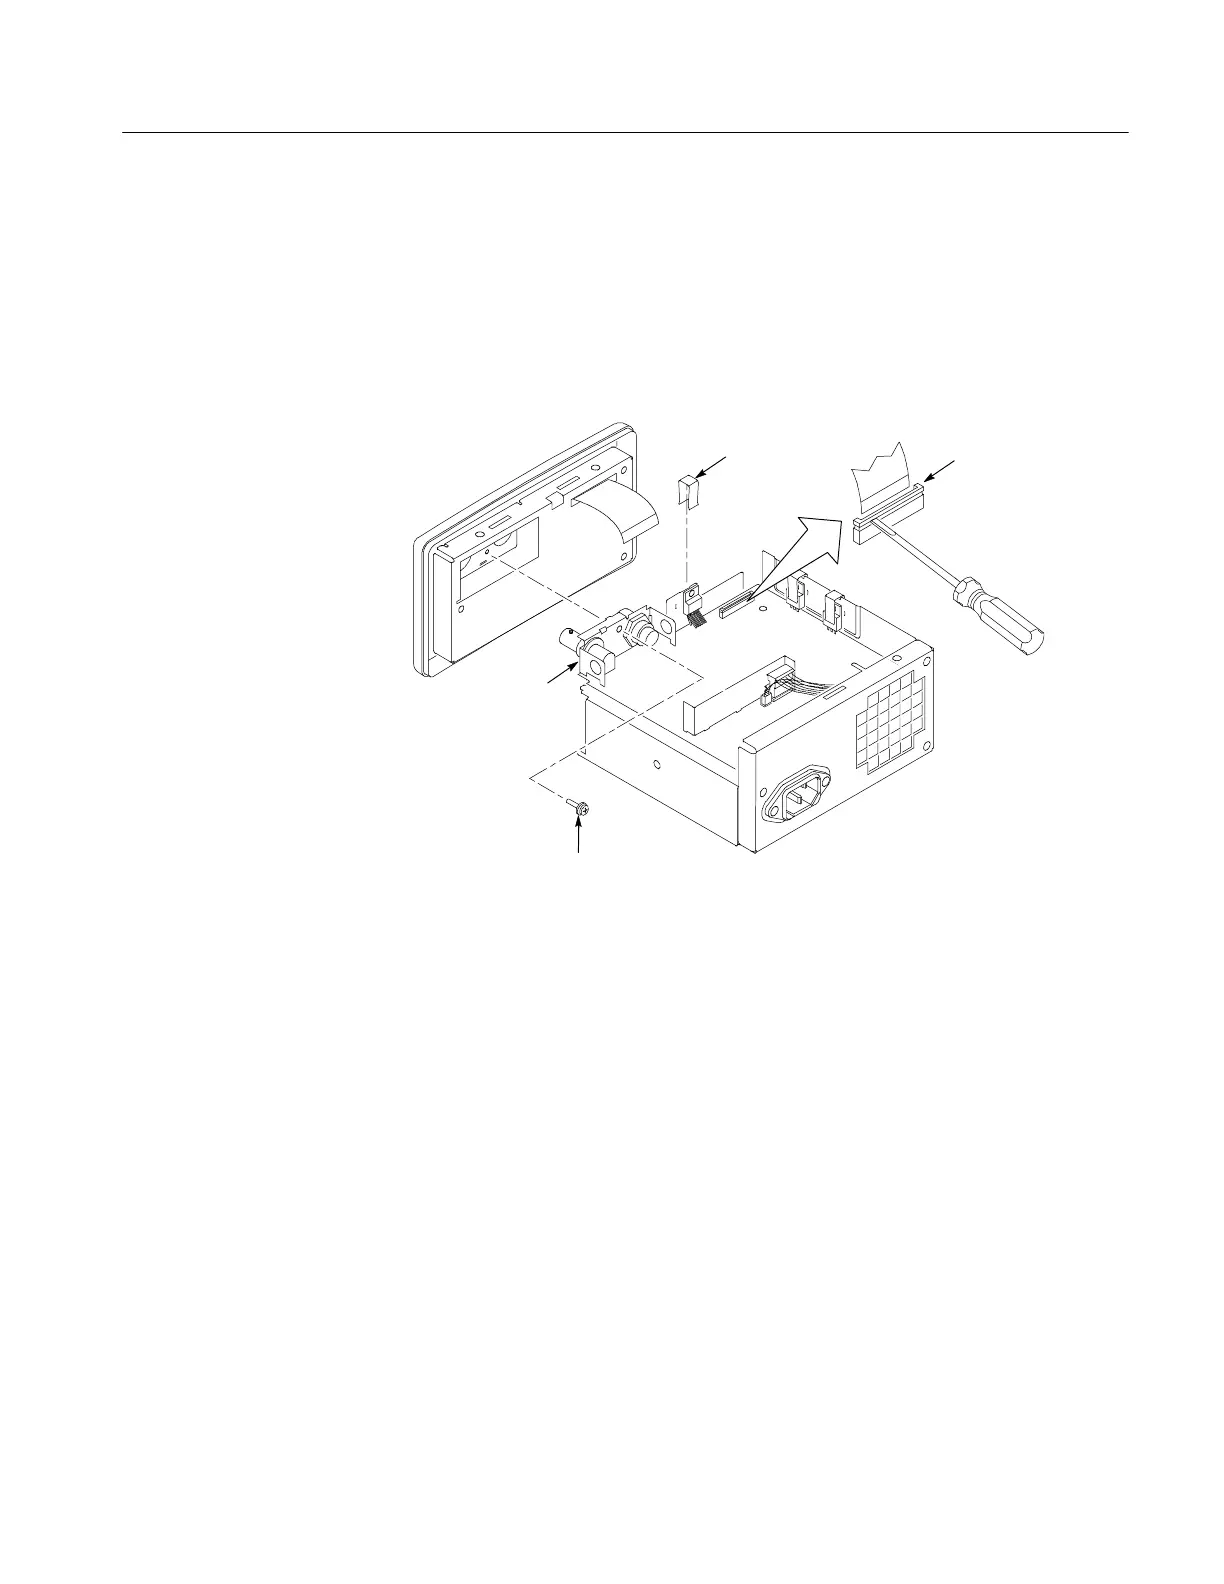
2. Using pliers, remove the heat sink clip from U9. See Figure 7--4.
Lift up the tab
to remove the
ribbon cable
U9 heat sink clip
Screw
Torque screws to 4 in-lbs
when reassembling
Probe input
connector frame
Figure 7- 4: Disconnecting the front-panel assembly
3. Disconnect the front-panel ribbon connector from J4 on the amplifier board.
Release the tab on the connector by carefully lifting the ends of the tab
before removing the ribbon cable from the connector. See Figure 7--4.
4. Remove the screw that attaches the probe input connector frame to the
front-panel assembly. Pull the front-panel assembly away from the amplifier.
5. Do in reverse steps 4 through 1 to install a new front-panel assembly.
 Loading...