©2004 TESA Switzerland All Rights Reserved.
Page 3-6
User's Manual
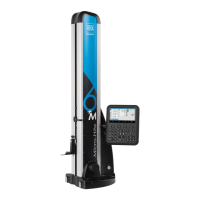
MH3D
Using A Desk Mouse
An important tool in using MH3D is the mouse. The mouse allows you to select
items by pointing at them. If you have never used a mouse before, you may need a
little practice to get comfortable with it. For the best control of the mouse, hold it
with the cable pointing away from you.
Without pressing any buttons, move the mouse around slowly and watch for icons
to highlight on the screen. If you run out of room, you can pick up the mouse and
place it on another spot. The icons on the screen will not move while the mouse is
off the pad or another surface. Notice how the mouse cursor changes shape when
it is in different places on the screen.
In MH3D, you press the mouse buttons to select button icons on the screen. First
you move the mouse to highlight the icon you want. Then you click a mouse
button to initiate some action involving the item. An action is initiated by
releasing, not pressing, the mouse button on that item. Each button performs
different functions.
Button 1:
For right handed mice, Button 1 is the leftmost button. This button is used to
select button icons on the screen.
Button 2:
For right handed mice, Button 2 is the center button. On MH3D this button is not
used.
Button 3:
For right handed mice, Button 3 is the rightmost button. This button initiates
scanning on machines witha hard probe and functions as an Escape/Abort
selection when the machine has a TTP installed.
LOGITECH!
Mouse Button 1 (MB 1)!
MM3: Enter/Select/Done Softkeys!
MM4/XWindows: Used to Select or Execute!
!
Mouse Button 2 (MB 2)!
MM3: Not used!
MM4/XWindows: Used to access Pop Up Menu!
Hold and drag to select option!
Mouse Button 3 (MB 3)!
MM3: Escape/ESC Softkey!
MM4/XWindows: Used to select Editor for Textbox!
Mouse Button 1 (MB1)
Used to select button icon on the screen
Mouse Button 2 (MB2)
Not used
Mouse Button 3 (MB3)
Scan/Abort with hard probe
Escape/Abort with TTP