2.3.4
Installing the Optional Numeric Keypad
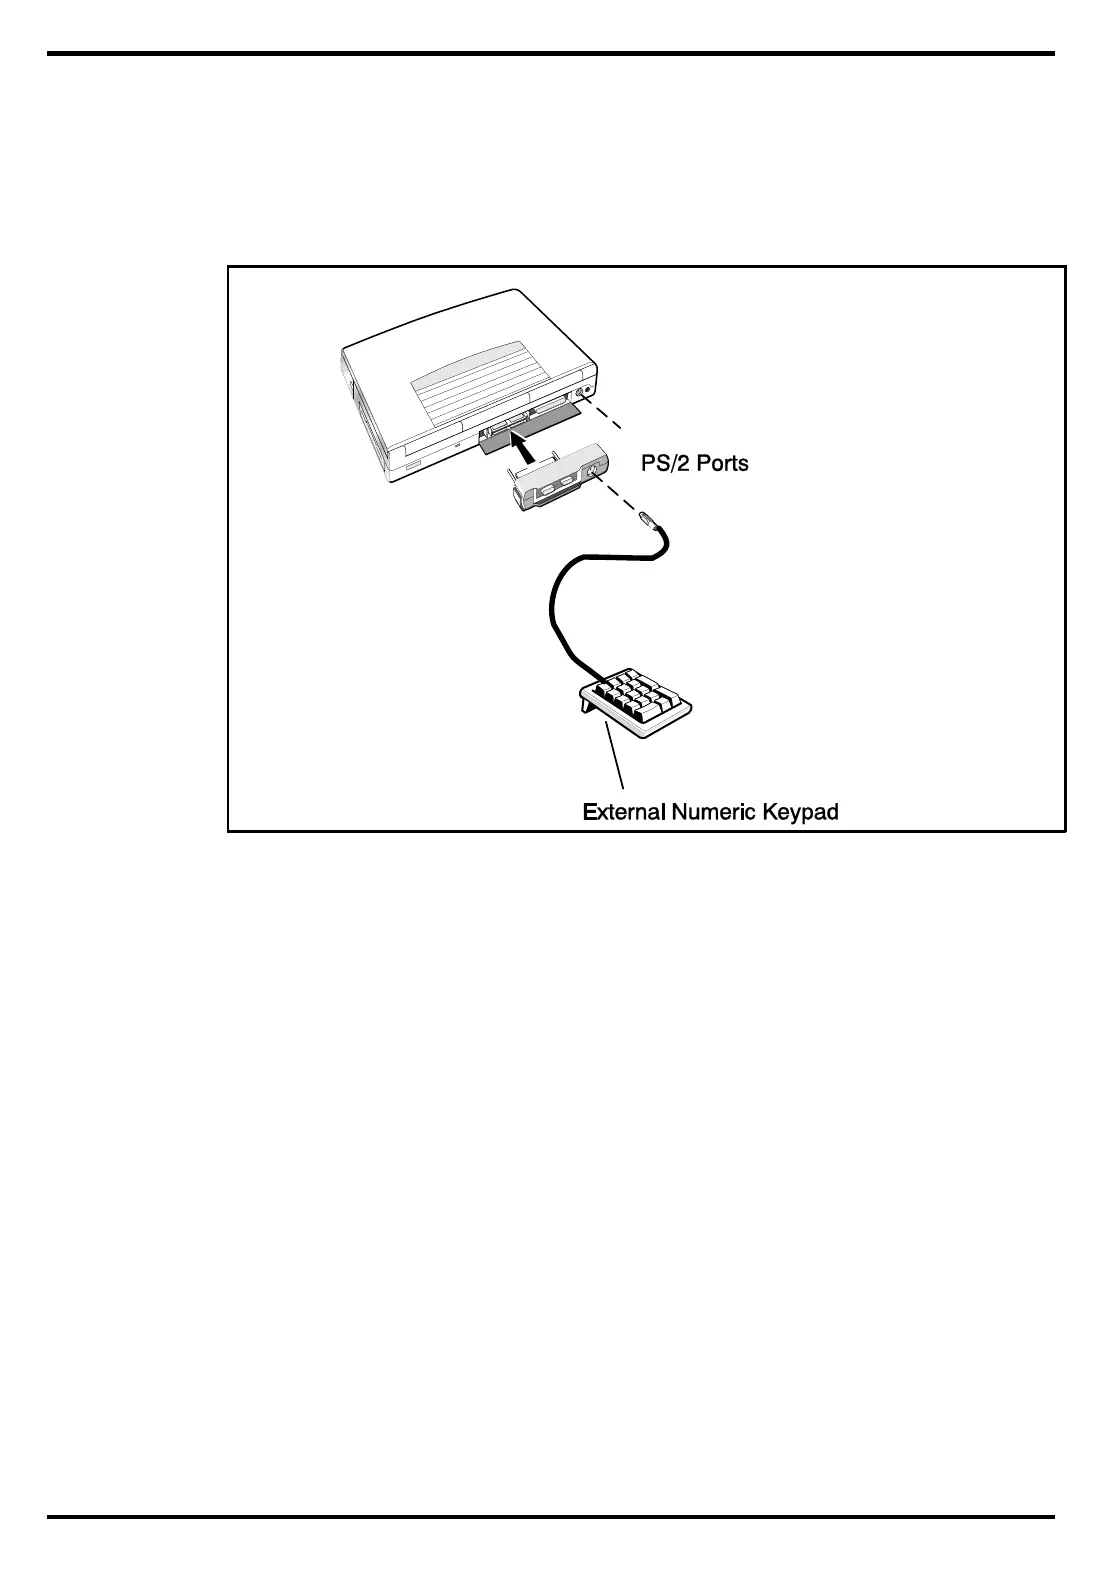
An optional numeric keyboard can be attached to the notebook via the notebook’s
PS/2 connector as shown in Figure 2-4.
2.4
Installing the Battery Pack(s )
The standard configuration of the Extensa Notebook is equipped with a single
battery pack that is inserted from the front right side of the computer. However, if
you can do without the Floppy Drive, you can use the floppy drive bay to house a
second Lithium Ion battery pack.
To remove or replace the battery pack, follow the steps below.
1. Power off the notebook, being sure to save your data first.
2. Locate the battery door (right side of notebook near the front). Press the battery
door inwards and slide the door toward the front of the notebook; remove the
battery door.
3. Insert a new or recharged battery pack into the battery compartment bay. Make
sure that the contacts are facing up and to the rear of the compartment.
Check the label (facing up when inserted) indicating the positive and
negative poles of the battery.
Figure 2-4 Installing the Numeric Keypad option
Installation
2-5
 Loading...