Phillips-head screws as they are part of the PCMCIA connector
hardware.
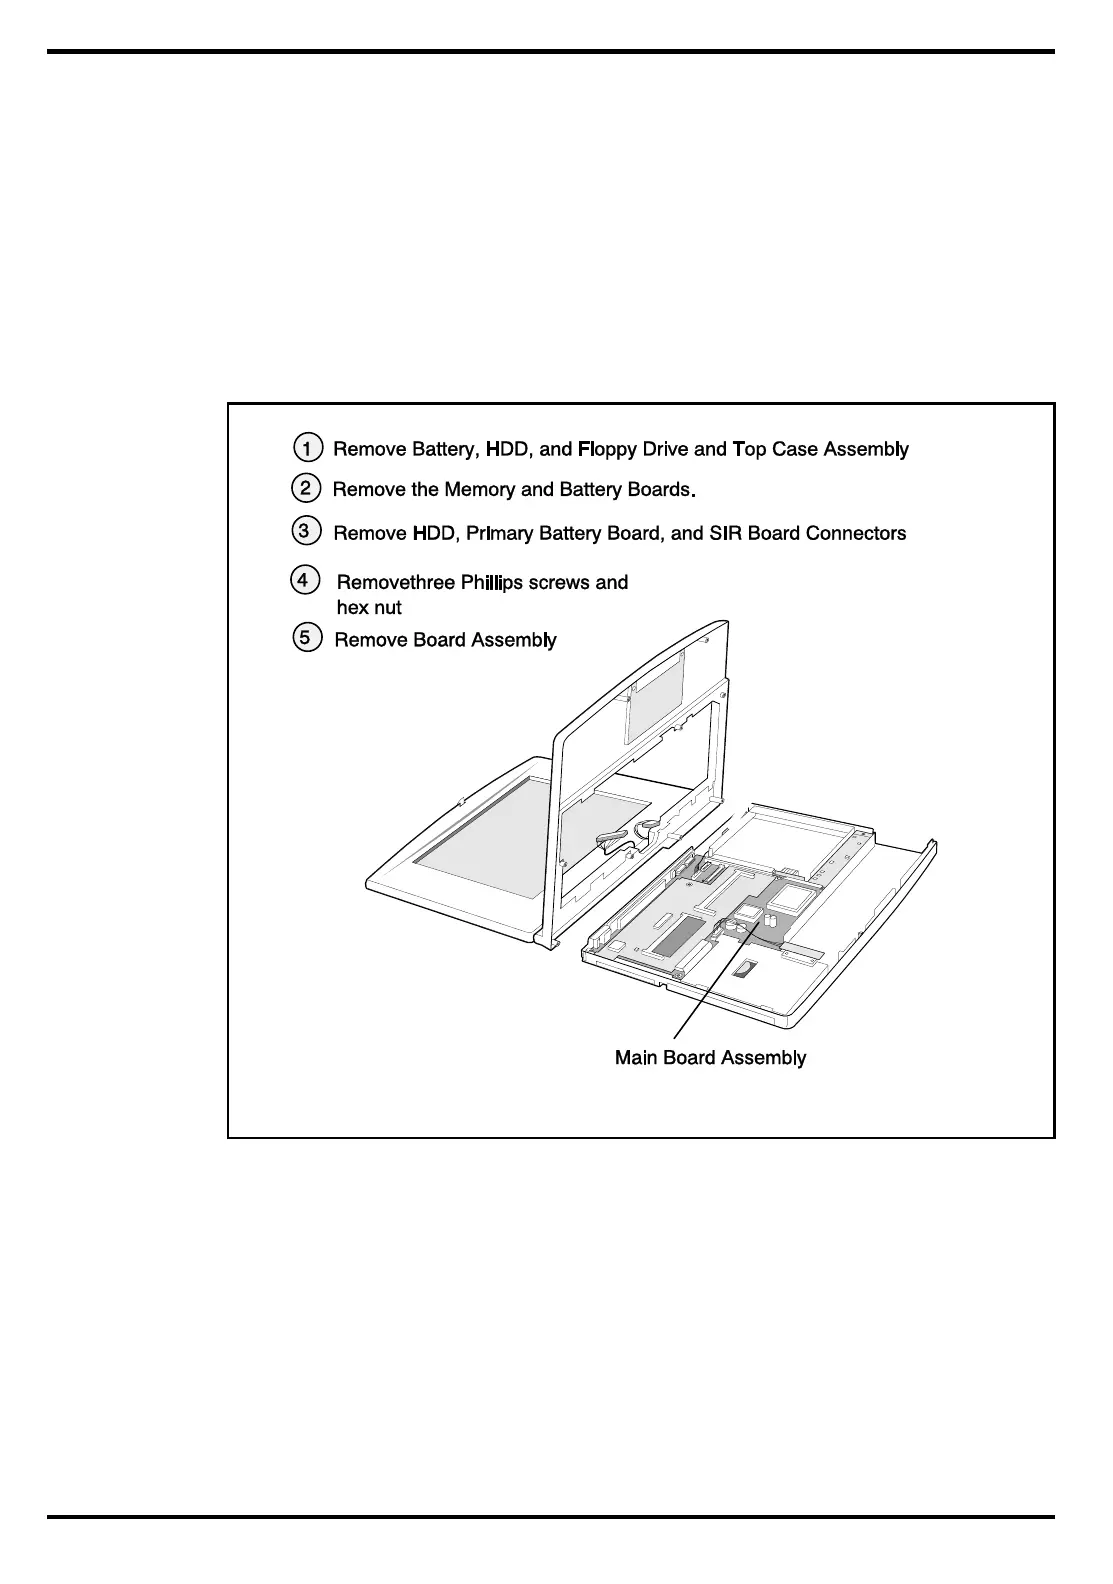
9. Using a 5 mm hex driver, remove the hex nut adjacent to the display cable
connectors.
10. Lift up along the front edge of the Main Board Assembly until it clears the hard
drive cavity; then pull the board forward and out of the plastics.
11. Remove the secondary Battery and transfer to the replacement Main Board
(reference Paragraph 6.5.17).
12 Reassembly is essentially the reverse of steps 1 through 10 above.
6.5.17
Removing/Replacing the Secondary Battery
Board
To remove and replace the Secondary Battery Assembly, perform the following
procedure:
Figure 6-10 Main Board Removal/Replacement
Field Service 6-17
 Loading...