s
ng
e
arm
ys
em
rem
er
ser
anua
8 INS177
3. The Arming Menu
Introduction
The normal day-to-day operations of the system are
carried out using the Arming menu i.e. arming, disarming,
omitting zones etc.
!
Not all functions are available to all users. If a function
cannot be selected, it may be that it is not assigned
to that user (see page 31 for details).
The table below shows the various functions available:
Arming Menu
Key Function Page
)
Arm System
9
)
Part Arm System
9
)
Silent Arming
10
)
Cancel Exit
10
)
Disarm the System
10
)
Use Anti-code
14
)
Omit Zones
15
)
View Zone Status
15
)
Omit 24Hr Zones
16
)
Set Chime Areas
16
)
View Act. Faults
18
)
View Act. Counts
18
/
User Menu
19
➤ To access the Arming Menu, proceed as follows:
The display will normally show the time & date.
##0+.,1 .+#234 2
3868495 8N#M%. #54
!
The top line of the display is programmable.
Enter a valid User code
....
........
....
, the display
should look like this:
!"#$"%#&'()#)"
*+,#-$-).,/
Press
)
))
)
until the required function is displayed, to
select that function, press
#
##
#
.
Press
(
((
(
, to exit the menu and return to normal.
!
If no keys are pressed, the display will return to
normal after 8 seconds.
Zone Faults During Arming
Before attempting to arm the system, ensure that the
premises are secure (all doors and windows closed etc.)
and the Ready light is on.
If an attempt is made to arm the system with any zones
active (e.g. door ajar, open window, etc.) the display will
show the zones that are active.
The display will look something like this:
F"(.-#N +.R.() 1(L
IZ[M#-) '+)#'+ .6
F"(.#557#*>)1R.
U.<+"",#;1(<"&
!
Active zones that will be secured during exit (e.g.
entry zones, like the front door) can be ignored, all
other zones should be secured.
To continue arming with a zone active, press
#
##
#
.
The internal sounders will bleep repeatedly (fault tone) and
the display will show the zones that are active.
The display will look something like this:
F"(.#55 3#*>)1 R.
?+"()#<""+
!
The fault tone will stop and the exit tone will resume
when all zones are secure. If it is necessary to leave
a zone open then it must be omitted (see page 15
for details).
If an active zone cannot be secured then it may be ‘in fault’
in this case contact the alarm company immediately.
Arm Fail
If the exit procedure is started and zones are still ‘Active’ at
the end of the exit procedure, an Internal alarm will occur
(internal sounders only) and the strobe light on the
external sounder will flash.
If this occurs the arm fail must be cleared and the zone in
fault identified before the system can be armed (see page
13 for details on clearing an Arm Fail).
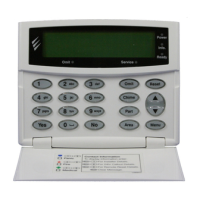
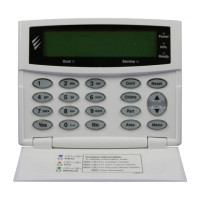
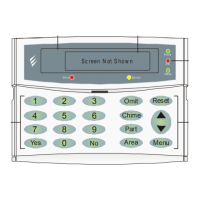
The Ready LED
To help prevent faults during arming, a Ready light has
been provided. The Ready light works as follows:
• If the Ready light is on steady then all zones are
secure and the system is ready to be armed
• If the Ready light is flashing then the system has
zones (with the ‘Force Omit’ attribute) that are active,
check these zones before proceeding
• If the Ready light is off then one or more zones are
active, either secure or omit these zones before
proceeding
 Loading...


