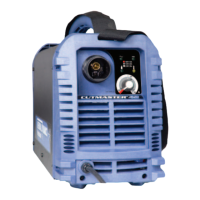
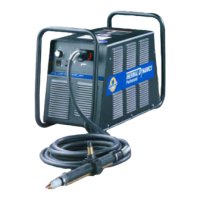
cutmaster 102
Manual 0-4998 5-21 SERVICE
B. PCB 1 Input Diode D1Test
1. Using an ohmmeter perform the tests in the
chart:
Input Diode Module D1 on PCB1
Test points located on PCB 2
Meter (+) Meter (-) Indication
80A _AC1 MTH 1 Forward Biased Diode
80A_AC2 MTH 1 Forward Biased Diode
80A_AC3 MTH 1 Forward Biased Diode
MTH 1 80A_AC1 Reverse Biase Diode
MTH 1 80A_AC2 Reverse Biase Diode
MTH 1 80A_AC3 Reverse Biase Diode
MTH 7 80A_AC1 Forward Biased Diode
MTH 7 80A_AC2 Forward Biased Diode
MTH 7 80A_AC3 Forward Biased Diode
80A_AC1 MTH 7 Reverse Biase Diode
80A_AC2 MTH 7 Reverse Biase Diode
80A_AC3 MTH 7 Reverse Biase Diode
MTH 7 MTH 1 2 Forward Biased Diodes
C. PCB 5 Input Diode D1 Test
1. Using an ohmmeter perform the tests in the
chart:
Input Diode Module D1 on PCB5
Test points are located on PCB2
Meter (+) Meter (-) Indication
40A _AC1 PMTH 1 Forward Biased Diode
40A_AC2 PMTH 1 Forward Biased Diode
40A_AC3 PMTH 1 Forward Biased Diode
PMTH 1 40A_AC1 Reverse Biase Diode
PMTH 1 40A_AC2 Reverse Biase Diode
PMTH 1 40A_AC3 Reverse Biase Diode
PMTH 4 40A_AC1 Forward Biased Diode
PMTH 4 40A_AC2 Forward Biased Diode
PMTH 4 40A_AC3 Forward Biased Diode
40A_AC1 PMTH 4 Reverse Biase Diode
40A_AC2 PMTH 4 Reverse Biase Diode
40A_AC3 PMTH 4 Reverse Biase Diode
PMTH 4 PMTH 1 2 Forward Biased Diodes
D. PCB 2 Capacitor / Relay Test
1. Using an ohmmeter perform the tests in the
chart:
INPUT CAPACITORS
PCB 2
Meter + Meter - Indication
MTH 2 MTH 4 Charging
MTH 8 MTH 7 Charging
Most meters will show a charging action. Initially a
low resistance will be shown and then the reststance
will start to increase. If the meter probews are re-
versed the reading will decrease to zero, then start
charging in the opposite polarity.
2. Using an ohmmeter perform the tests in the
chart:
INPUT VOLTAGE SELECTION RELAYS
PCB 2
Meter + Meter - Indication
MTH 7 MTH 4 Charging
MTH 8 MTH 2 Charging
MTH 8 MTH 4 Charging
E. PCB 1 IGBT Test
1. Disconnect transformer wire from PCB 2 Terminal
PRI1 (A).
2. Using an ohmmeter check continuity between the
following points:
PCB 1 Q1
Test points located on PCB 2
Meter (+) Meter (-) Indication
PRI 1 MTH 2 Forward Bias
PRI 1 MTH 4 Capacitor Charging
MTH 2 PRI 1 Capacitor Charging
MTH 4 PRI 1 Forward Bias
PRI 2 MTH 2 Forward Bias
PRI 2 MTH 4 Capacitor Charging
MTH 2 PRI 2 Capacitor Charging
MTH 4 PRI 2 Forward Bias
 Loading...


