7-22
Stop Solenoid (cont’d)
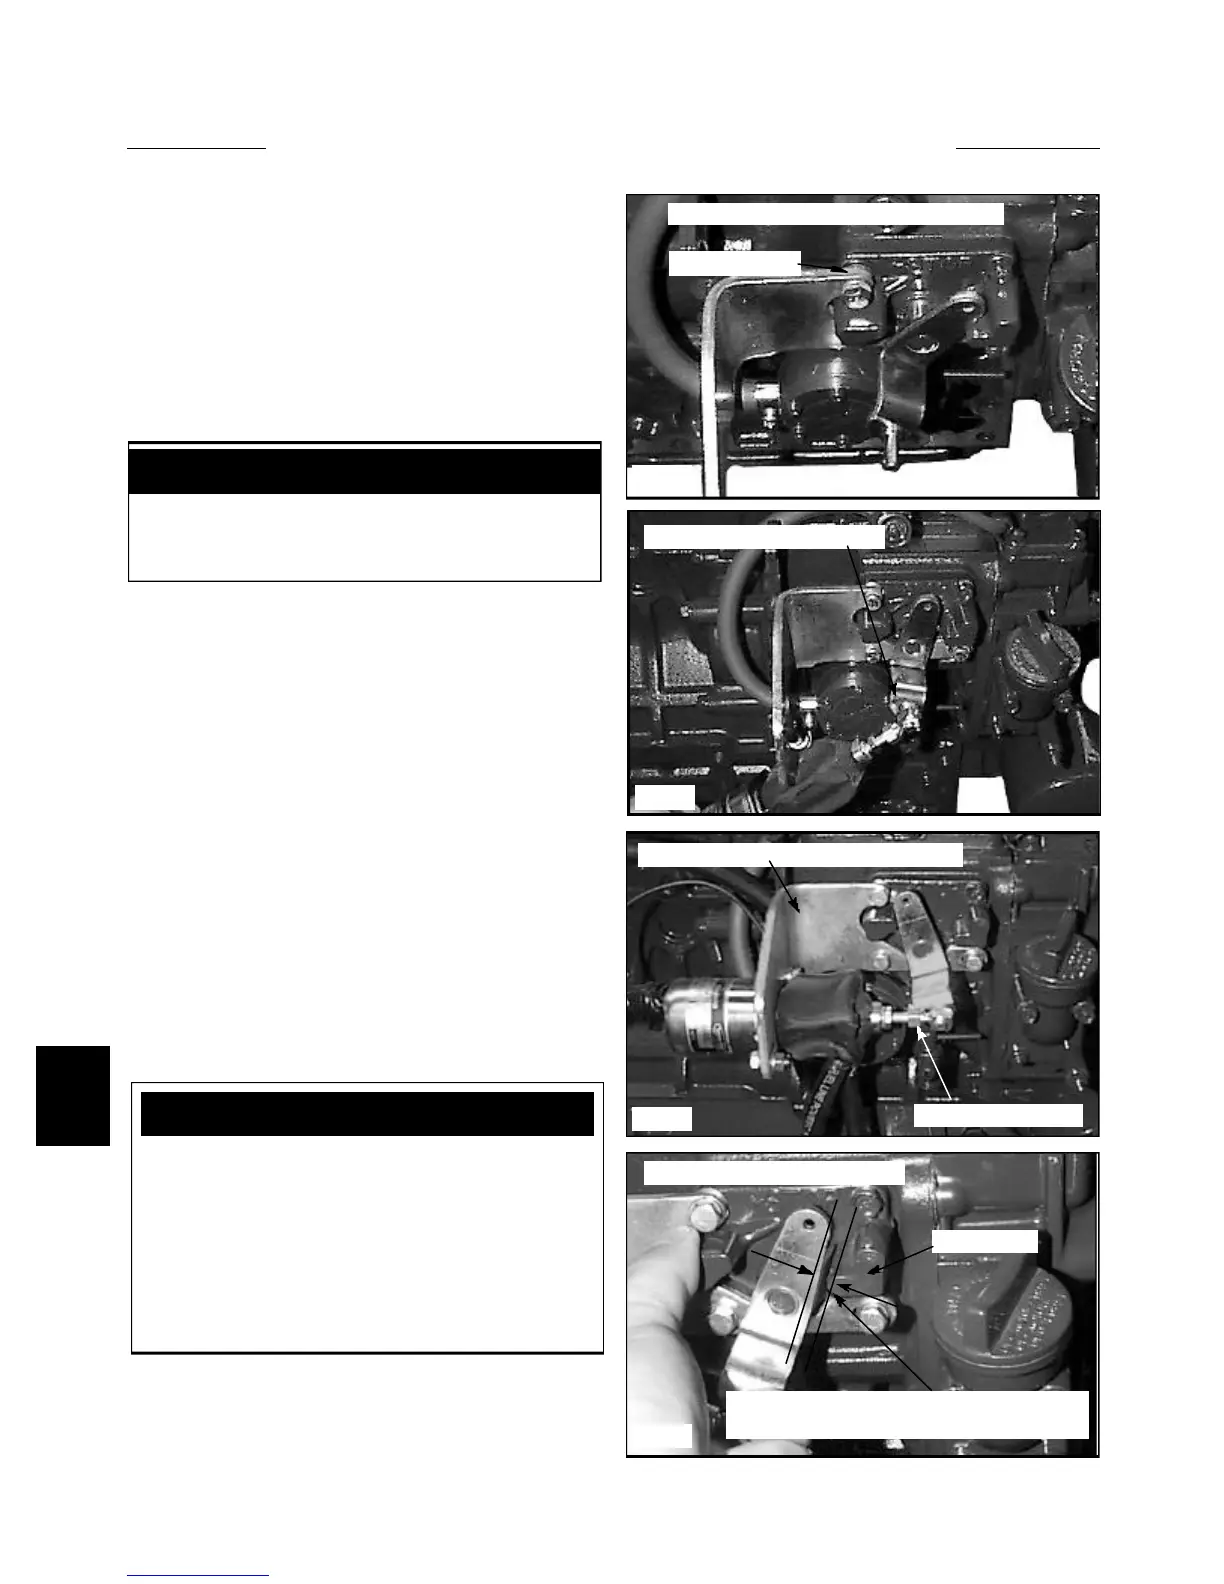
7 Attach the stop solenoid to the shut off lever making
sure the cable tie around the solenoid dust boot is facing
down , away from the mounting bracket. (fig. C2277)
Failure to do so may cause the solenoid to bind and fail
prematurely. Use the cotter pin provided to secure the
solenoid to the stop lever.
8 Bolt the stop solenoid to the mounting bracket. (fig.
C2220)
9 Pull the stop lever and solenoid by hand to initially
adjust the clearance between the stop lever and the stop
cover lever limiter. (fig. C2221) Adjust stop lever clear-
ance to 1 / 16 in. (1.5mm) by turning the swivel.
10 Plug in the solenoid connector to the engine electri-
cal harness.
11 Turn on the ignition key but do not start the engine.
12 Manually push the stop solenoid to the run position.
Check for smooth engagement, no binding should occur.
The solenoid must remain in the “RUN” position now,
without holding by hand.
13 Check the stop lever clearance again as the solenoid
is engaged. Adjust to 1 / 16 in. (1.5mm).
14 Apply Loctite 242 (blue) to the swivel and jam nut
and turn the jam nut against the end of the solenoid
plunger. Be sure to support the solenoid as the jam nut is
tightened.
C2277
C2276
C2221
C2220
Stop solenoid installed:” Stop” position
Adjustment location
Stop solenoid: “RUN” position
Stop limiter
Adjust swivel for 1 / 16” (1.5mm) clearance
when in the “RUN” position.
Install stop cover and mounting bracket
Attach solenoid to stop lever
IMPORTANT
To prevent premature failure of the engine stop sole-
noid, follow the recommended starting procedure.
Maximum energizing of the pull coil must not exceed
three 30 second cranking attempts with 2 minutes
rest between each attempt. After the third 30 second
cranking attempt, the stop solenoid must be allowed
to cool to ambient 25 º C (77 º F) before further
cranking attempts.
Spacer washers
IMPORTANT
The boot cable tie clamp must face away from the
mounting bracket to prevent binding
ENGINE REPLACEMENT 7.3